Today I’m sharing my top 3D Models from 2025! What did you think this post would be about?
And some models from 2023, ‘24, and ‘26 as well, since I have neglected Thingiverse for some time.
I got into this hobby in 2013, and I 3D print A LOT. I’ve had more than enough time for it to become a part of my lifestyle and first avenue to fix things around the house. If you look at any room in my house closely, you’ll find many prints to organize and fix things.
All of the prints in this post are things I’ve designed versus found somewhere on the internet. I think it’s a pretty cool collection. Looking back, I am surprised how often I can fix or improve something with 3 bucks of plastic instead of buying a replacement.
A quick reference for those new to 3D printing
Most of this hobby is actually 3D modeling. You can of course find some good general-purpose prints and nifty figurines and toys on sites like Thingiverse and Printables - and I do that too - but in my 12-year plus printing career I have found the most valuable things I’ve printed were my own design. I use solid CAD tools like OpenSCAD and other CAD tools primarily, since I make engineer-y things, but also sometimes non-CAD art-focused applications like GravitySketch and Blender.
I print with my BambuLab X1, my second printer, which is about 4x faster than my first one I got in 2013, the Makergear M2. The X1 also does fancy things like multi-color prints with automatic plastic swapping, and has an enclosed bed so printing with engineering-grade plastics like ABS rarely fails. Generally, this hobby requires a lot less tinkering and engineering know-how now than it did when I got started.
I print primarily in PLA and ABS. PLA is by far the easiest to print with and easiest on the printer, but only suitable indoors and not so resistant to moisture and heat. ABS happens to be the same stuff Lego is made of and is much more resilient. ASA is a type of ABS, but even more resistant to UV (sun) and tends to fail by “warping” up off the print bed more often. I sometimes print in other materials like nylon and PETG but not enough to go into detail as to why.
Onto the Prints
Organized oldest to newest, with header in format “Date · Printed Material”
Drain Covers

A simple just-in-time and print-to-fit model to repair some broken drain coverings at my wedding venue!
Workbench Drawer Organizers
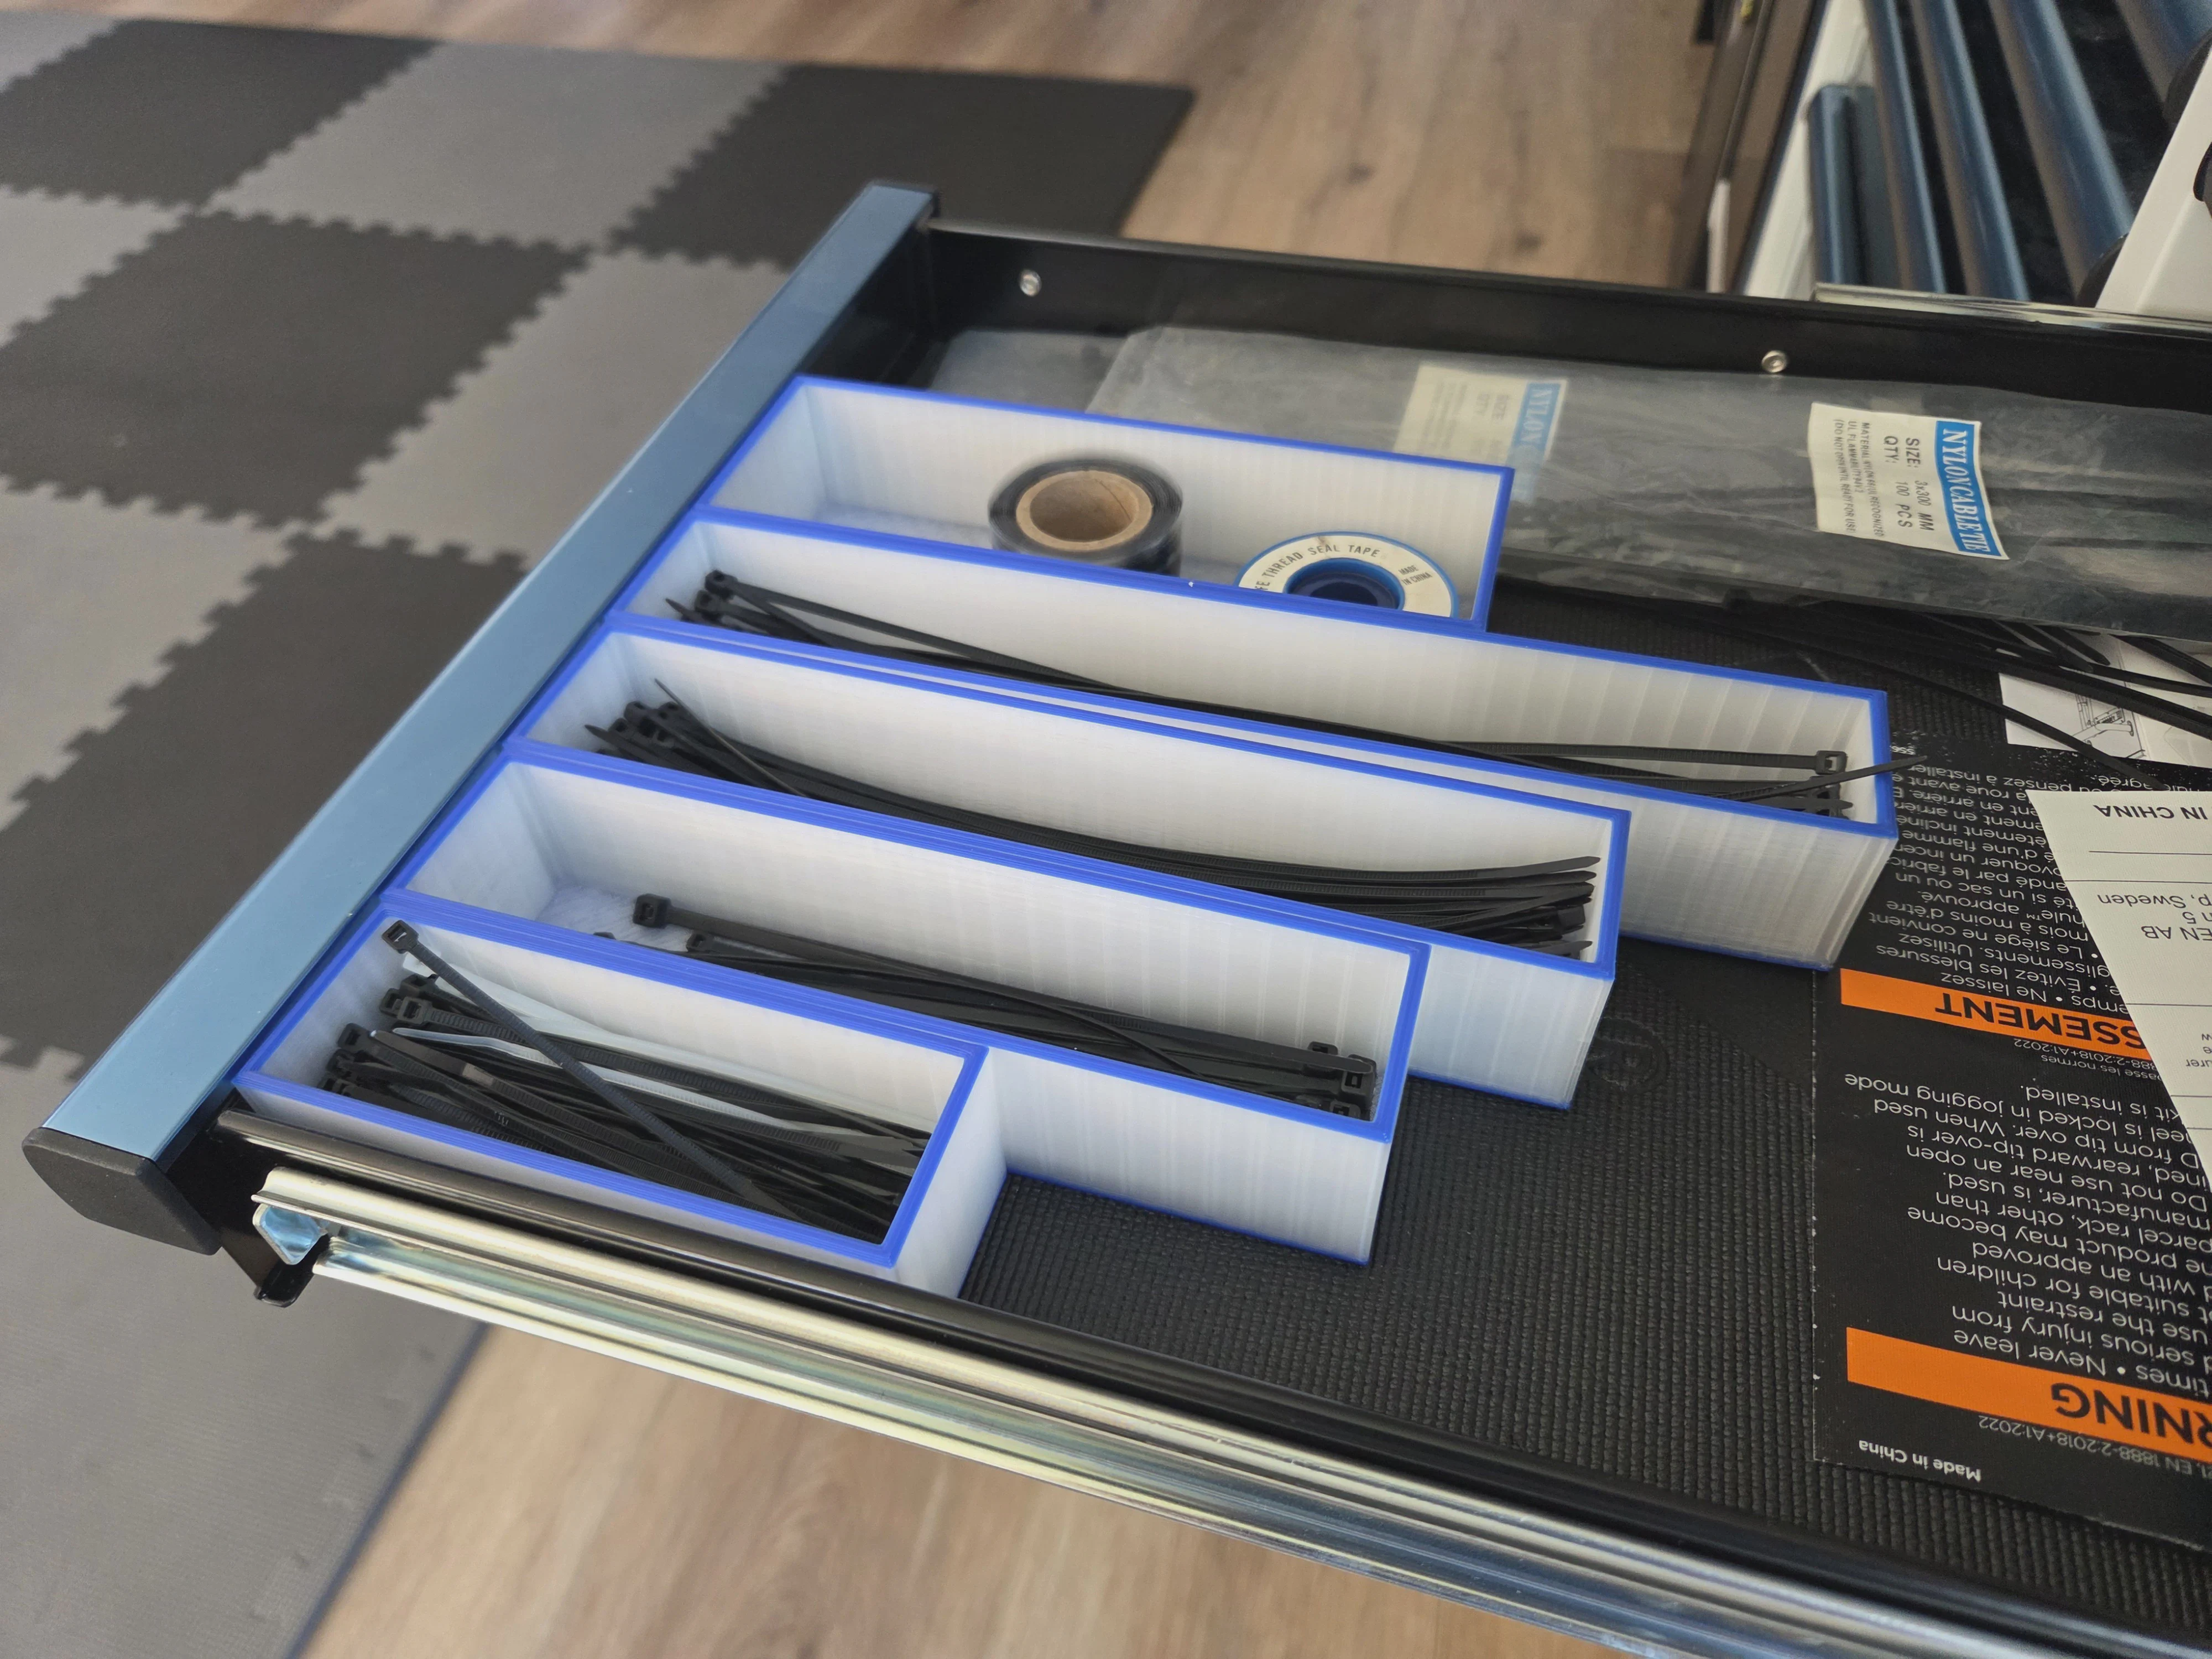
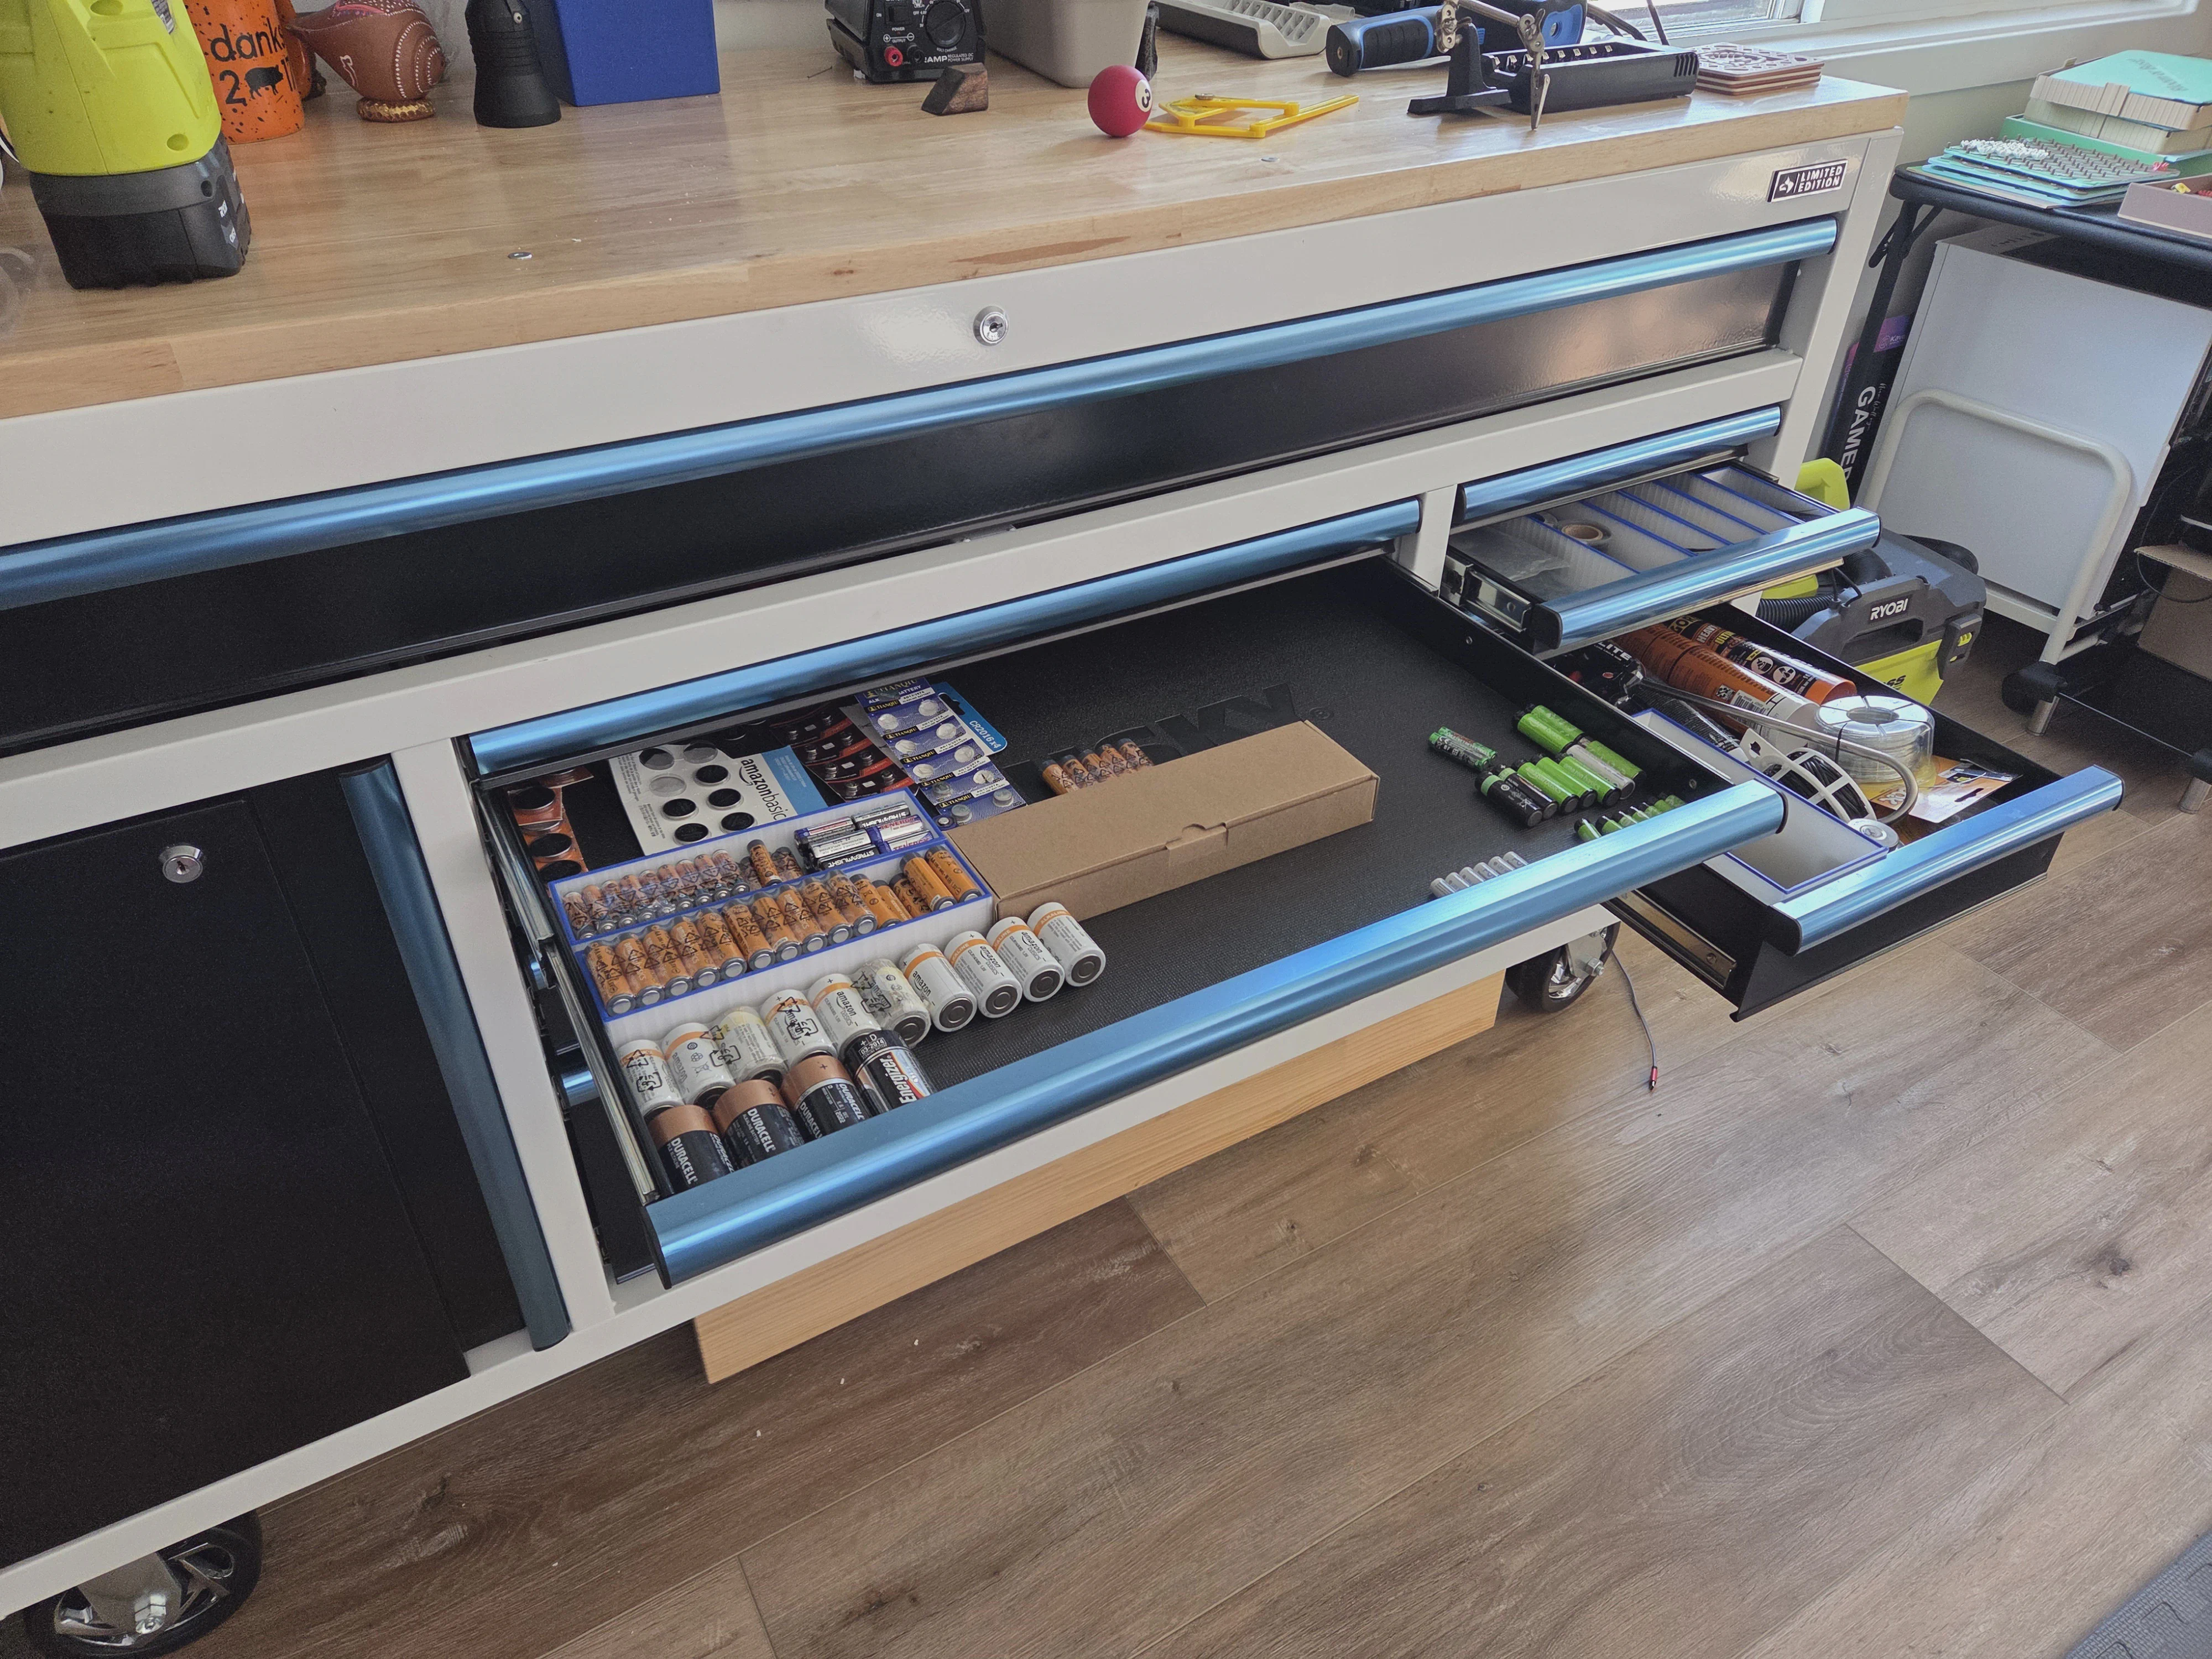
What can I say? When you have a 3D printer, you organize your drawers with prints. One of my simpler prints I appreciate on most days.
Replica Wood Tiles
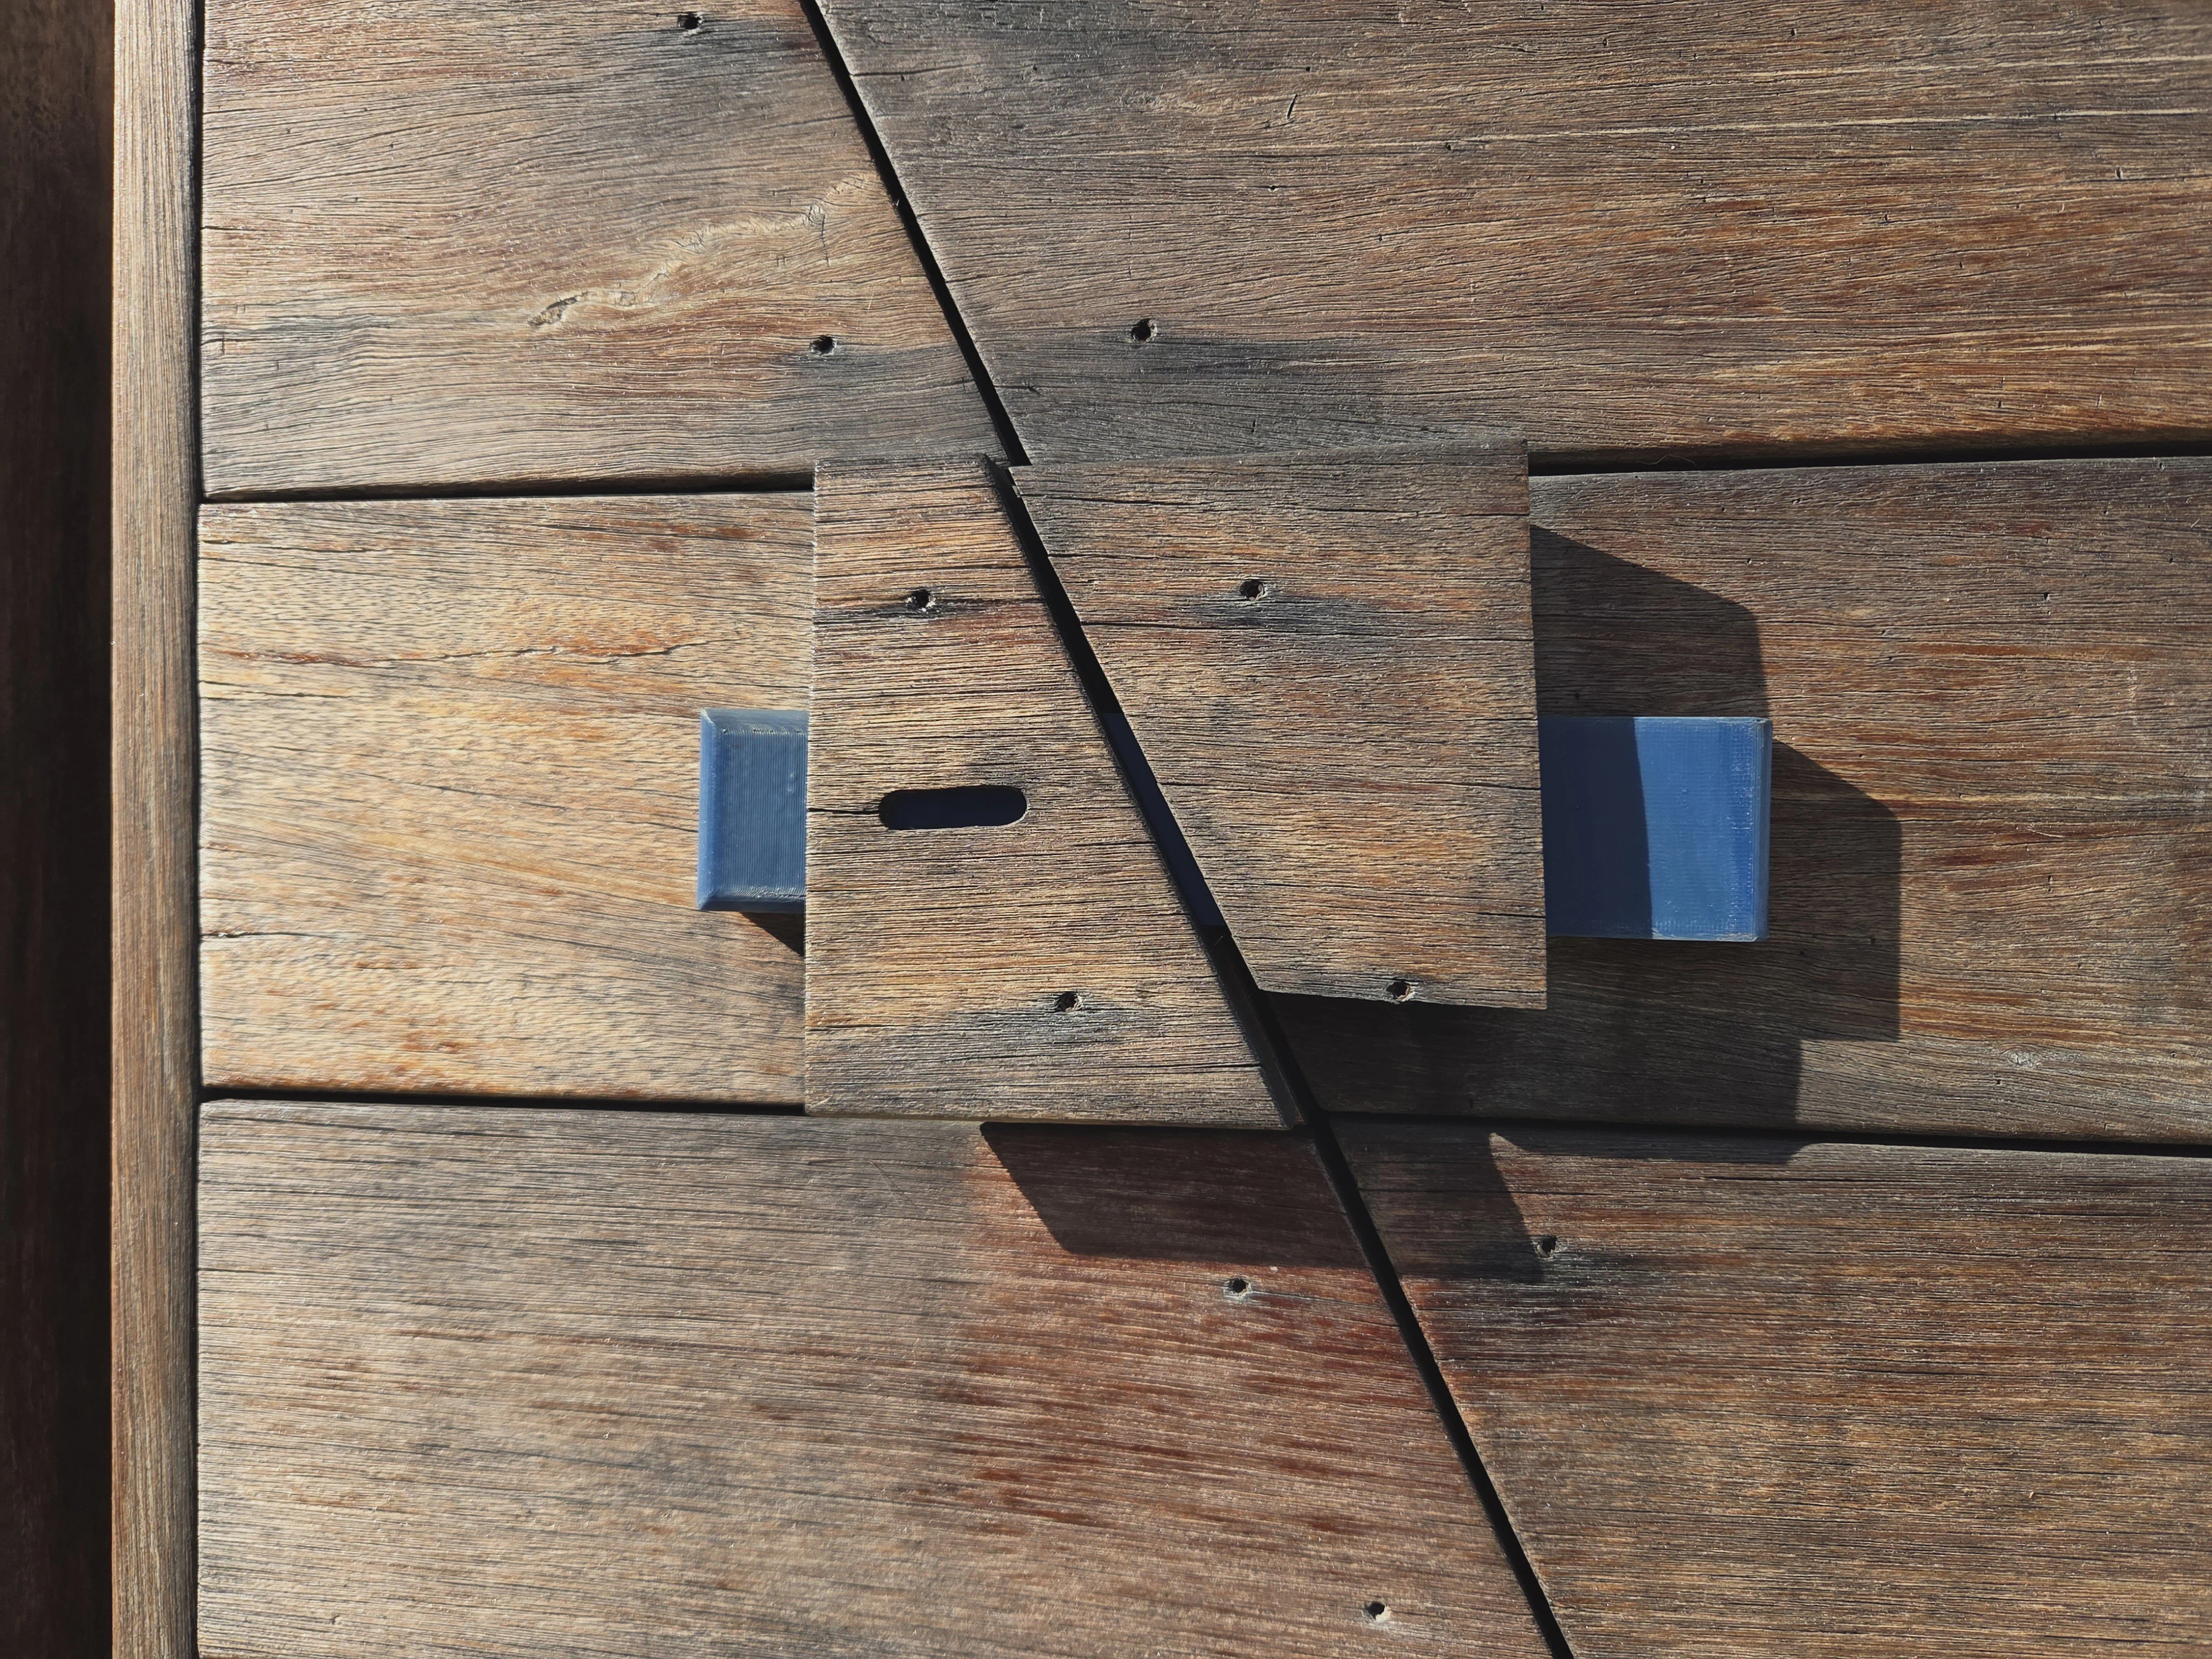
This is one of my most cost-saving “reprints” ever. I have returned to print more at least three times since I modeled these two years ago. We have a deck of wood tiling on a grid from Ikea in the back, and sometimes the wood cracks and a tile comes loose. When I first noticed this, I happened to have some brown ASA that matched the color almost perfectly, and ever since I have been printing replacements when needed. If you think that would look obvious - check out the second pic of the tiling after I refinished it. There are at least 5 replacement tiles visible in that picture.
Ruggedized Indoor/Outdoor TV Cart
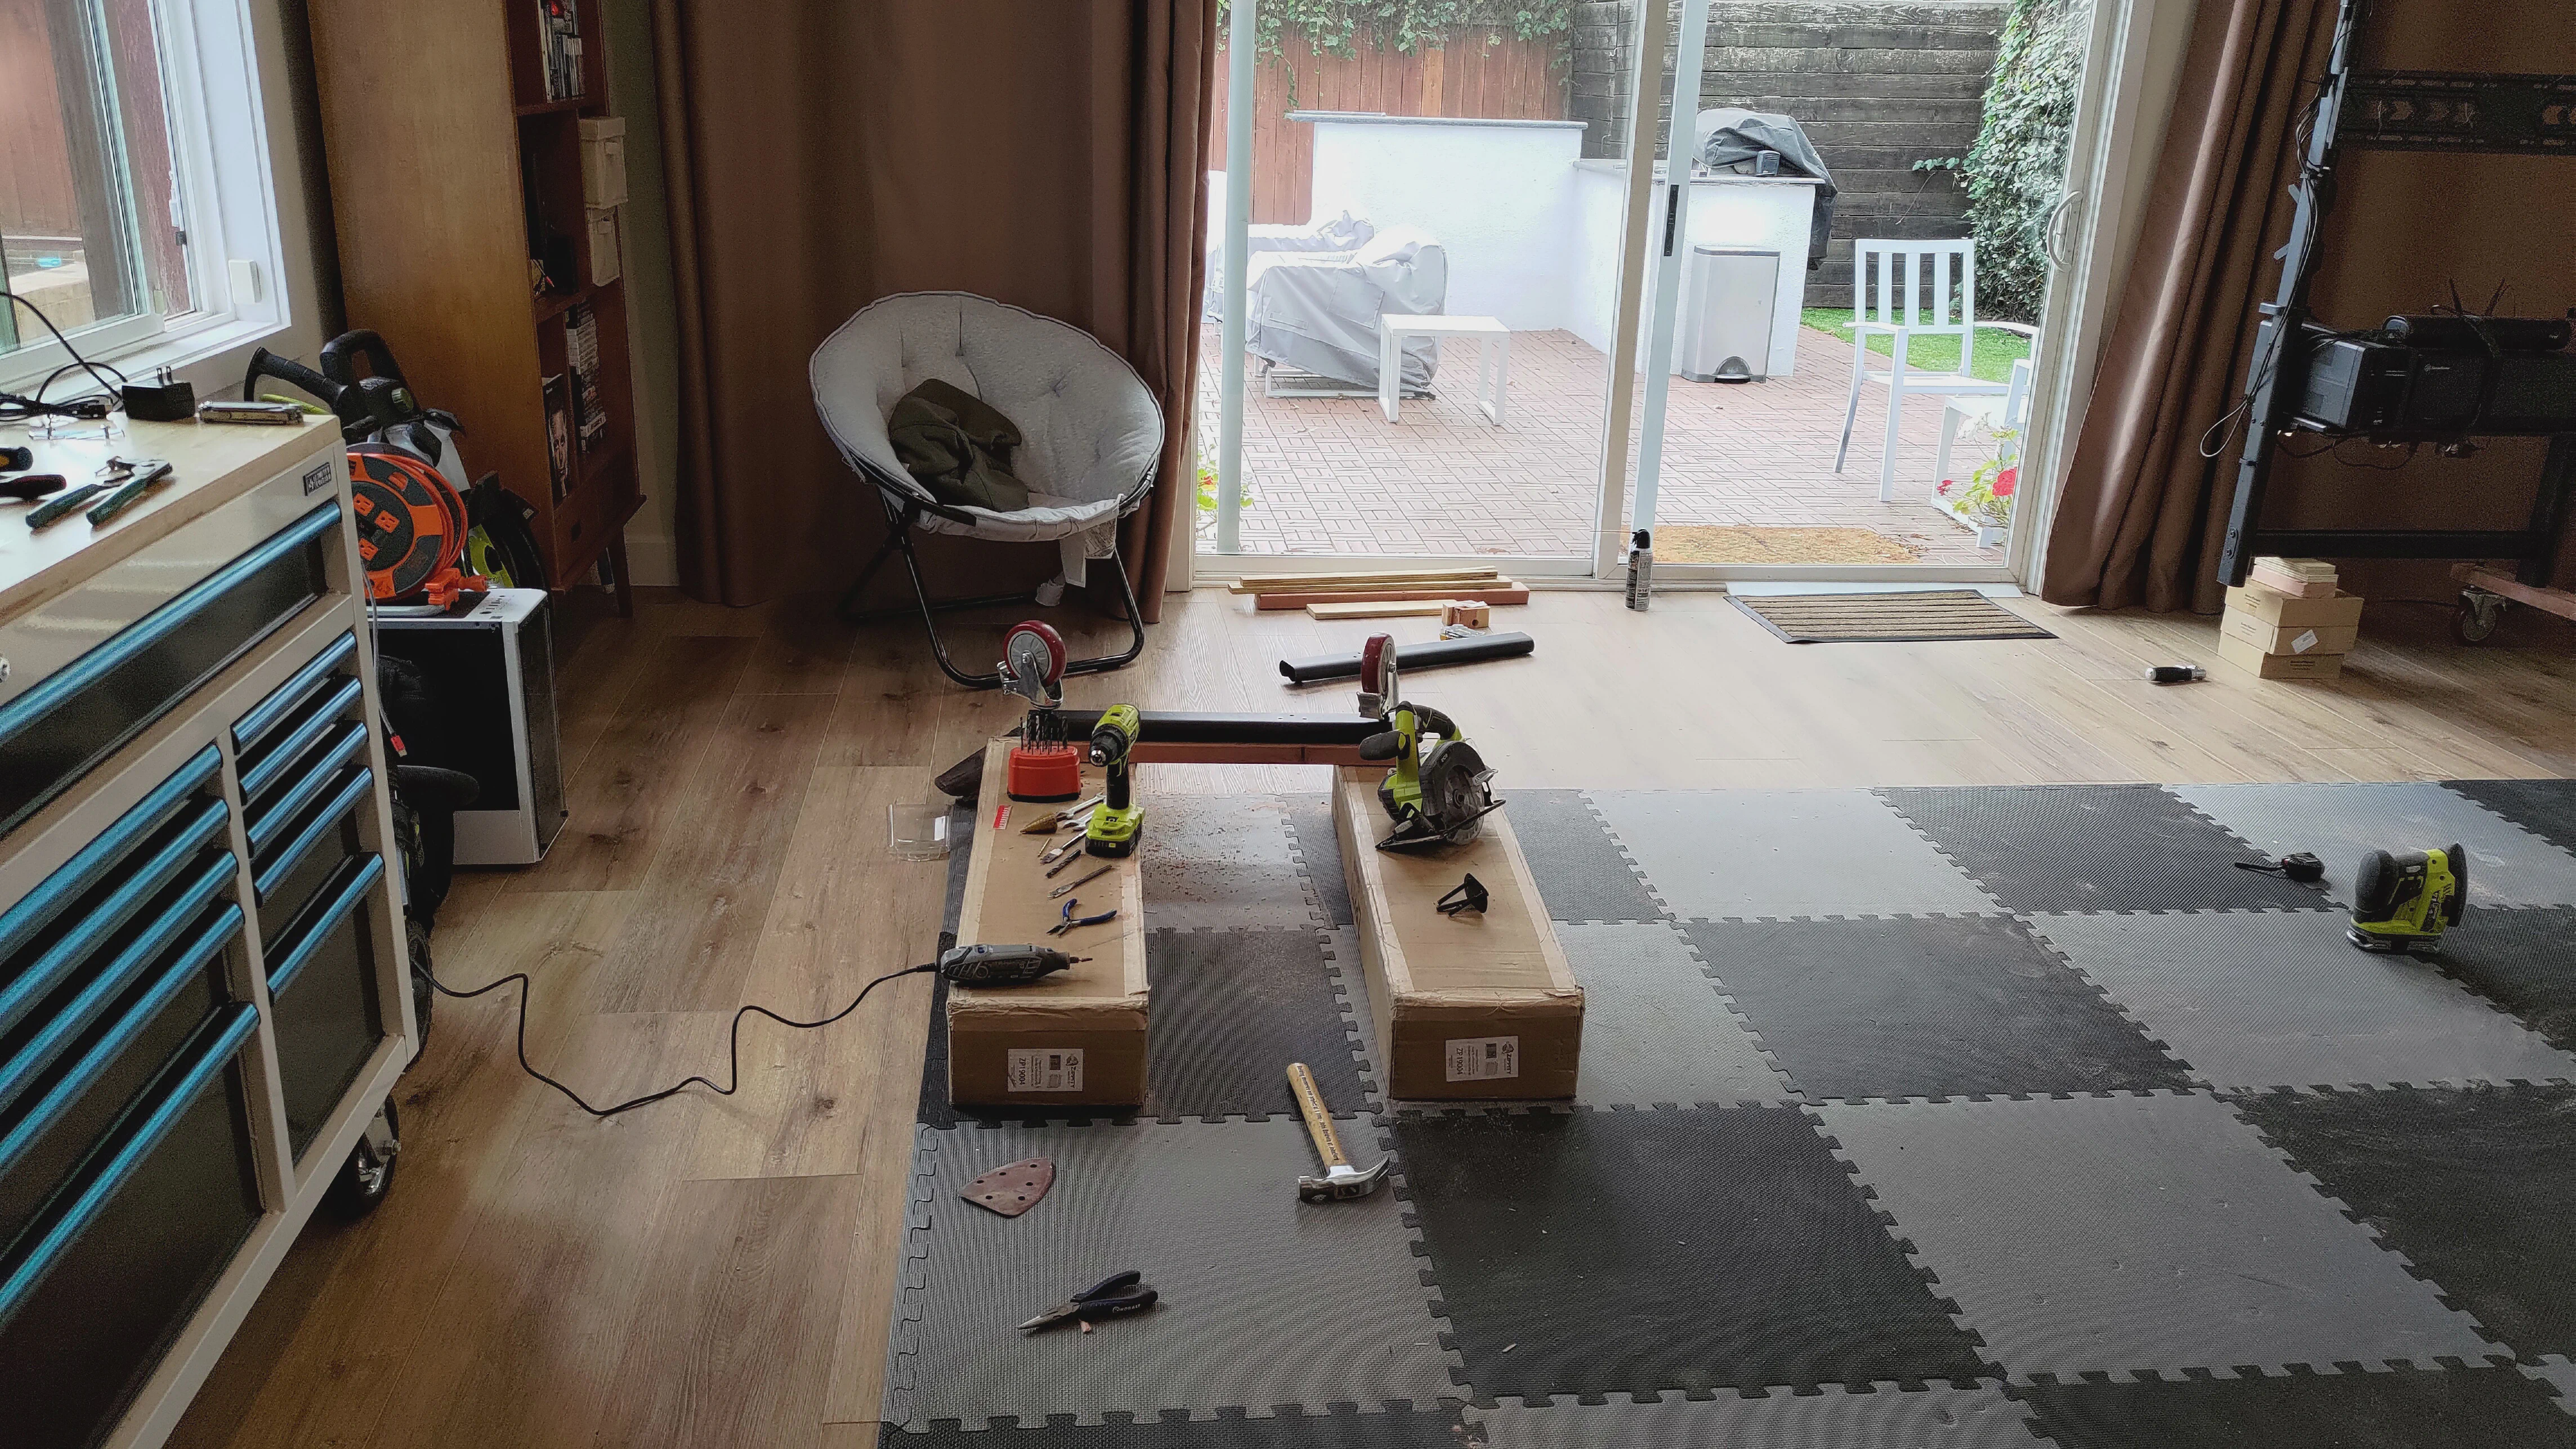
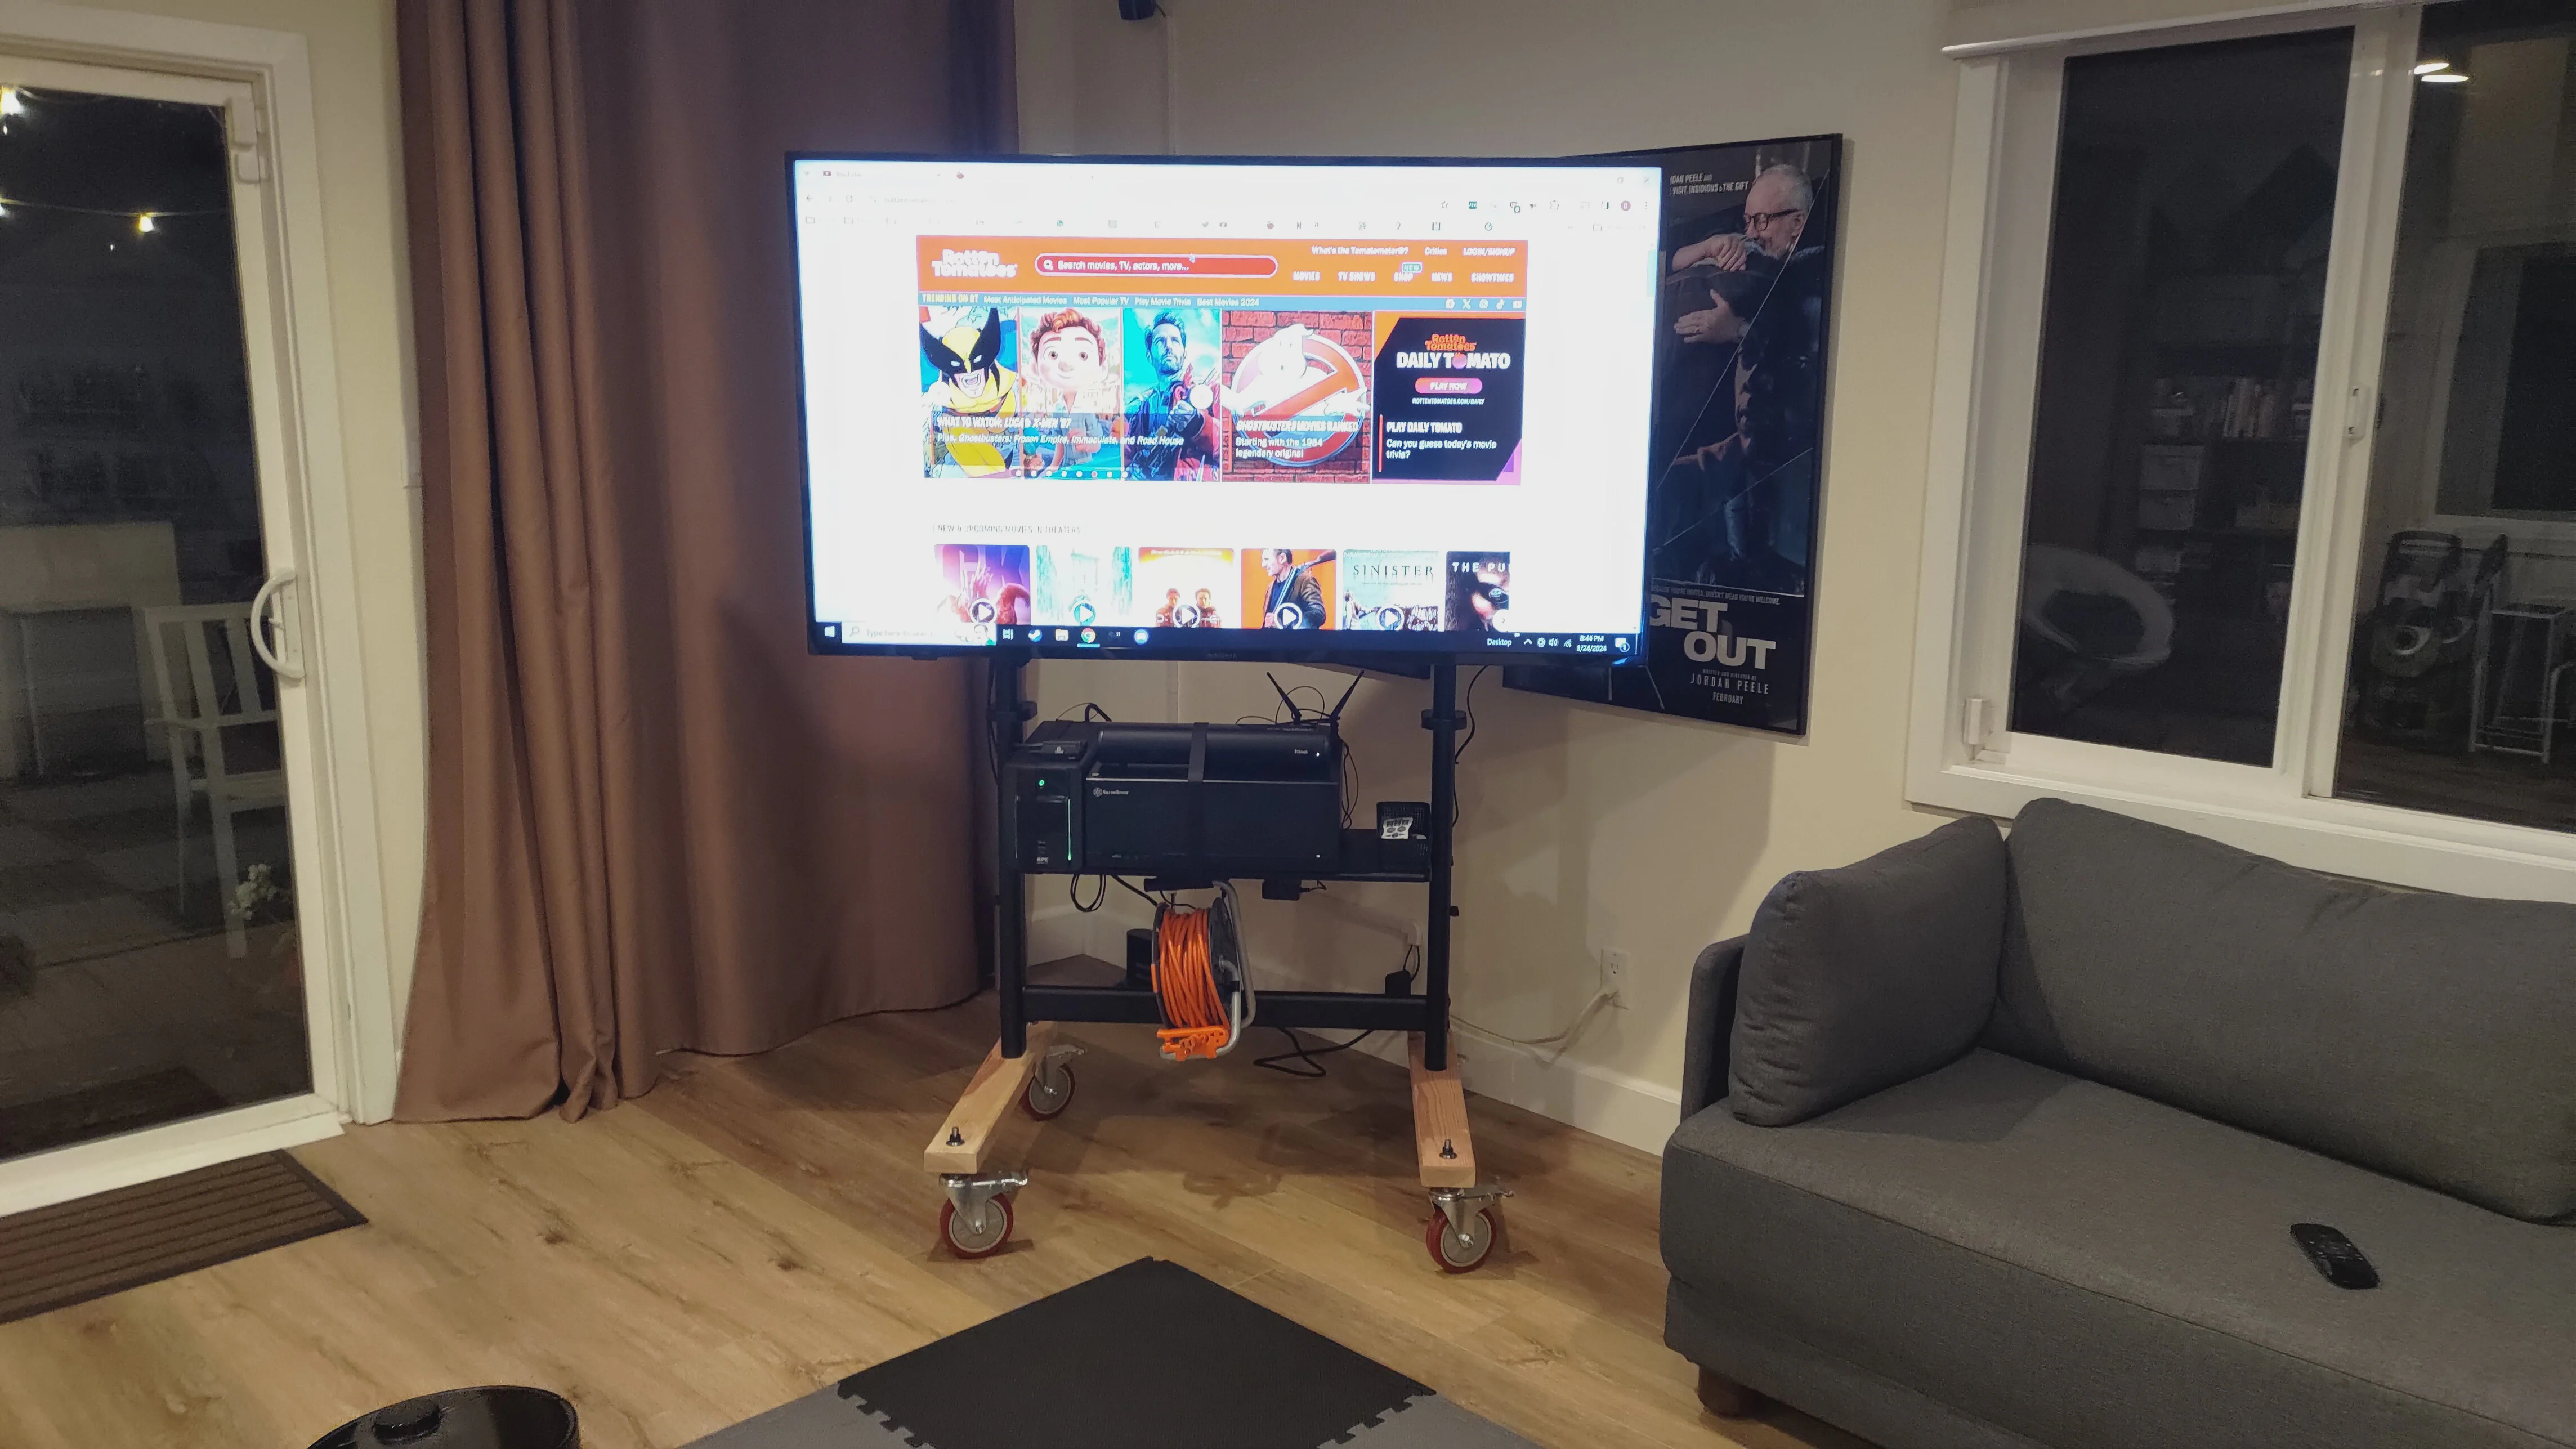
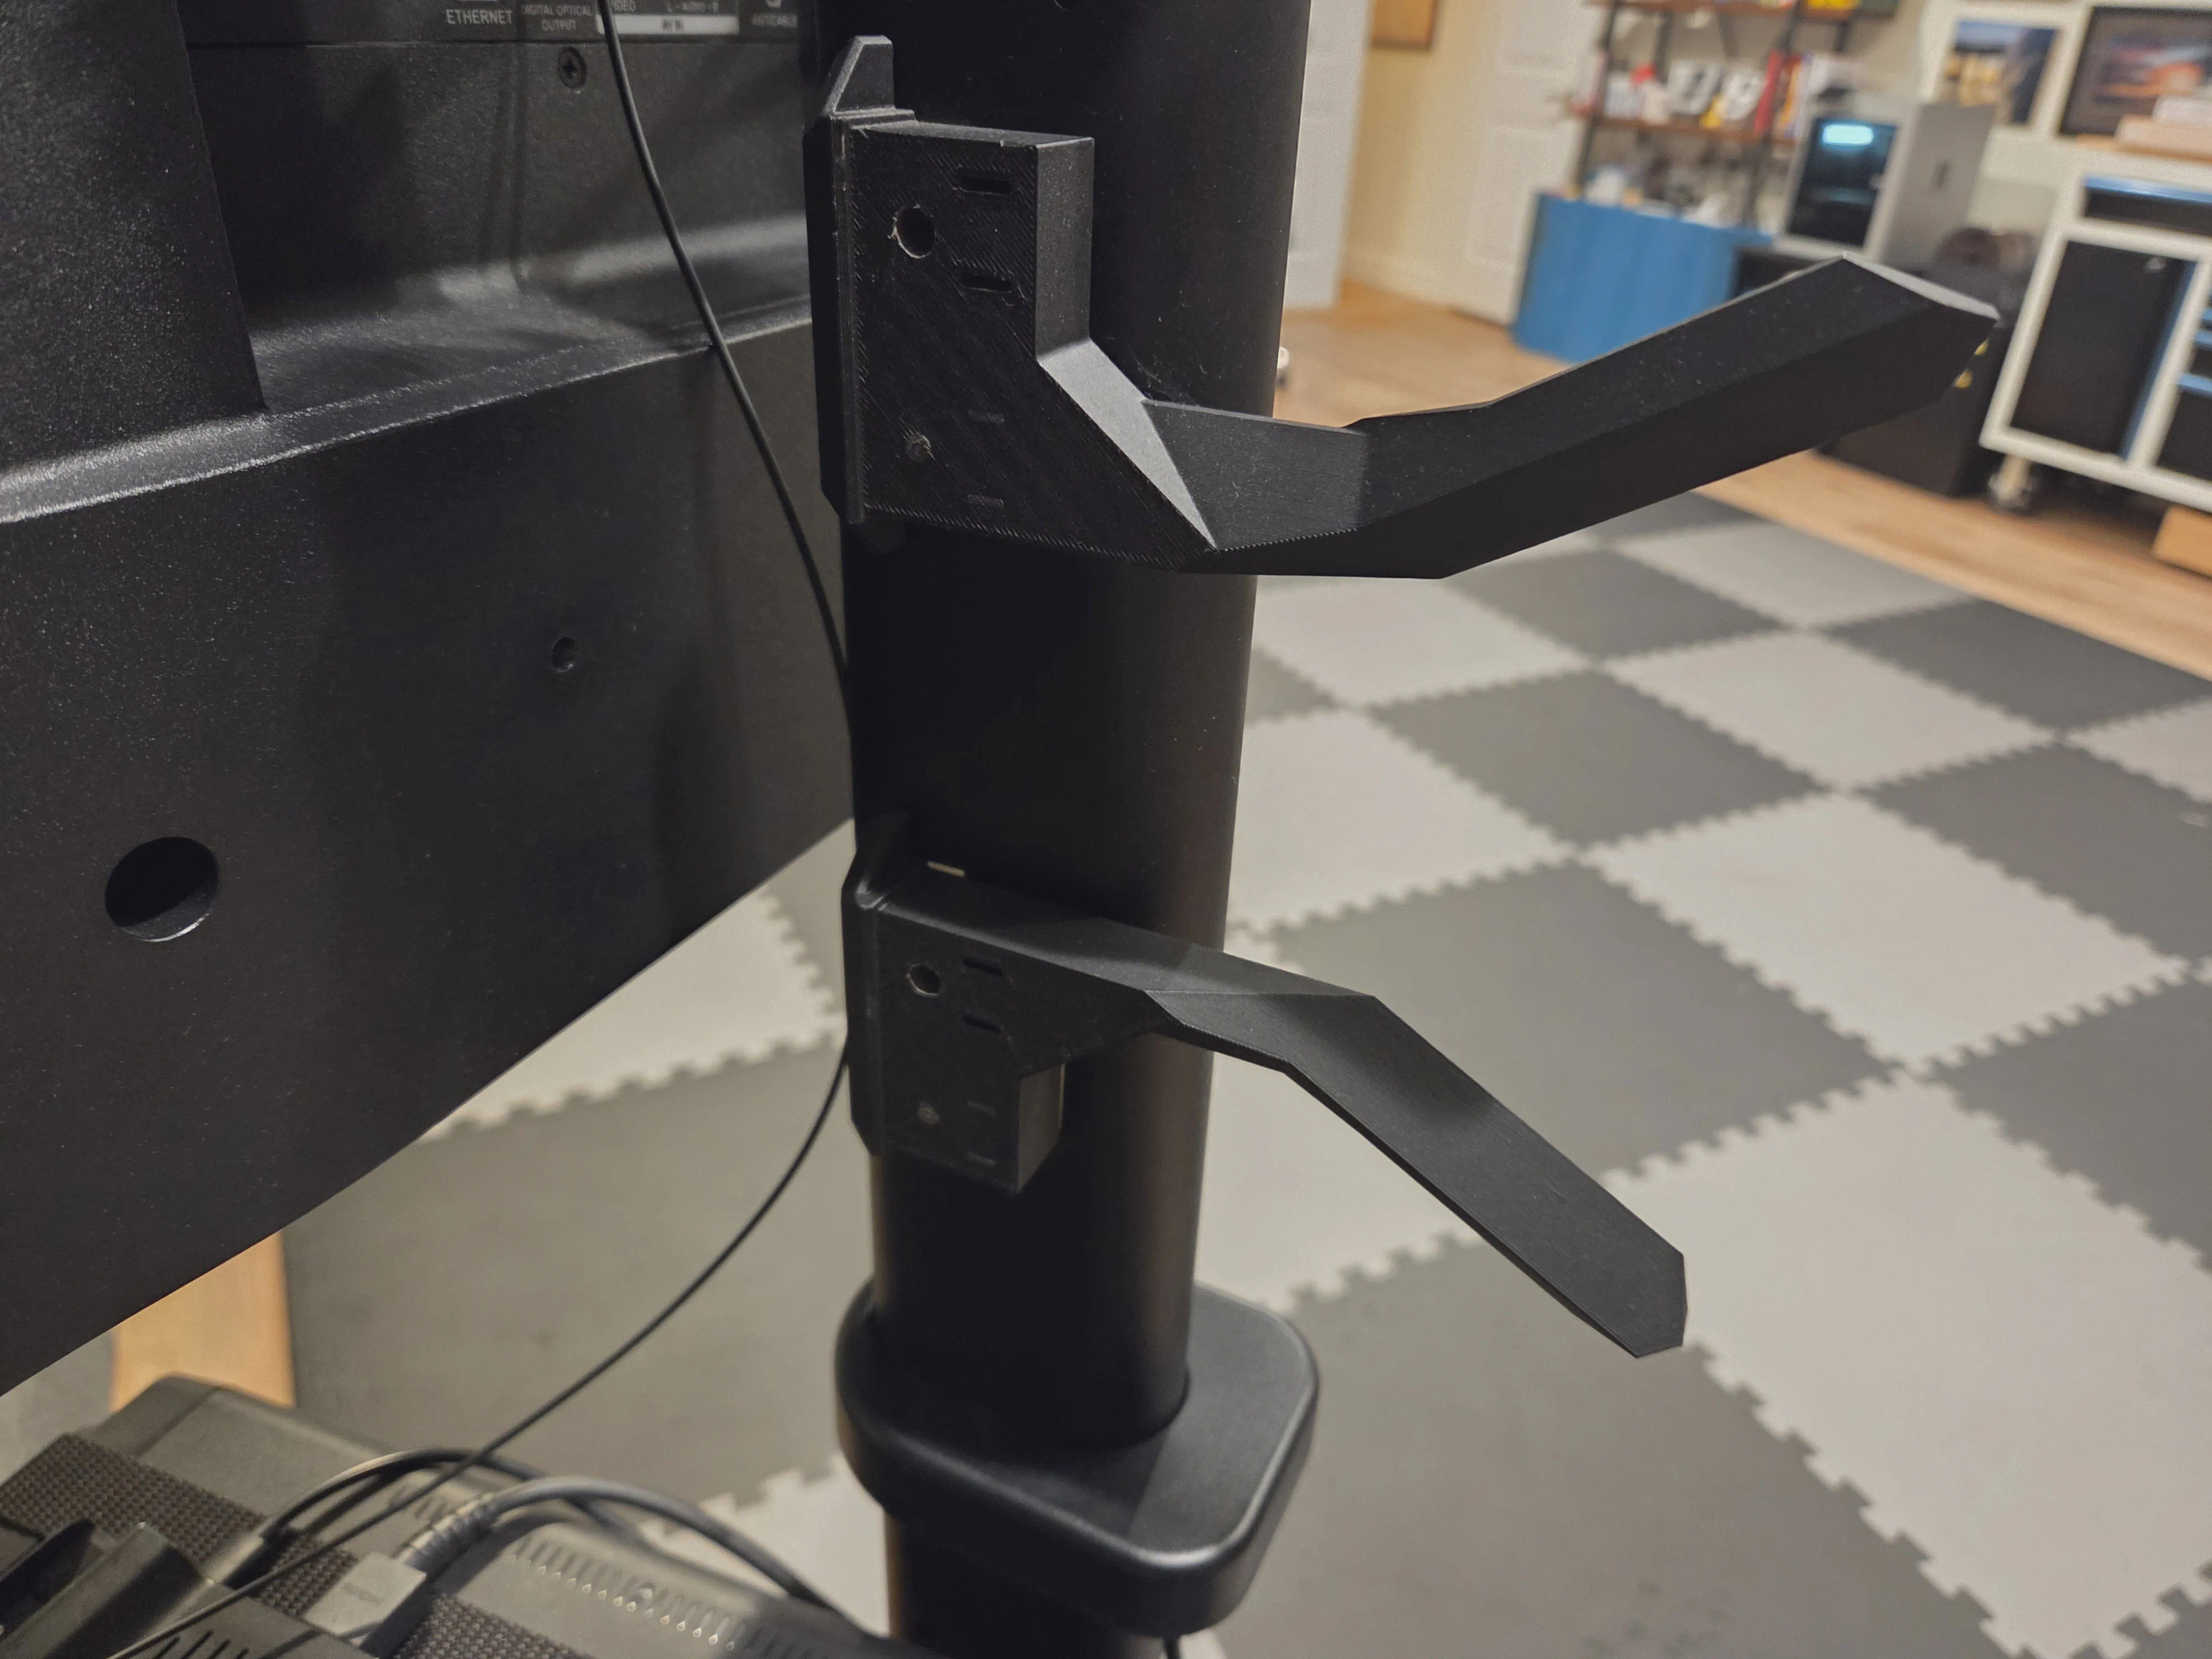
This was a big project: primarily woodworking, but one in which 3D printing came up several times as a quick solution. My family is big into gaming, and I wanted an outdoor TV for a long time. I got this giant TV cart on caster wheels out of sheer unabashed frugality: It is so expensive to mount an outdoor TV, and TVs don’t last very long outside. My solution was to make my studio TV dual-purpose for use inside or rolled out to be viewed from any angle (though almost always from the pool or jacuz). The complete system includes a Media PC, a large UPS battery backup (lets the system remain on during transfer), built in speakers, and an extension cord roller that stays with it and plugs in at the closest indoor or outdoor outlet. Other than the parts I already had such as old PC and battery, the whole thing cost somewhere around $400 - including the TV!
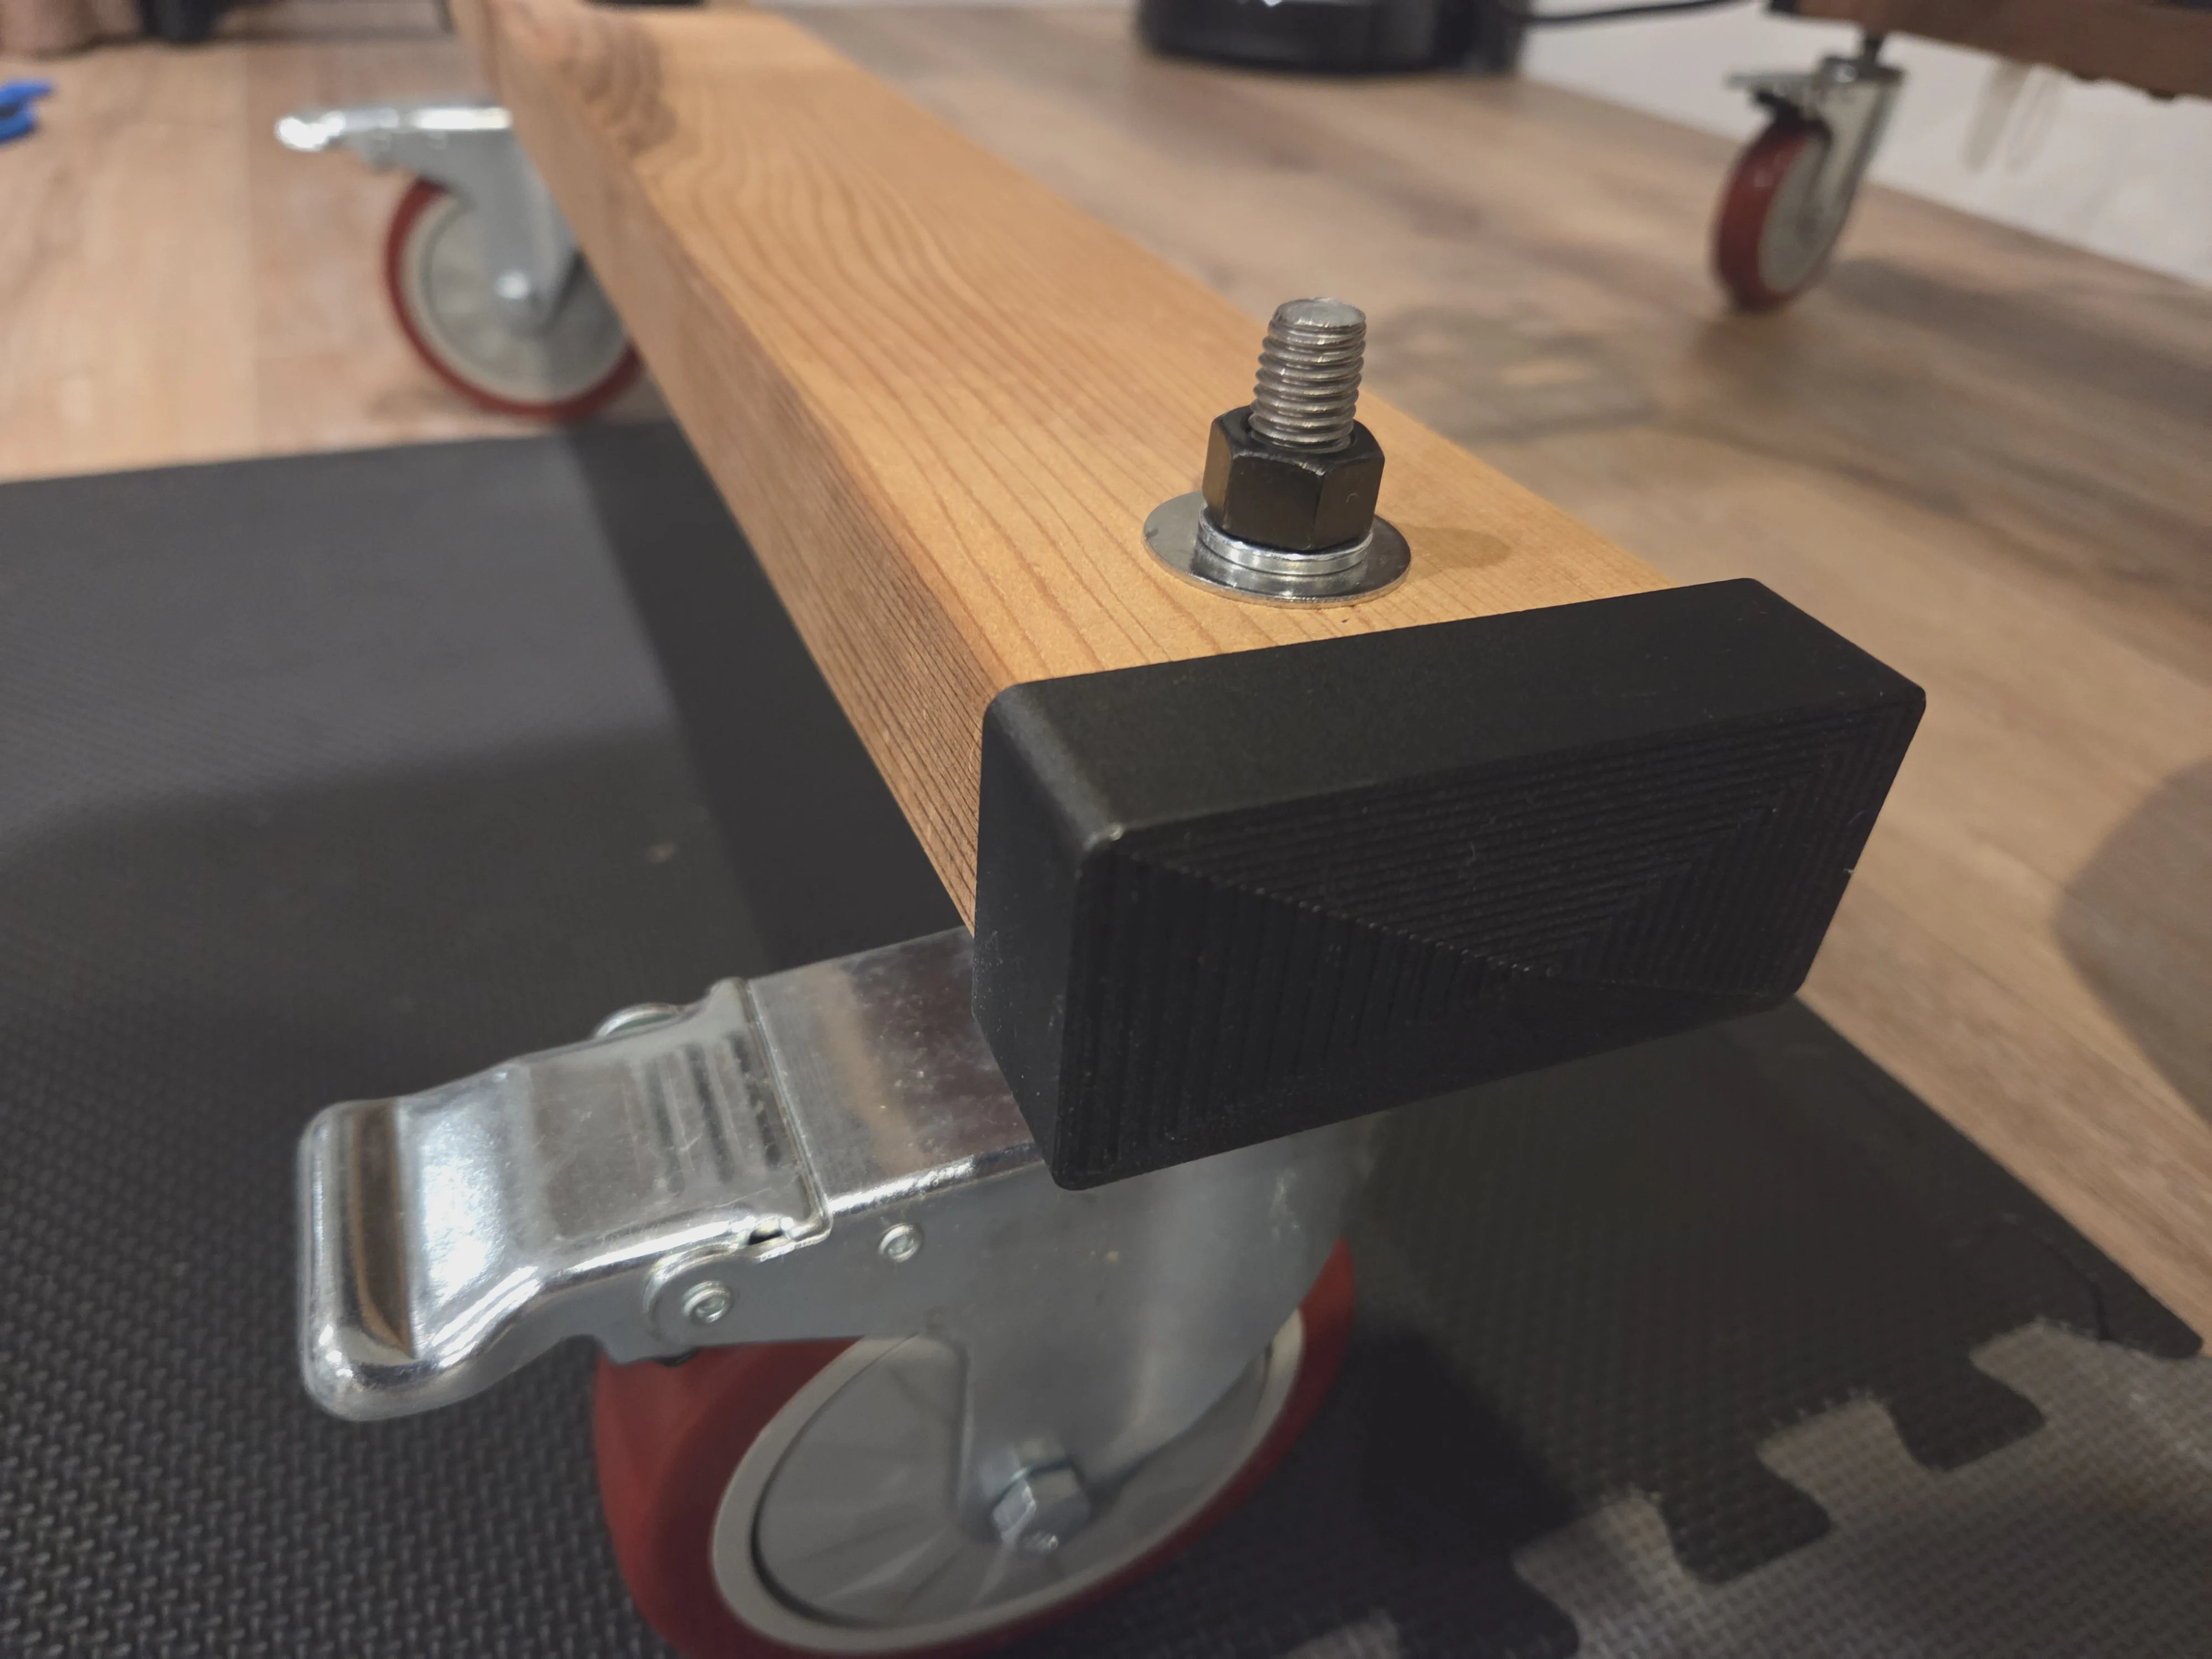
The cart I originally got (on the wedding registry) had a fatal flaw: its wheels were too small to roll outside. So I replaced those with 6-inch rubberized plastic caster wheels, which proved too much for the cart’s structural integrity, the base of which warped seriously after the first 3 or 4 times it made the trip outside and back. So the main project here after initial construction was replacing the entire base of the TV cart with hardwood 2x4s cut to the same dimensions as the original base, and finding the hardware to secure them.
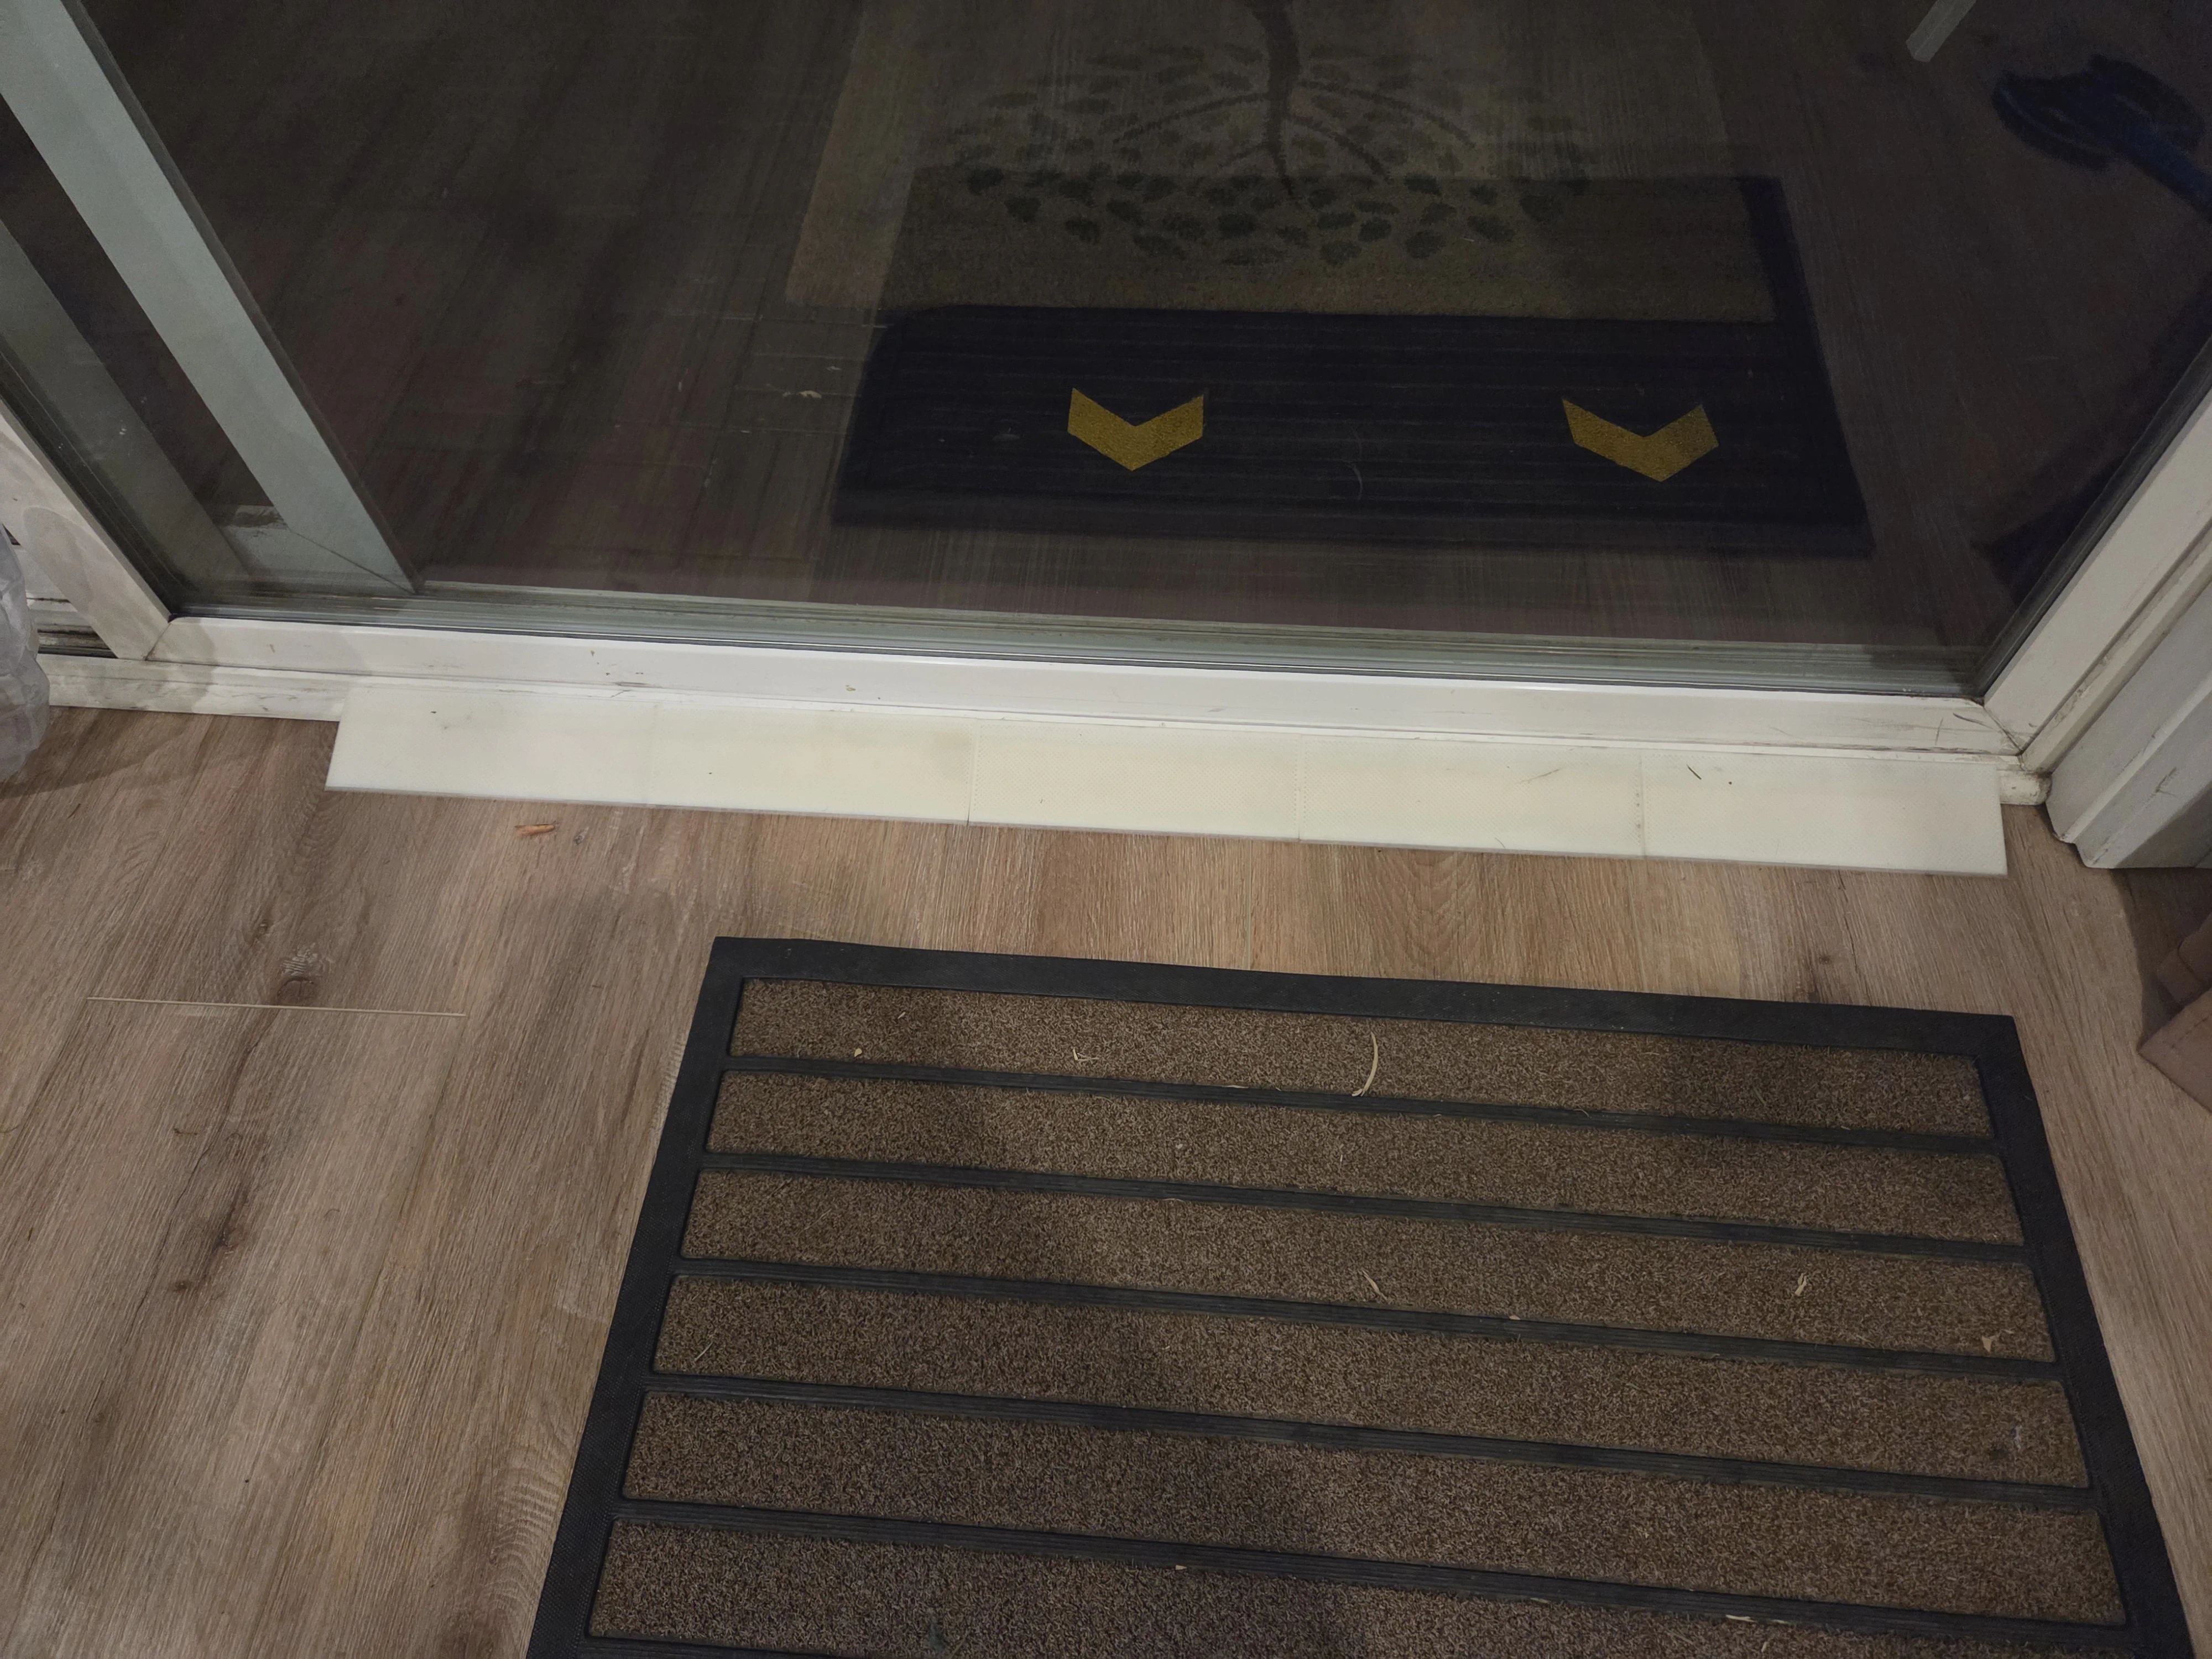
From top left to bottom right: A view of the worksite doing the core woodworking to replace the bent cart legs with wood and refit the giant caster wheels, the final TV cart with the new 2x4 legs, end caps I printed for the legs, a ramp of translucent and white ABS as a ramp up to the doorframe to roll the cart outside (with a rubber wheelchair ramp I have on the outside), and 2 prints to coil the power cable and plug it in while moving it.
I have been super pleased with my ruggedized TV cart since this project. I have never seen anything quite like it and it is by far the easiest way to get a functional videogame or movie setup anywhere in the back (we have also pulled it to the front of the house for Superbowl parties etc) - and with no maintenance or failure modes of an actual outdoor TV.
Pourover Coffee “Extender”
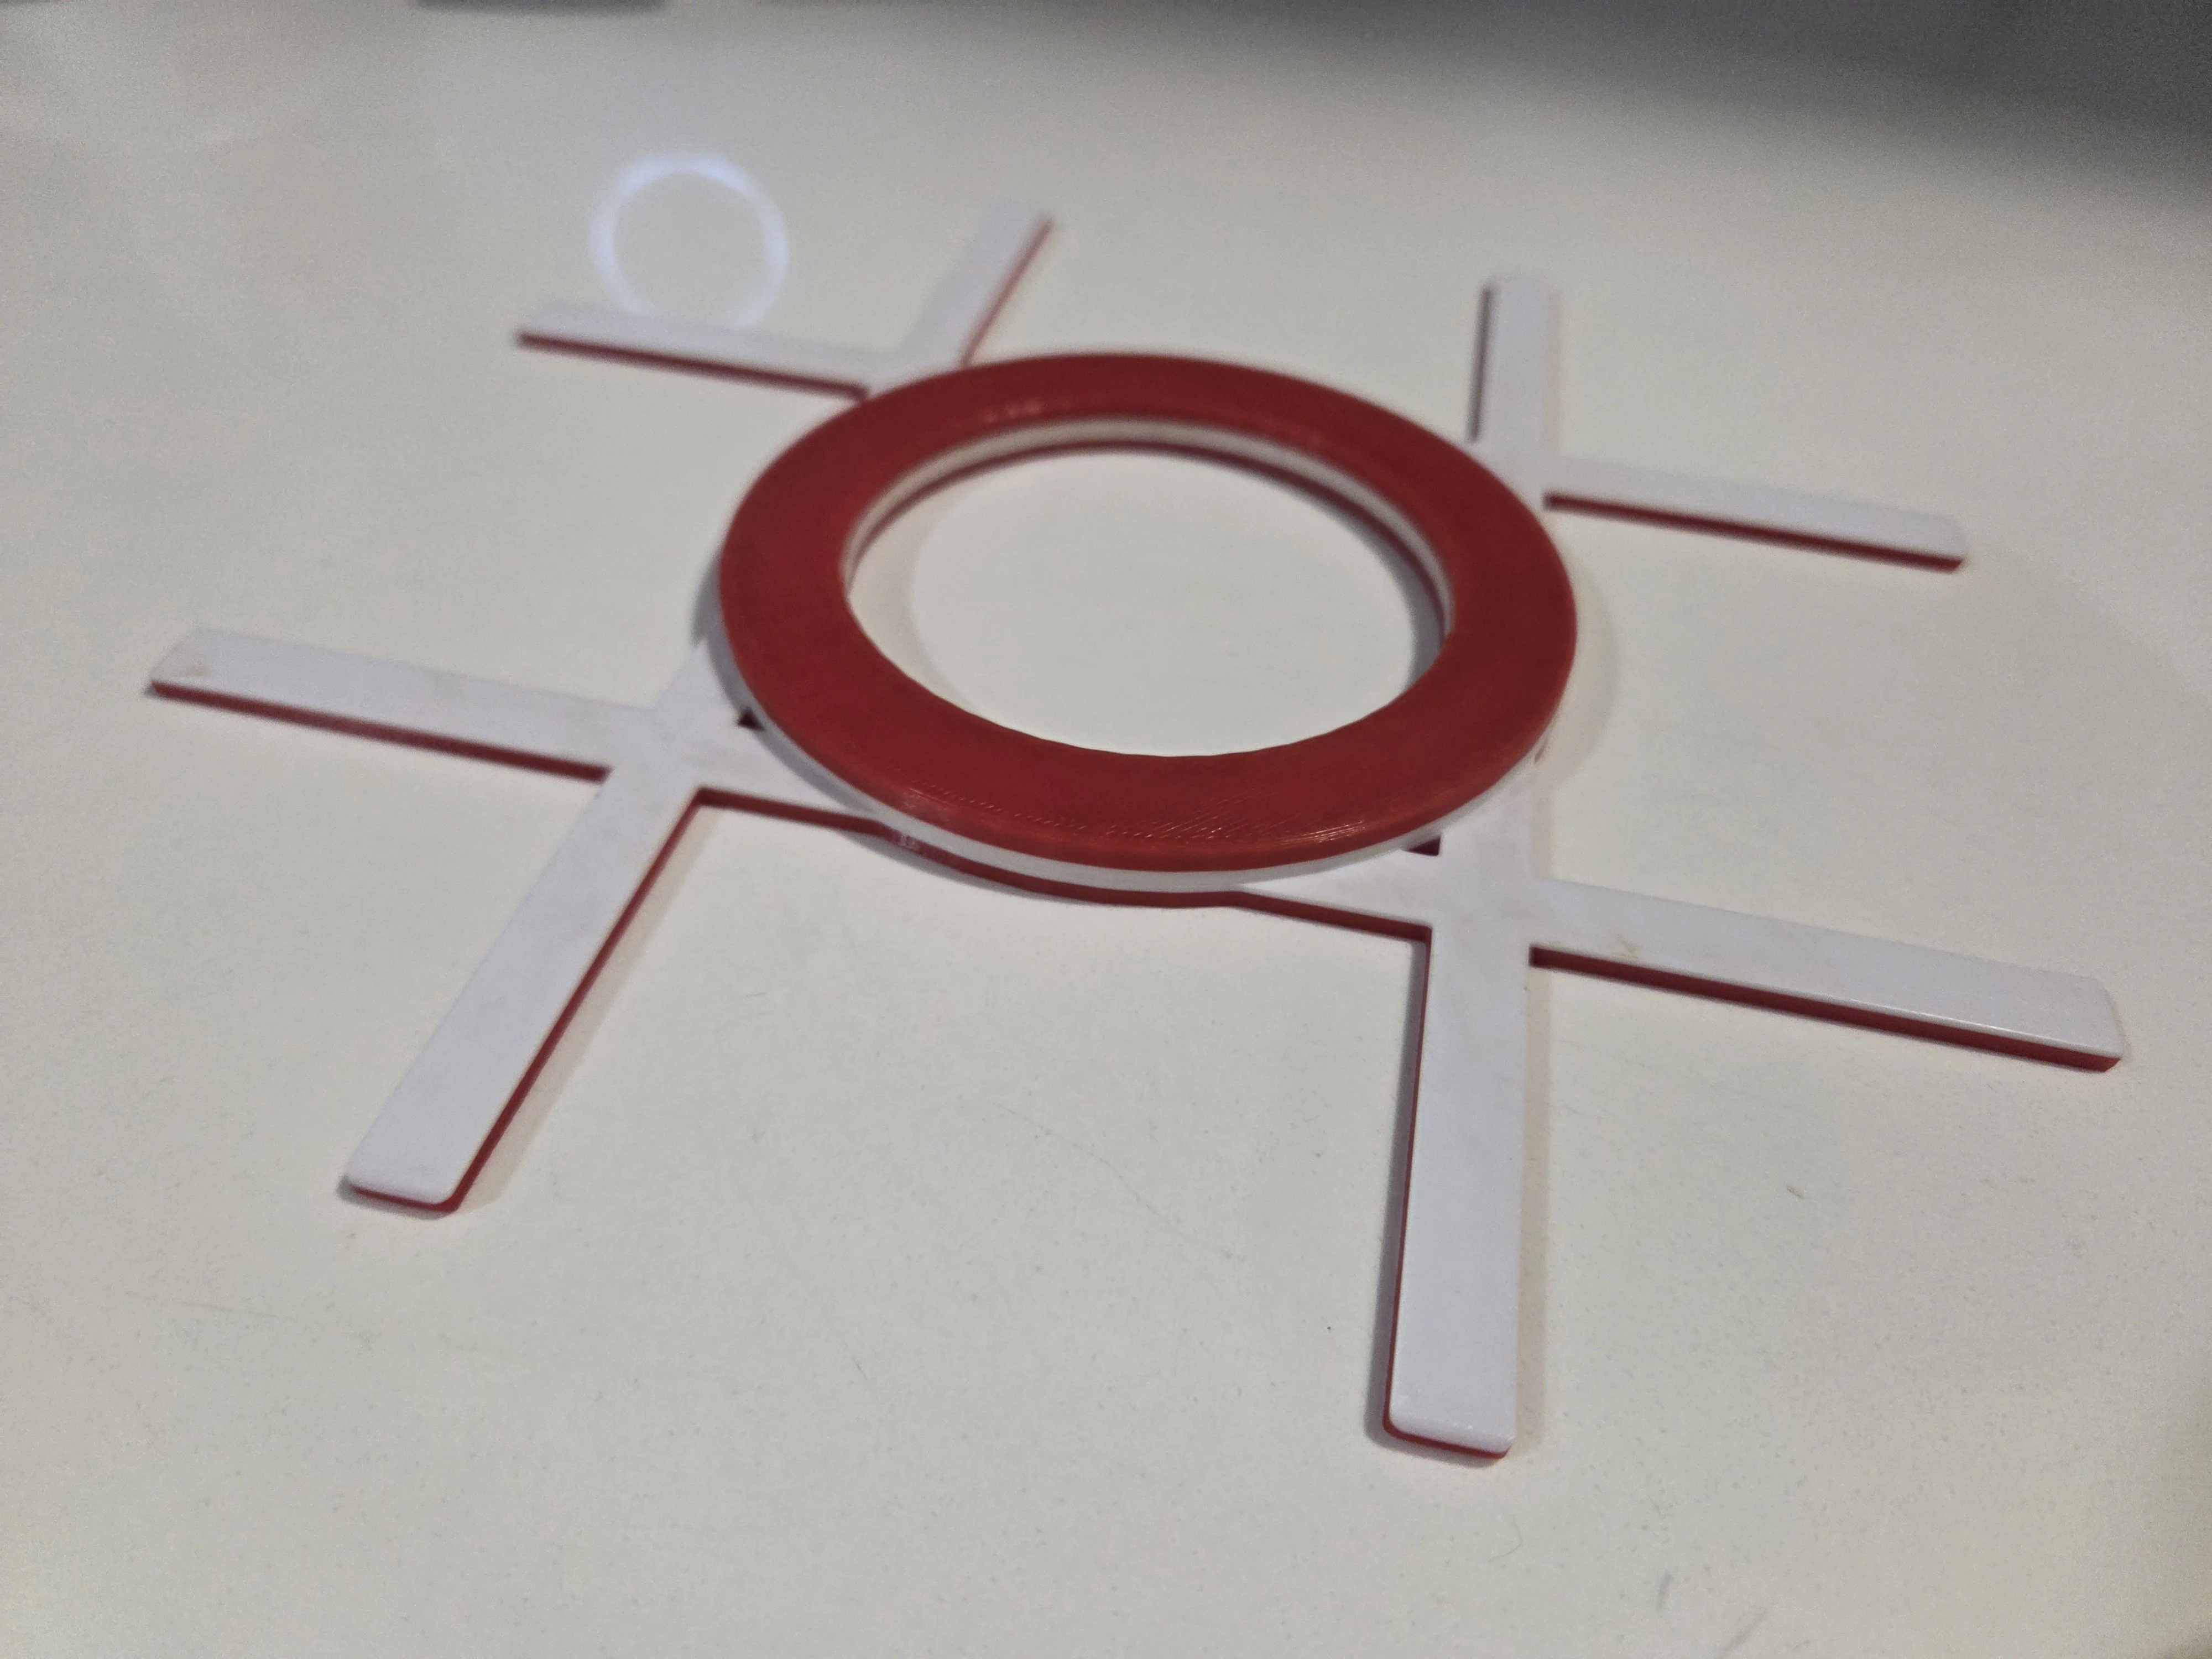
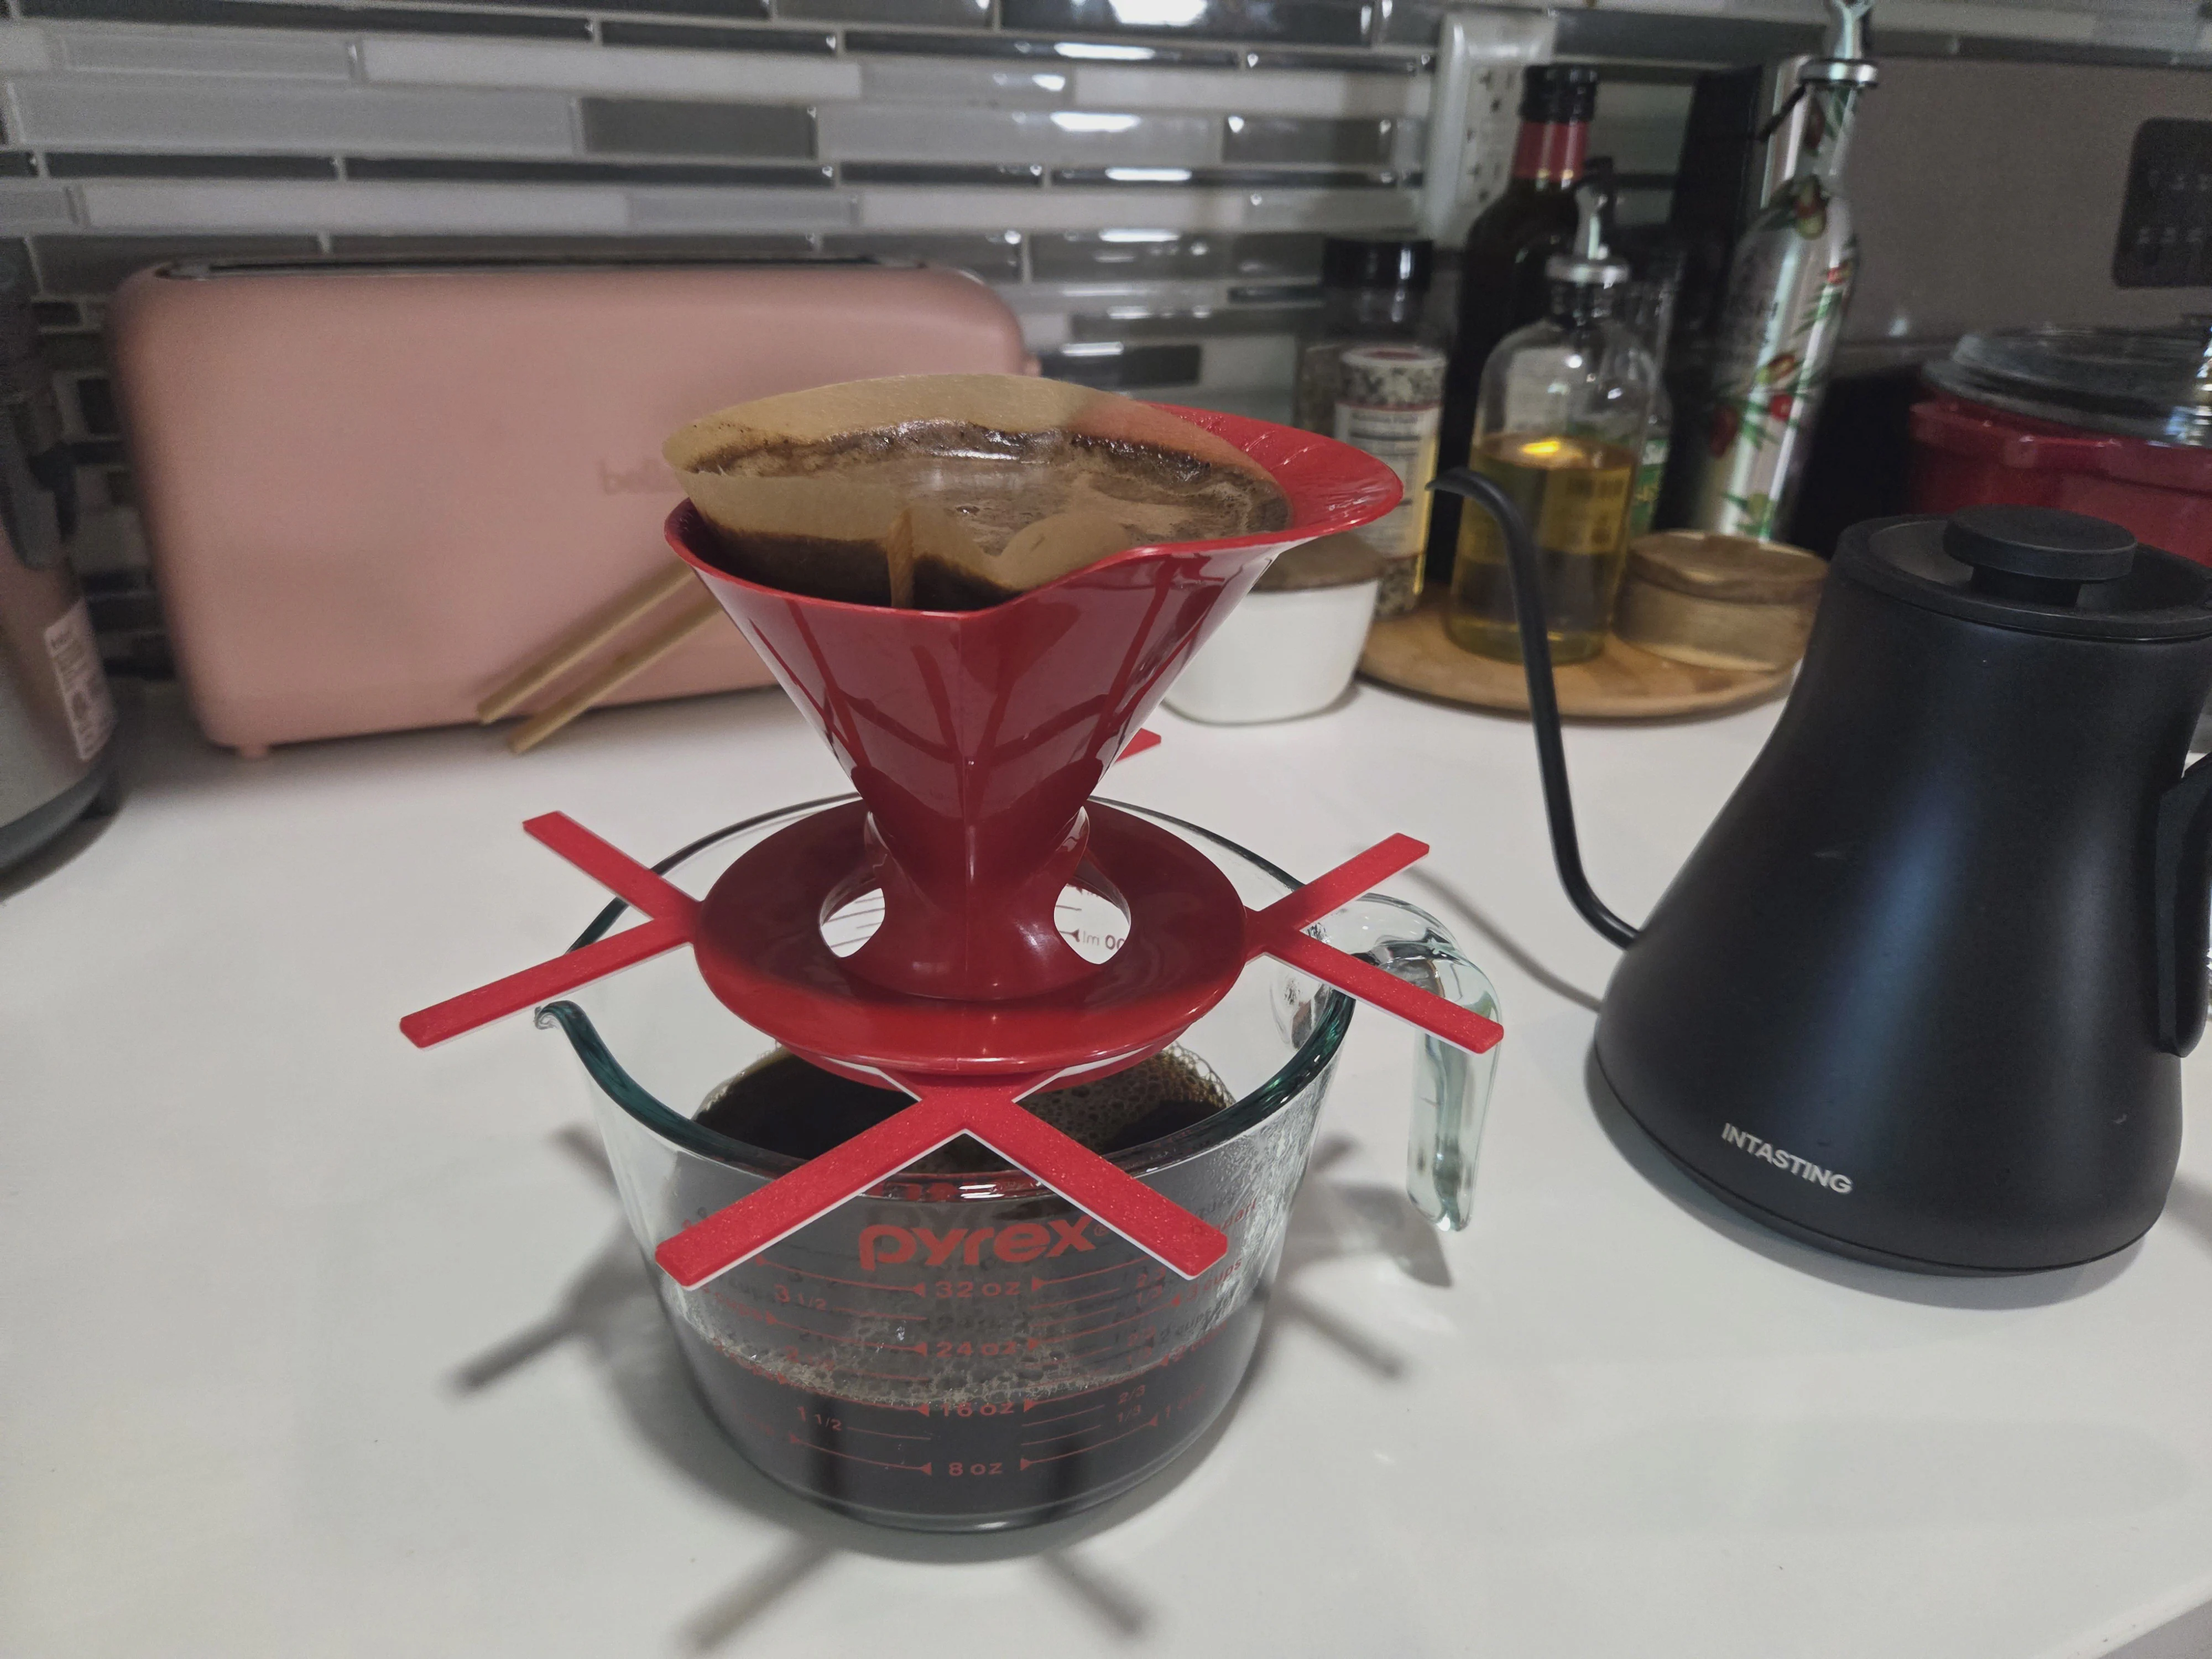
I use this print every single day. I switched to pourover when my favorite actually-good k-cup was discontinued and haven’t looked back since. But usually I make more than one cup or make it for other people, so I want it to drip right into a larger container. This “tic-tac-toe” shaped grid and ring print let me pourover securely on basically any container, like the wide pyrex in the second picture. Printed multicolor in bright red/white to match our kitchen theme.
I never posted this one on thingiverse because even though it seems generally useful, it only fits my specific pourover exactly and it was a trivially simple 3D model.
Saloon Style Picket Fence Gate
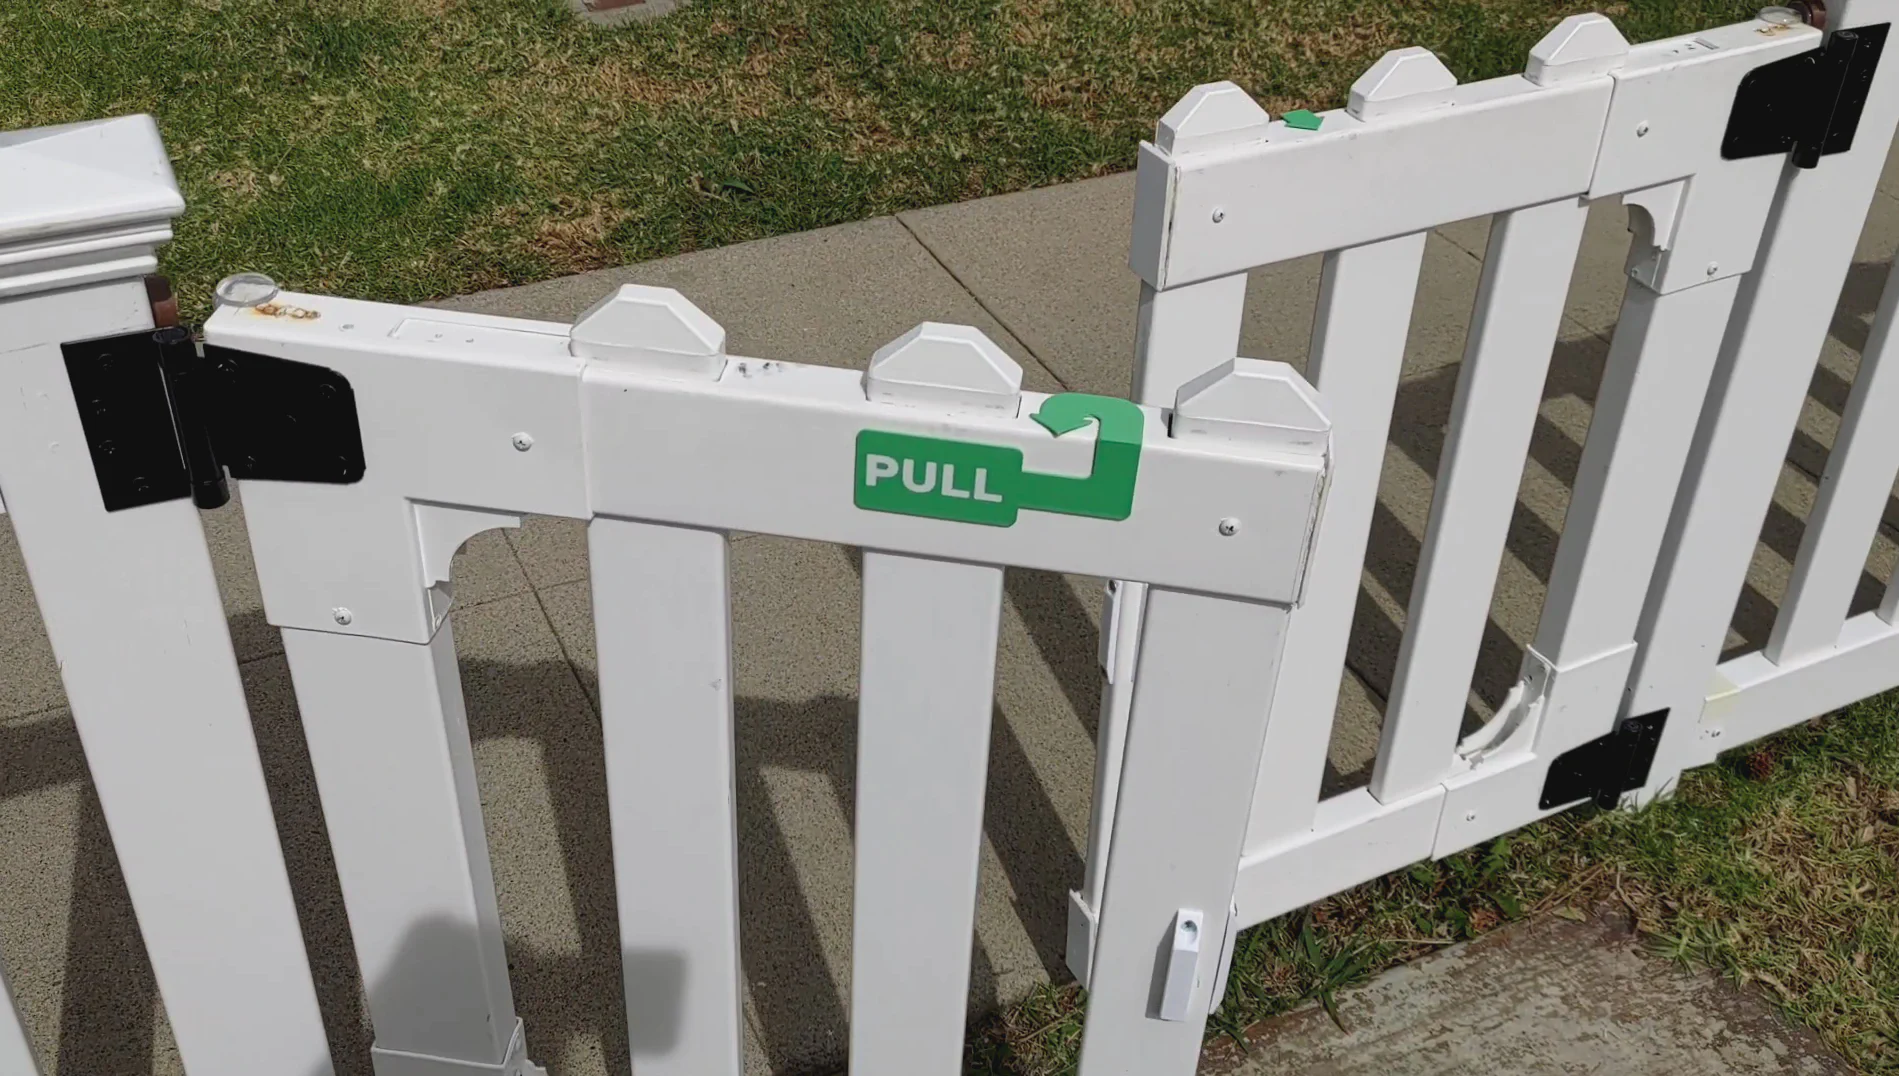
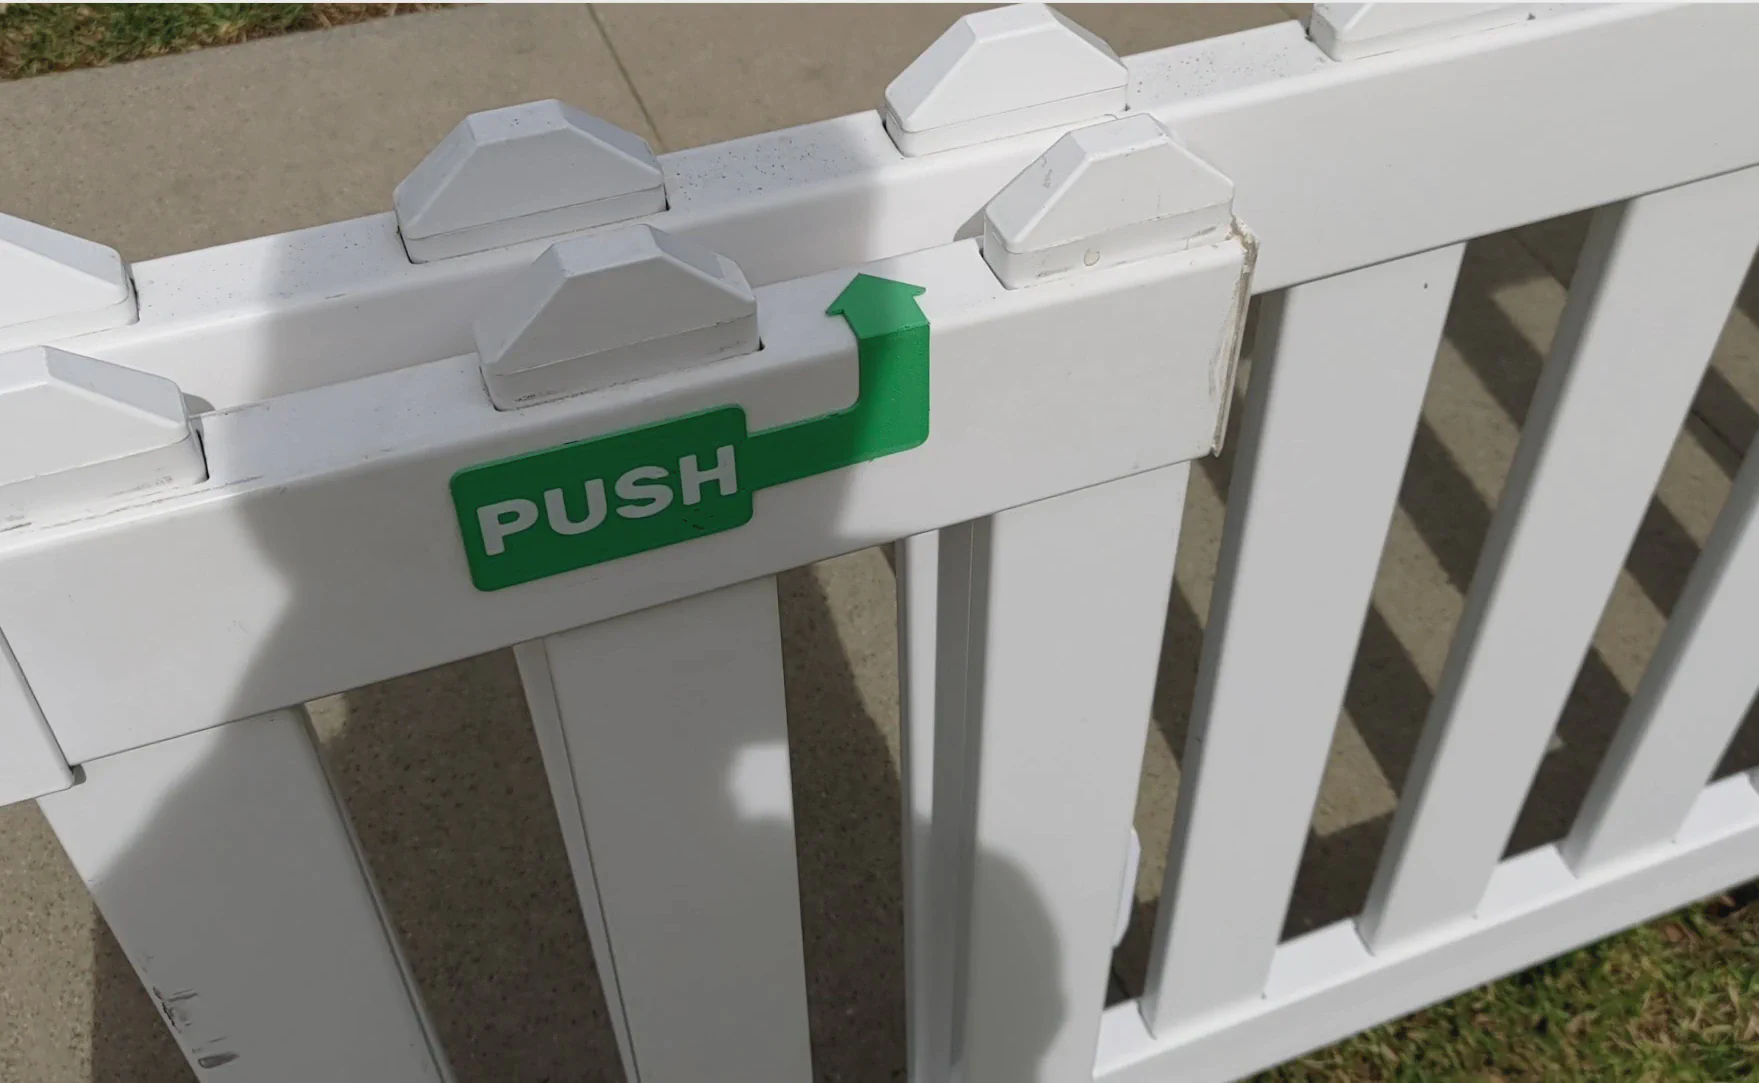
My wife actually made the first version of this saloon gate for the Zippity fence she put around our front yard, but the hinges fell apart quickly and when I replaced them I took the liberty of printing several enhancements. Pictured above - end caps for the doors where the original wide door was cut in two, push and pull signs custom printed in PLA, which have lasted surprisingly well, and some custom magnet holders for these type of rare earth magnet bars you can buy in bulk to keep the doors aligned when closed, and that allow them to be pushed 180° to lock open. It took some tuning to get right! And now seeing how the price of those magnets has increased.. I am going to have to conserve the rest of them!
Not pictured are some extra white ABS coverings I also printed for the gaps left between fence horizontals in some areas of the fence that had to stretch. The fence looked pretty ugly without them. What do people without printers do for this kind of stuff?
Outdoor Ottoman Reinforcer
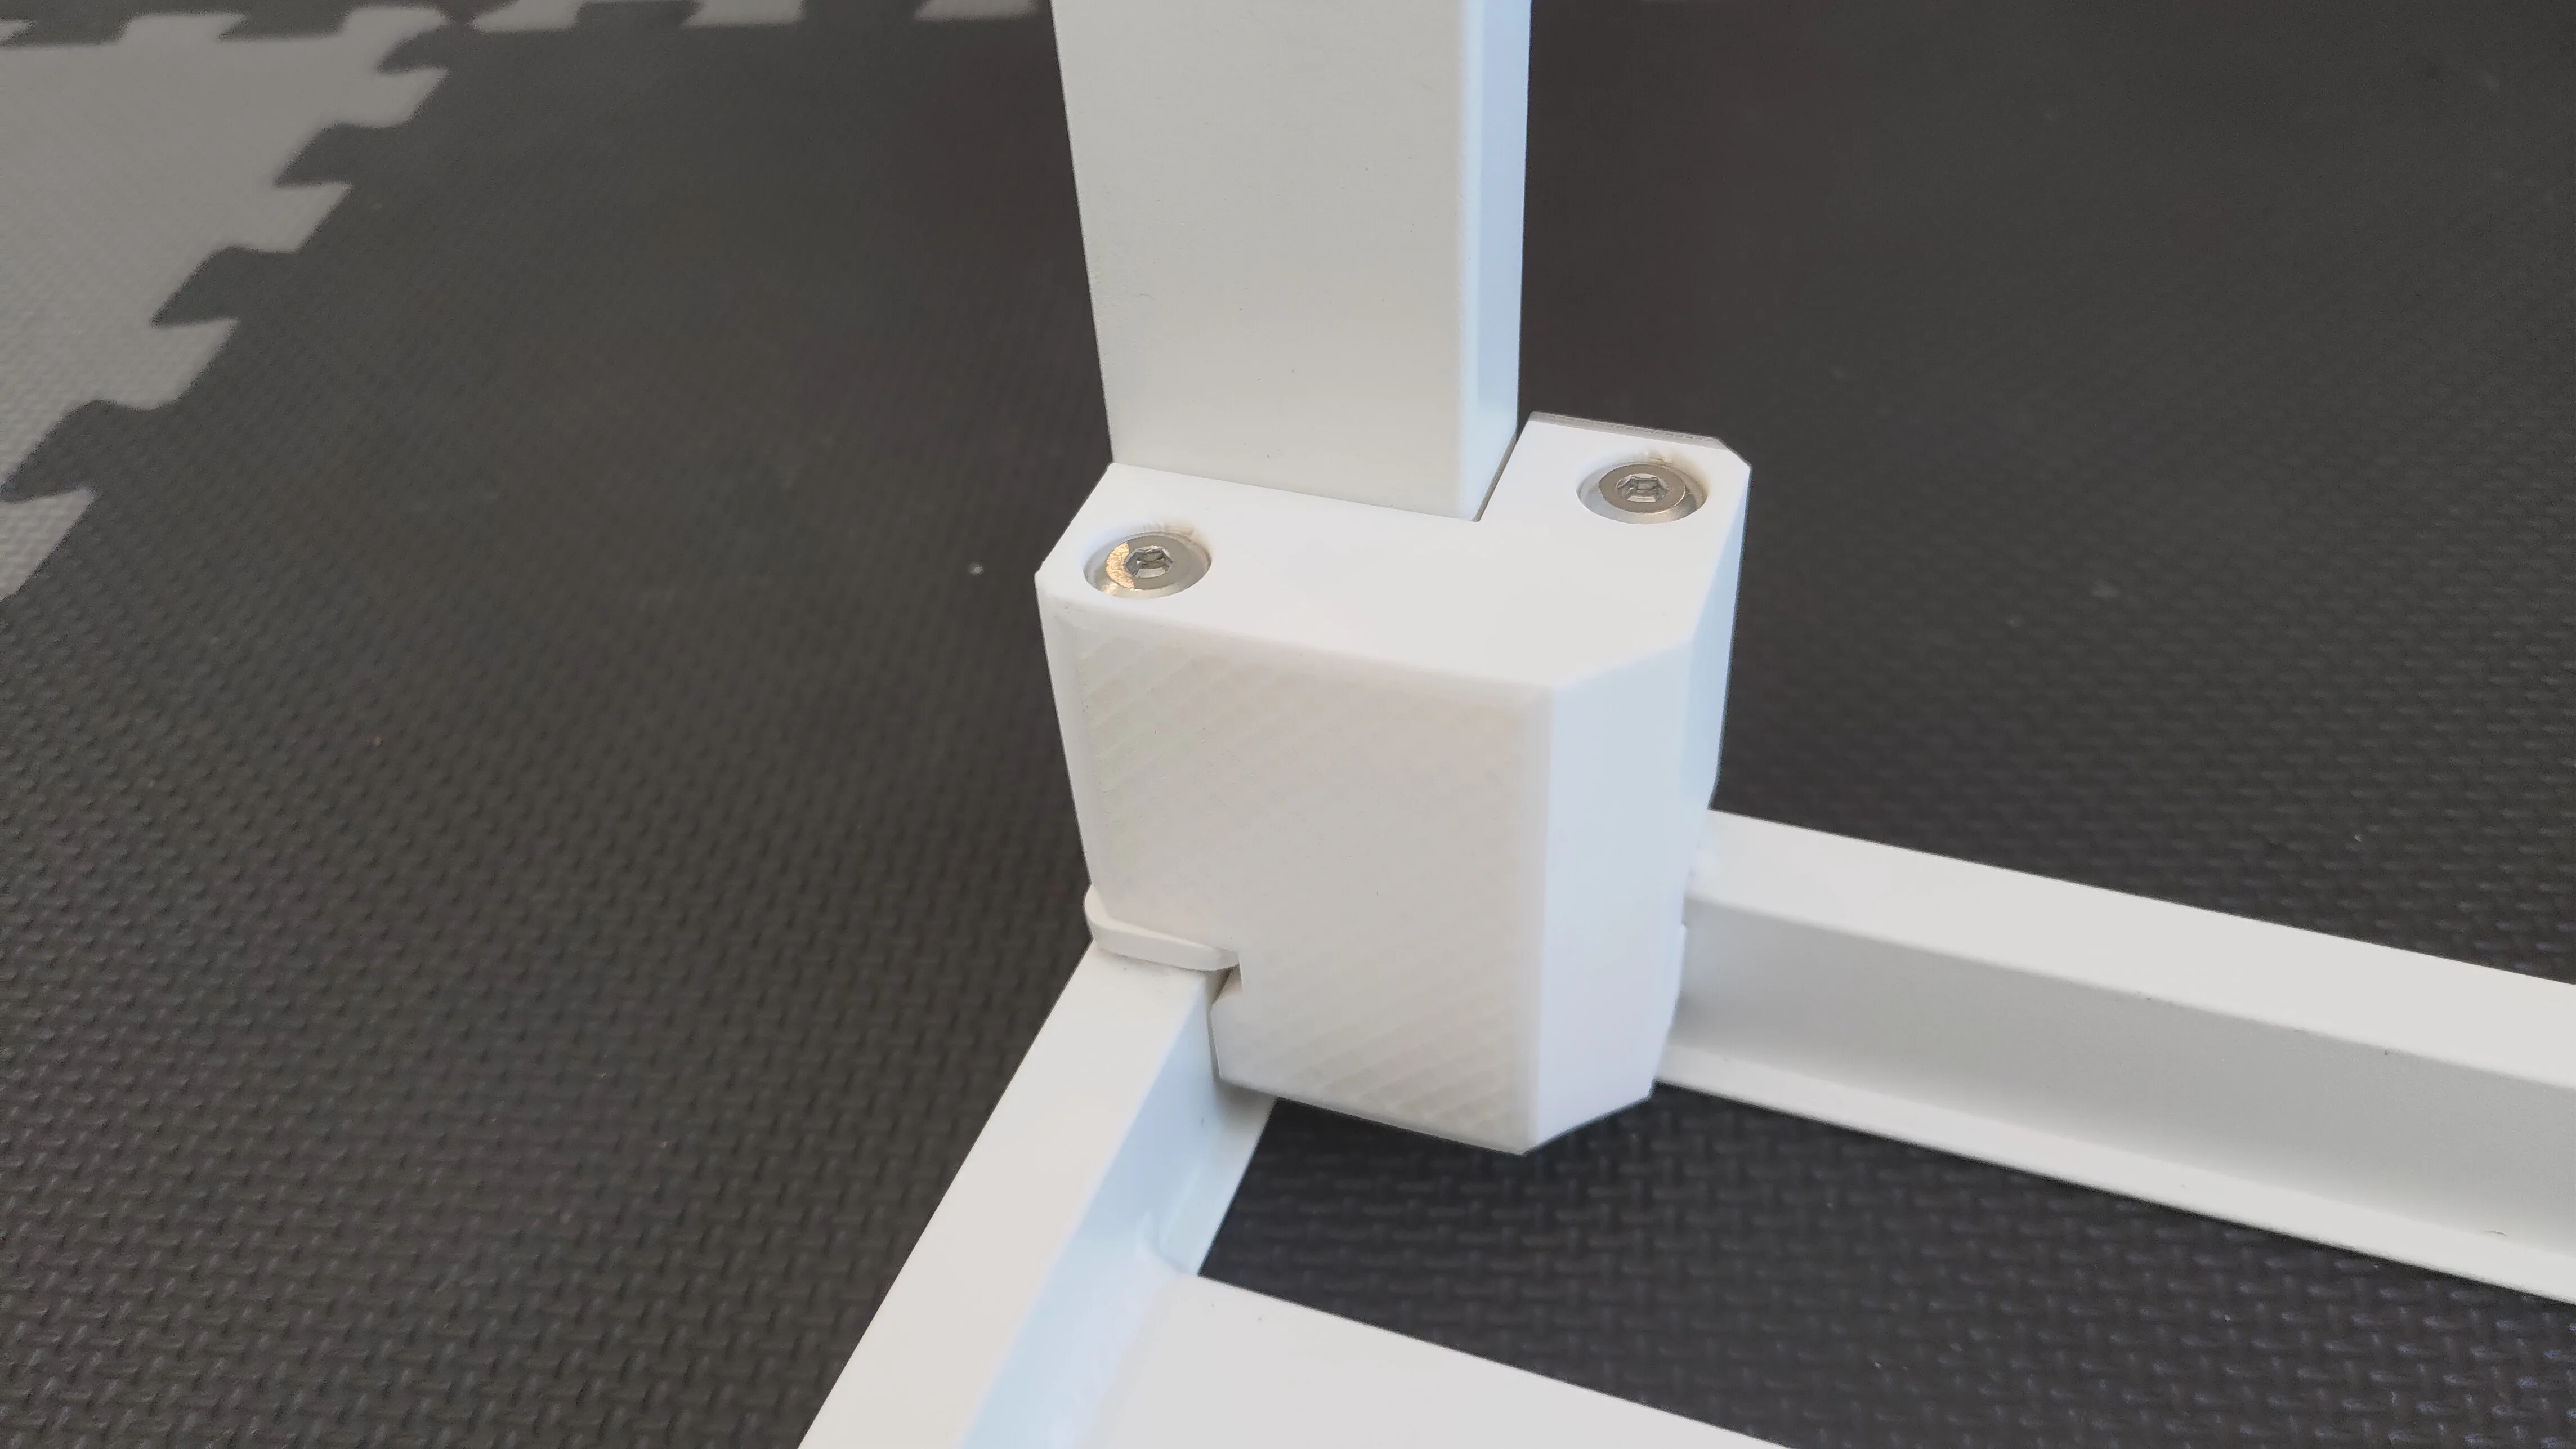
I was honestly so proud this worked the first time. We have a great aluminum outdoor furniture set that we got as a wedding gift, but these little ottomans were very wimpy compared to the rest of the set and the legs started to wiggle within a year. I was afraid someone would sit on one and collapse, so I solid-CAD modeled the “inverse shape” of the joint between the leg and the frame, and replaced the short M6 bolts it came with with the long silver ones you see flush with the part. The reinforcement is super solid now because it simply keeps everything tight - but the load is still on the original metal, not the plastic. It’s ABS though, so should be strong for years outside. I love Bambu’s white ABS.. it’s all over the place in these prints.
Alice’s Birthday Marker Frame

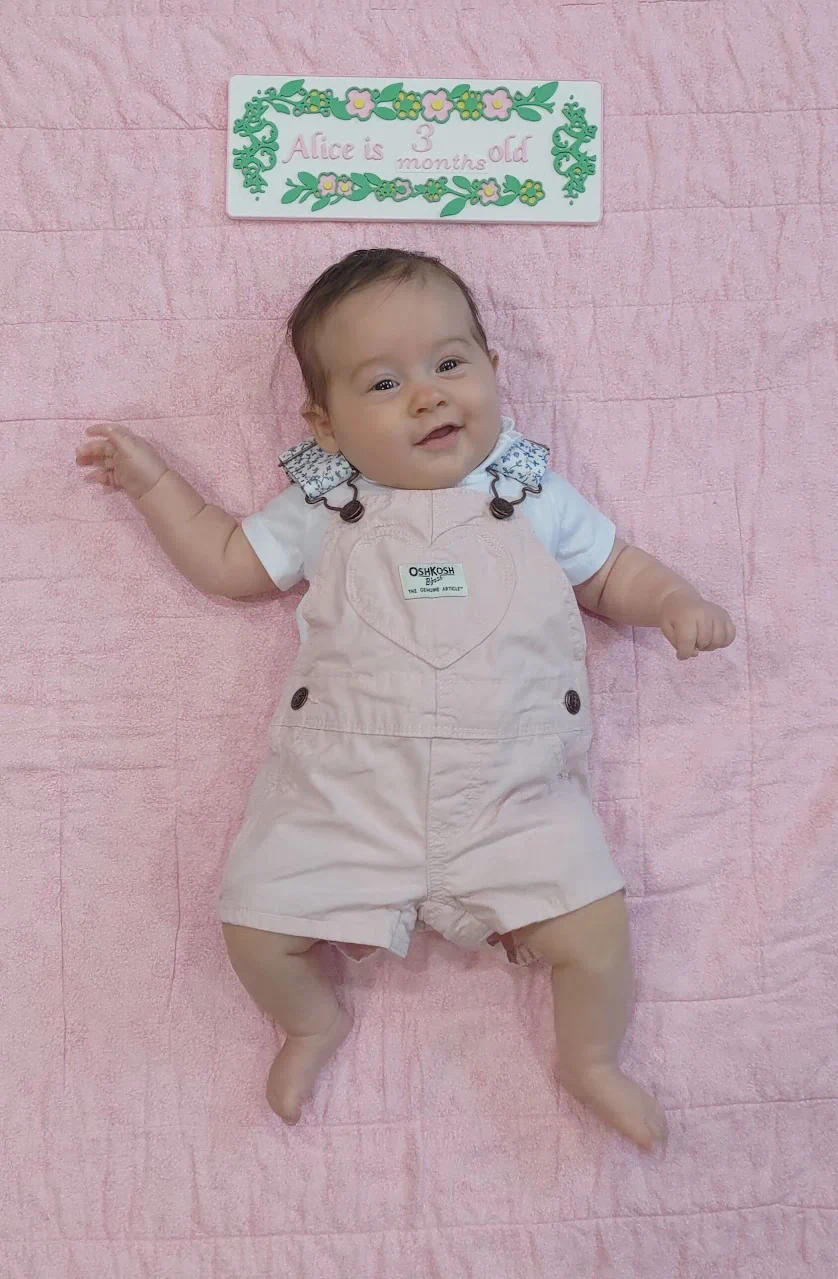
My first 3D model as a parent was one of the first models where I let AI do the “art” part - I just made it 3D, colored, and added the numbers. I’ve been using this frame with all the different numbers and “weeks, months, years” words for every week and month milestone pics of Alice!
Lidar Mesh of Alice
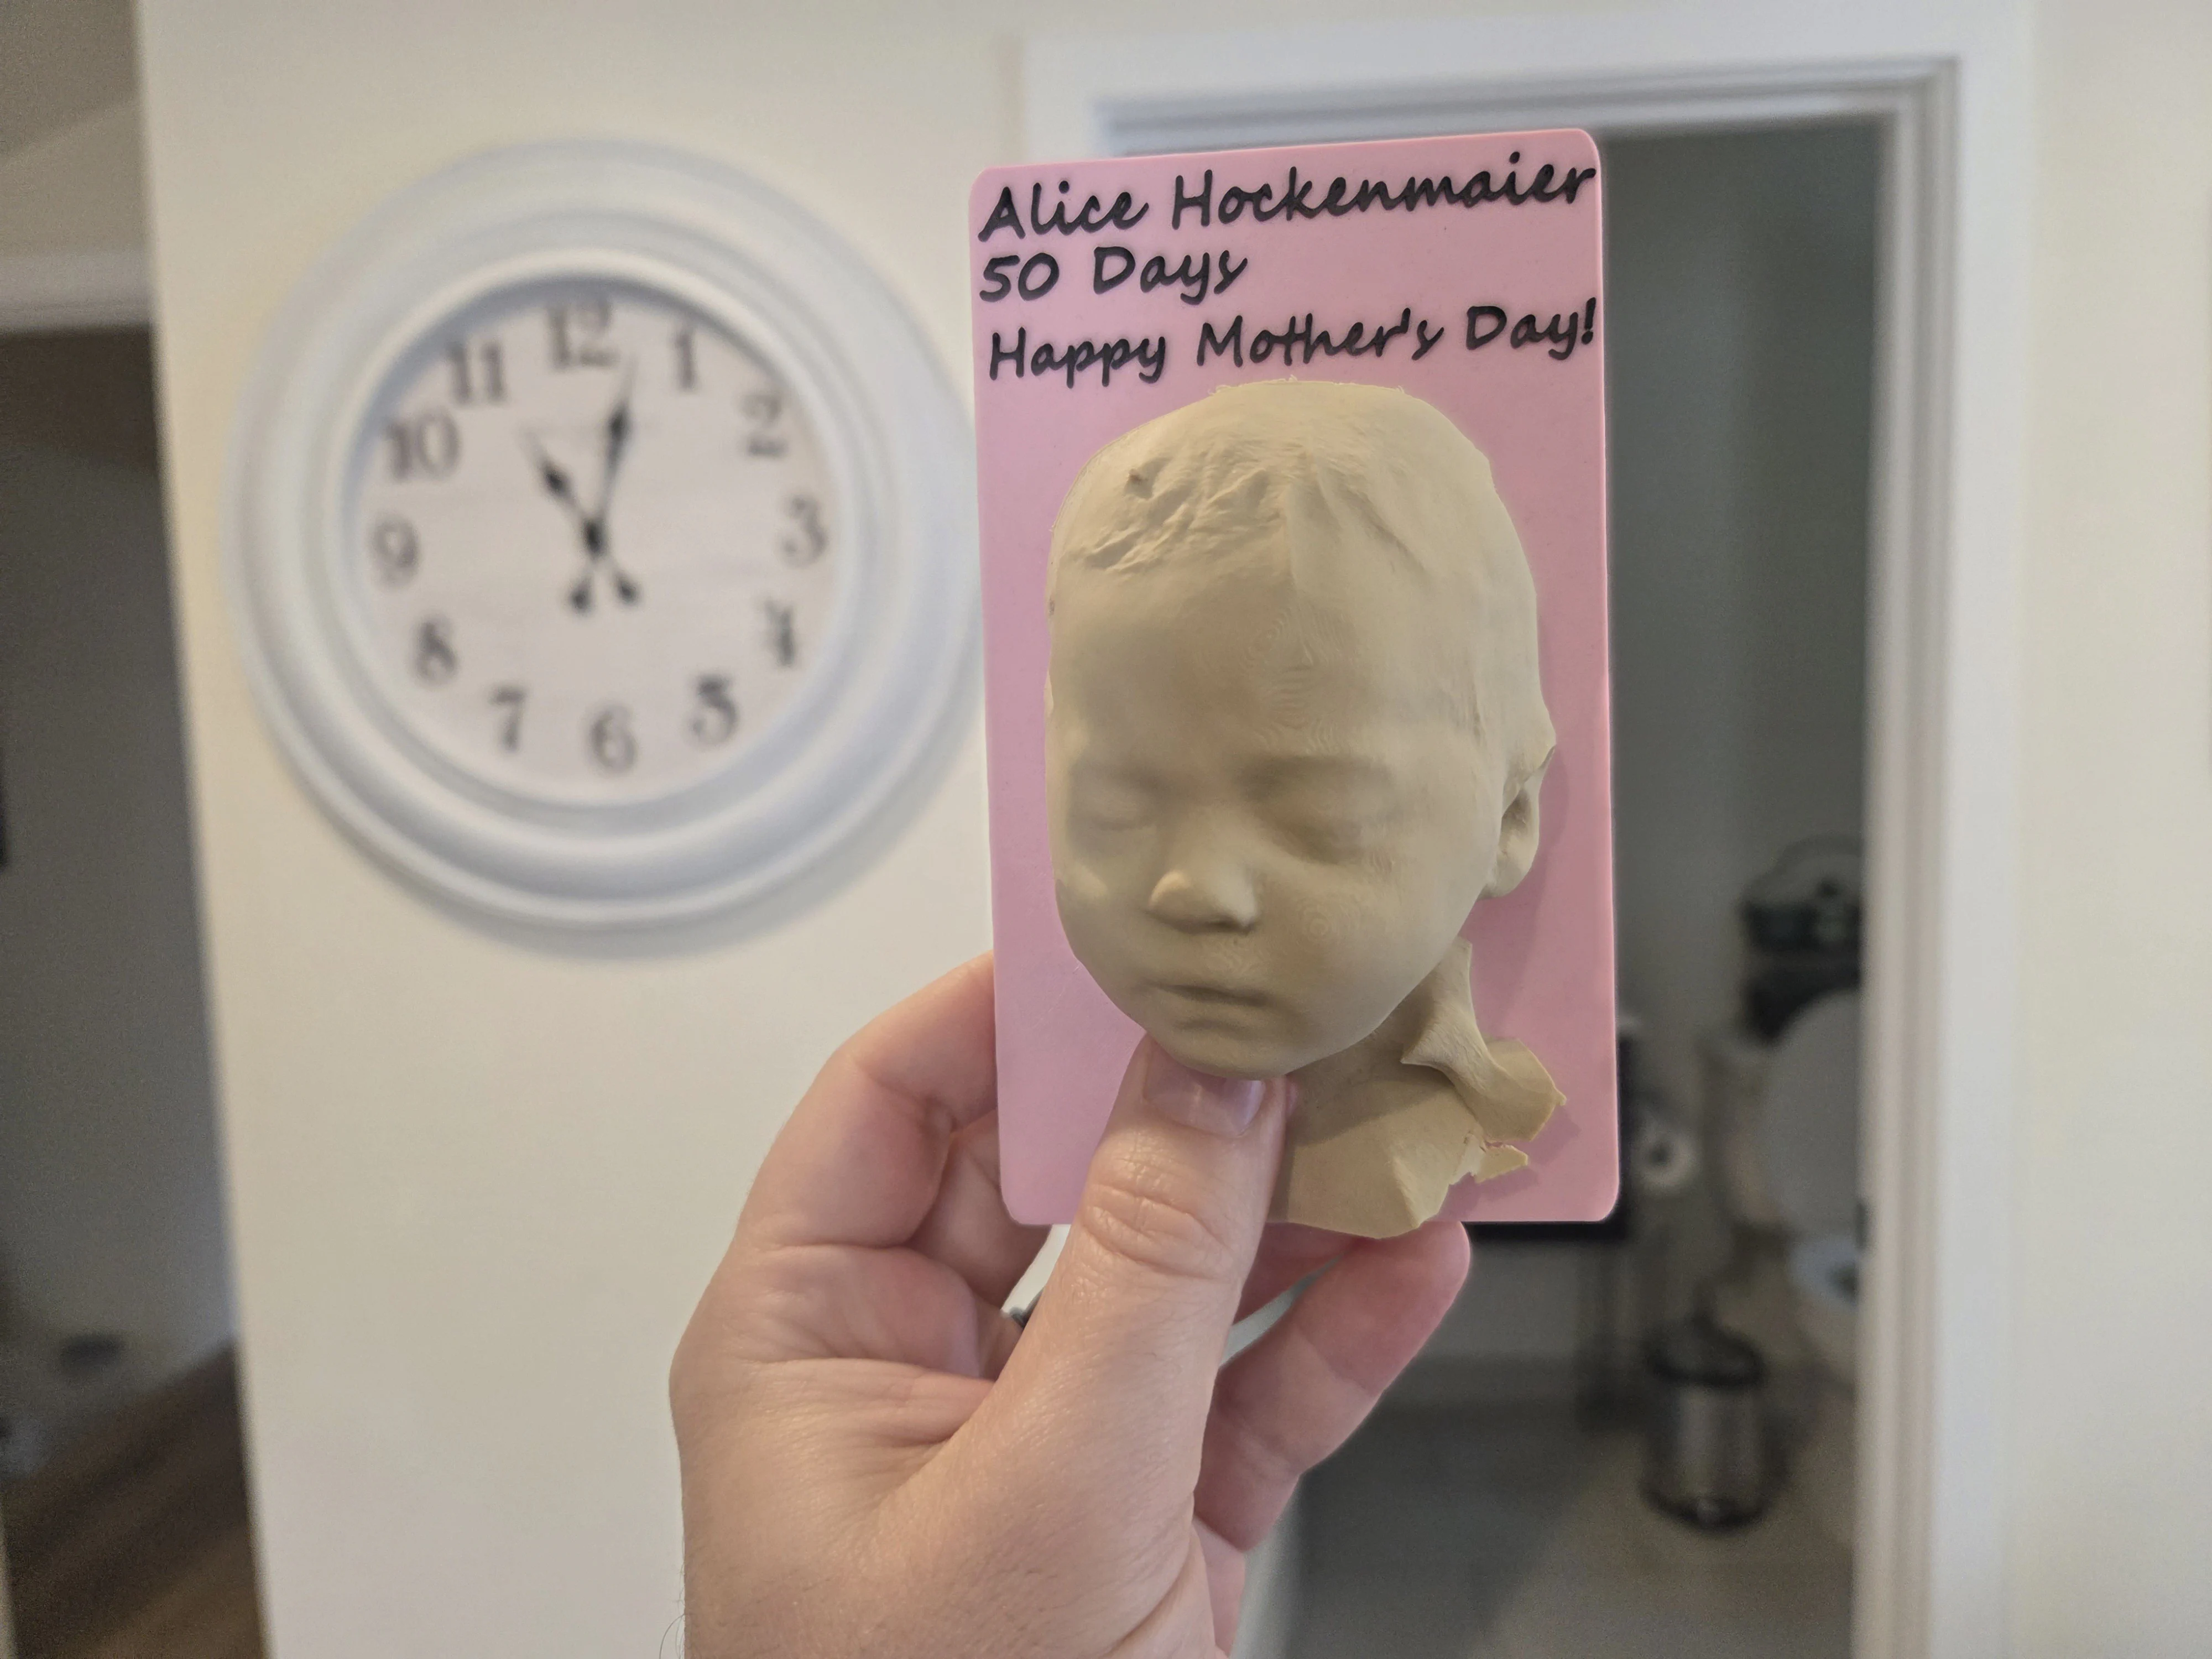
This one is a keepsake! I 3D-scanned Alice’s face at 50 days while she was sleeping on me with an iphone lidar app, cleaned it up in Blender, and printed it for my mom and Alice’s mom for Mother’s day. Printed with my 0.2mm nozzle and a 100 micron resolution to show the detail of the scan - it worked well!
Alice In Wonderland Nursery
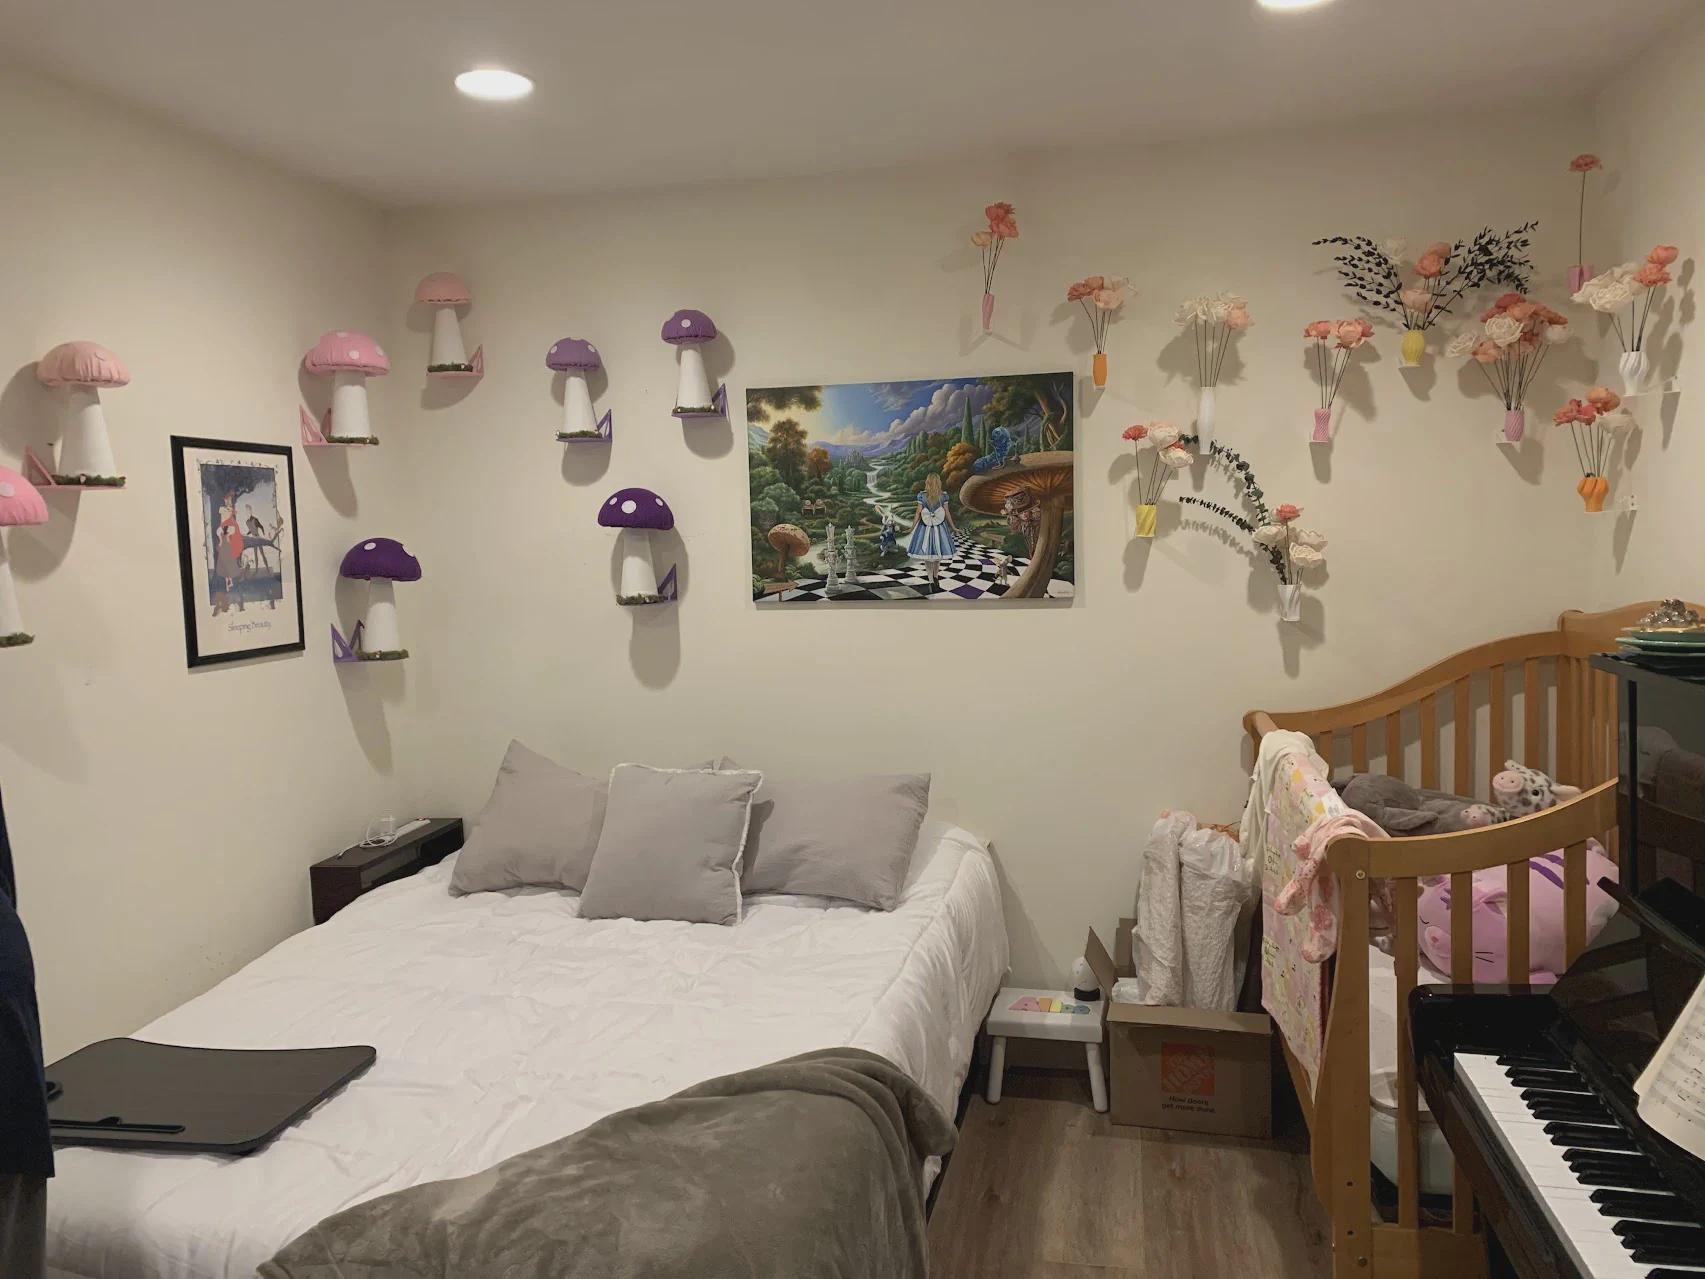

I had a ton of fun kitting out Alice’s nursery wall and the top of the piano we have in there with all kinds of Alice in Wonderland gear from her baby shower and a friend’s wedding. Specifically, the matching color mushroom wall mounts, flower vases, and wall mounts for those. A great mother-in-law made the mushrooms and a great friend custom painted the beautiful centerpiece!
Don’t worry new parents: I had plenty of time to do all this work on the nursery after the baby came. They stay in the bassinet next to you for quite a while!
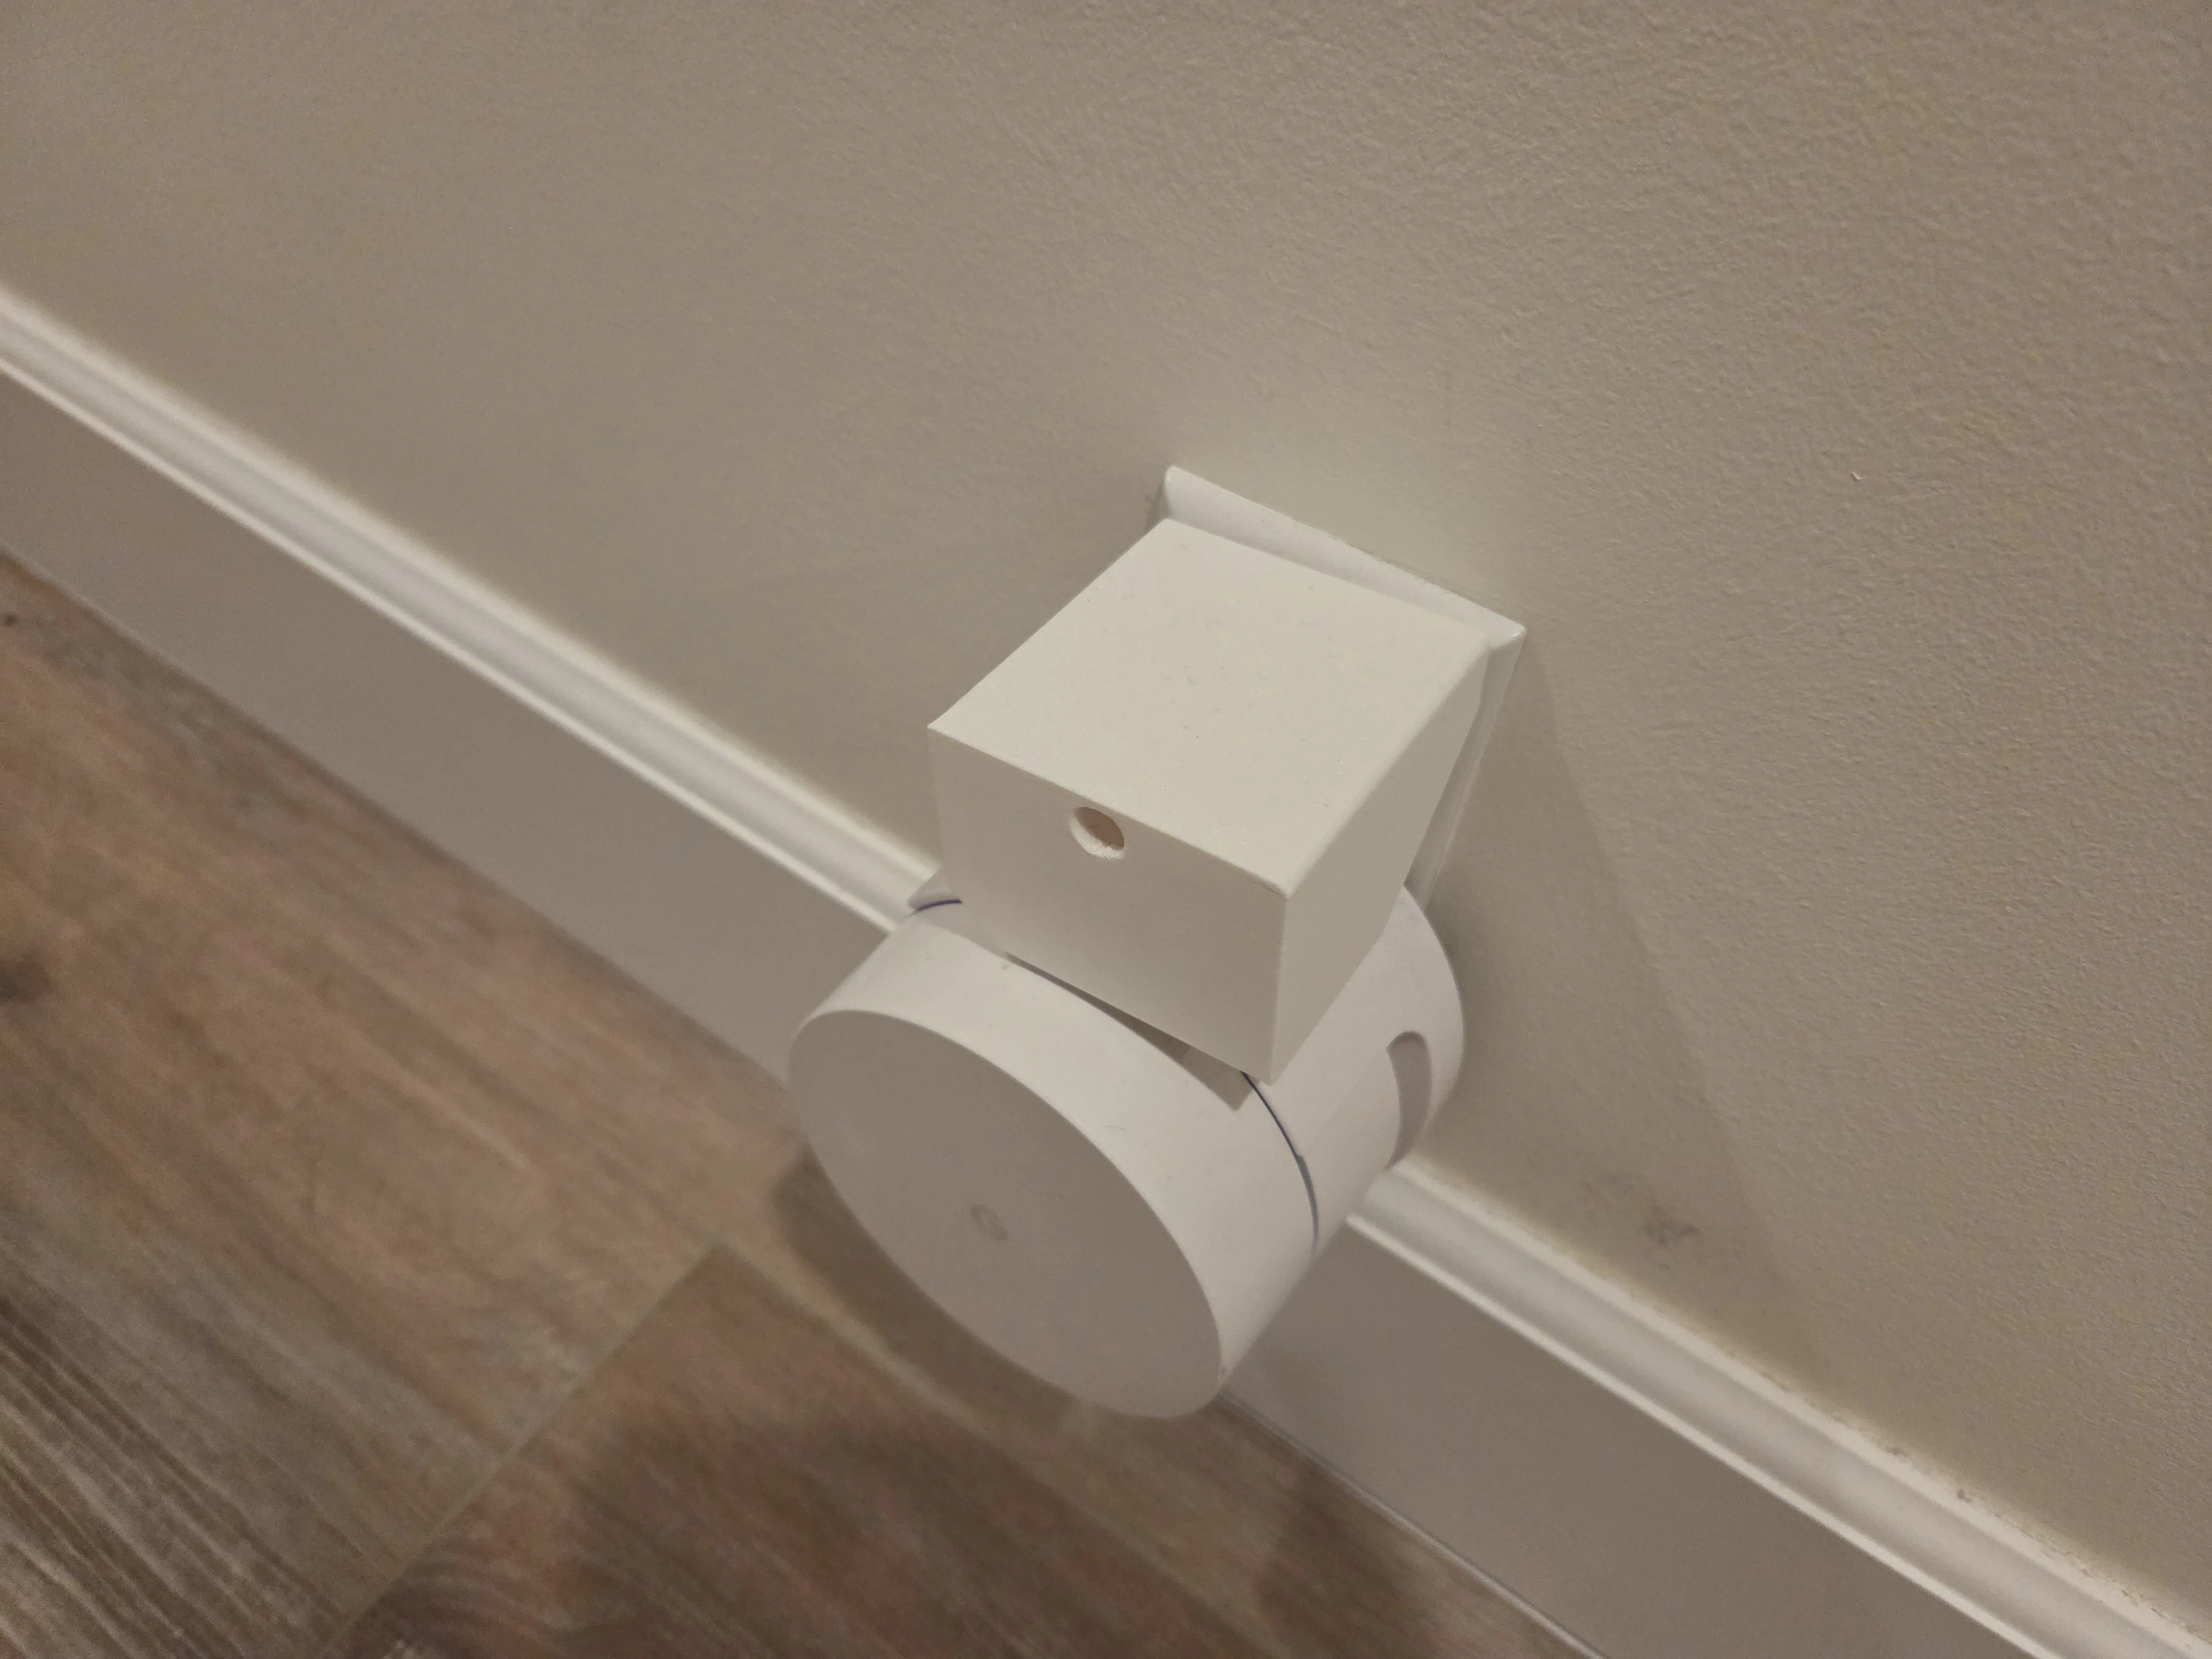
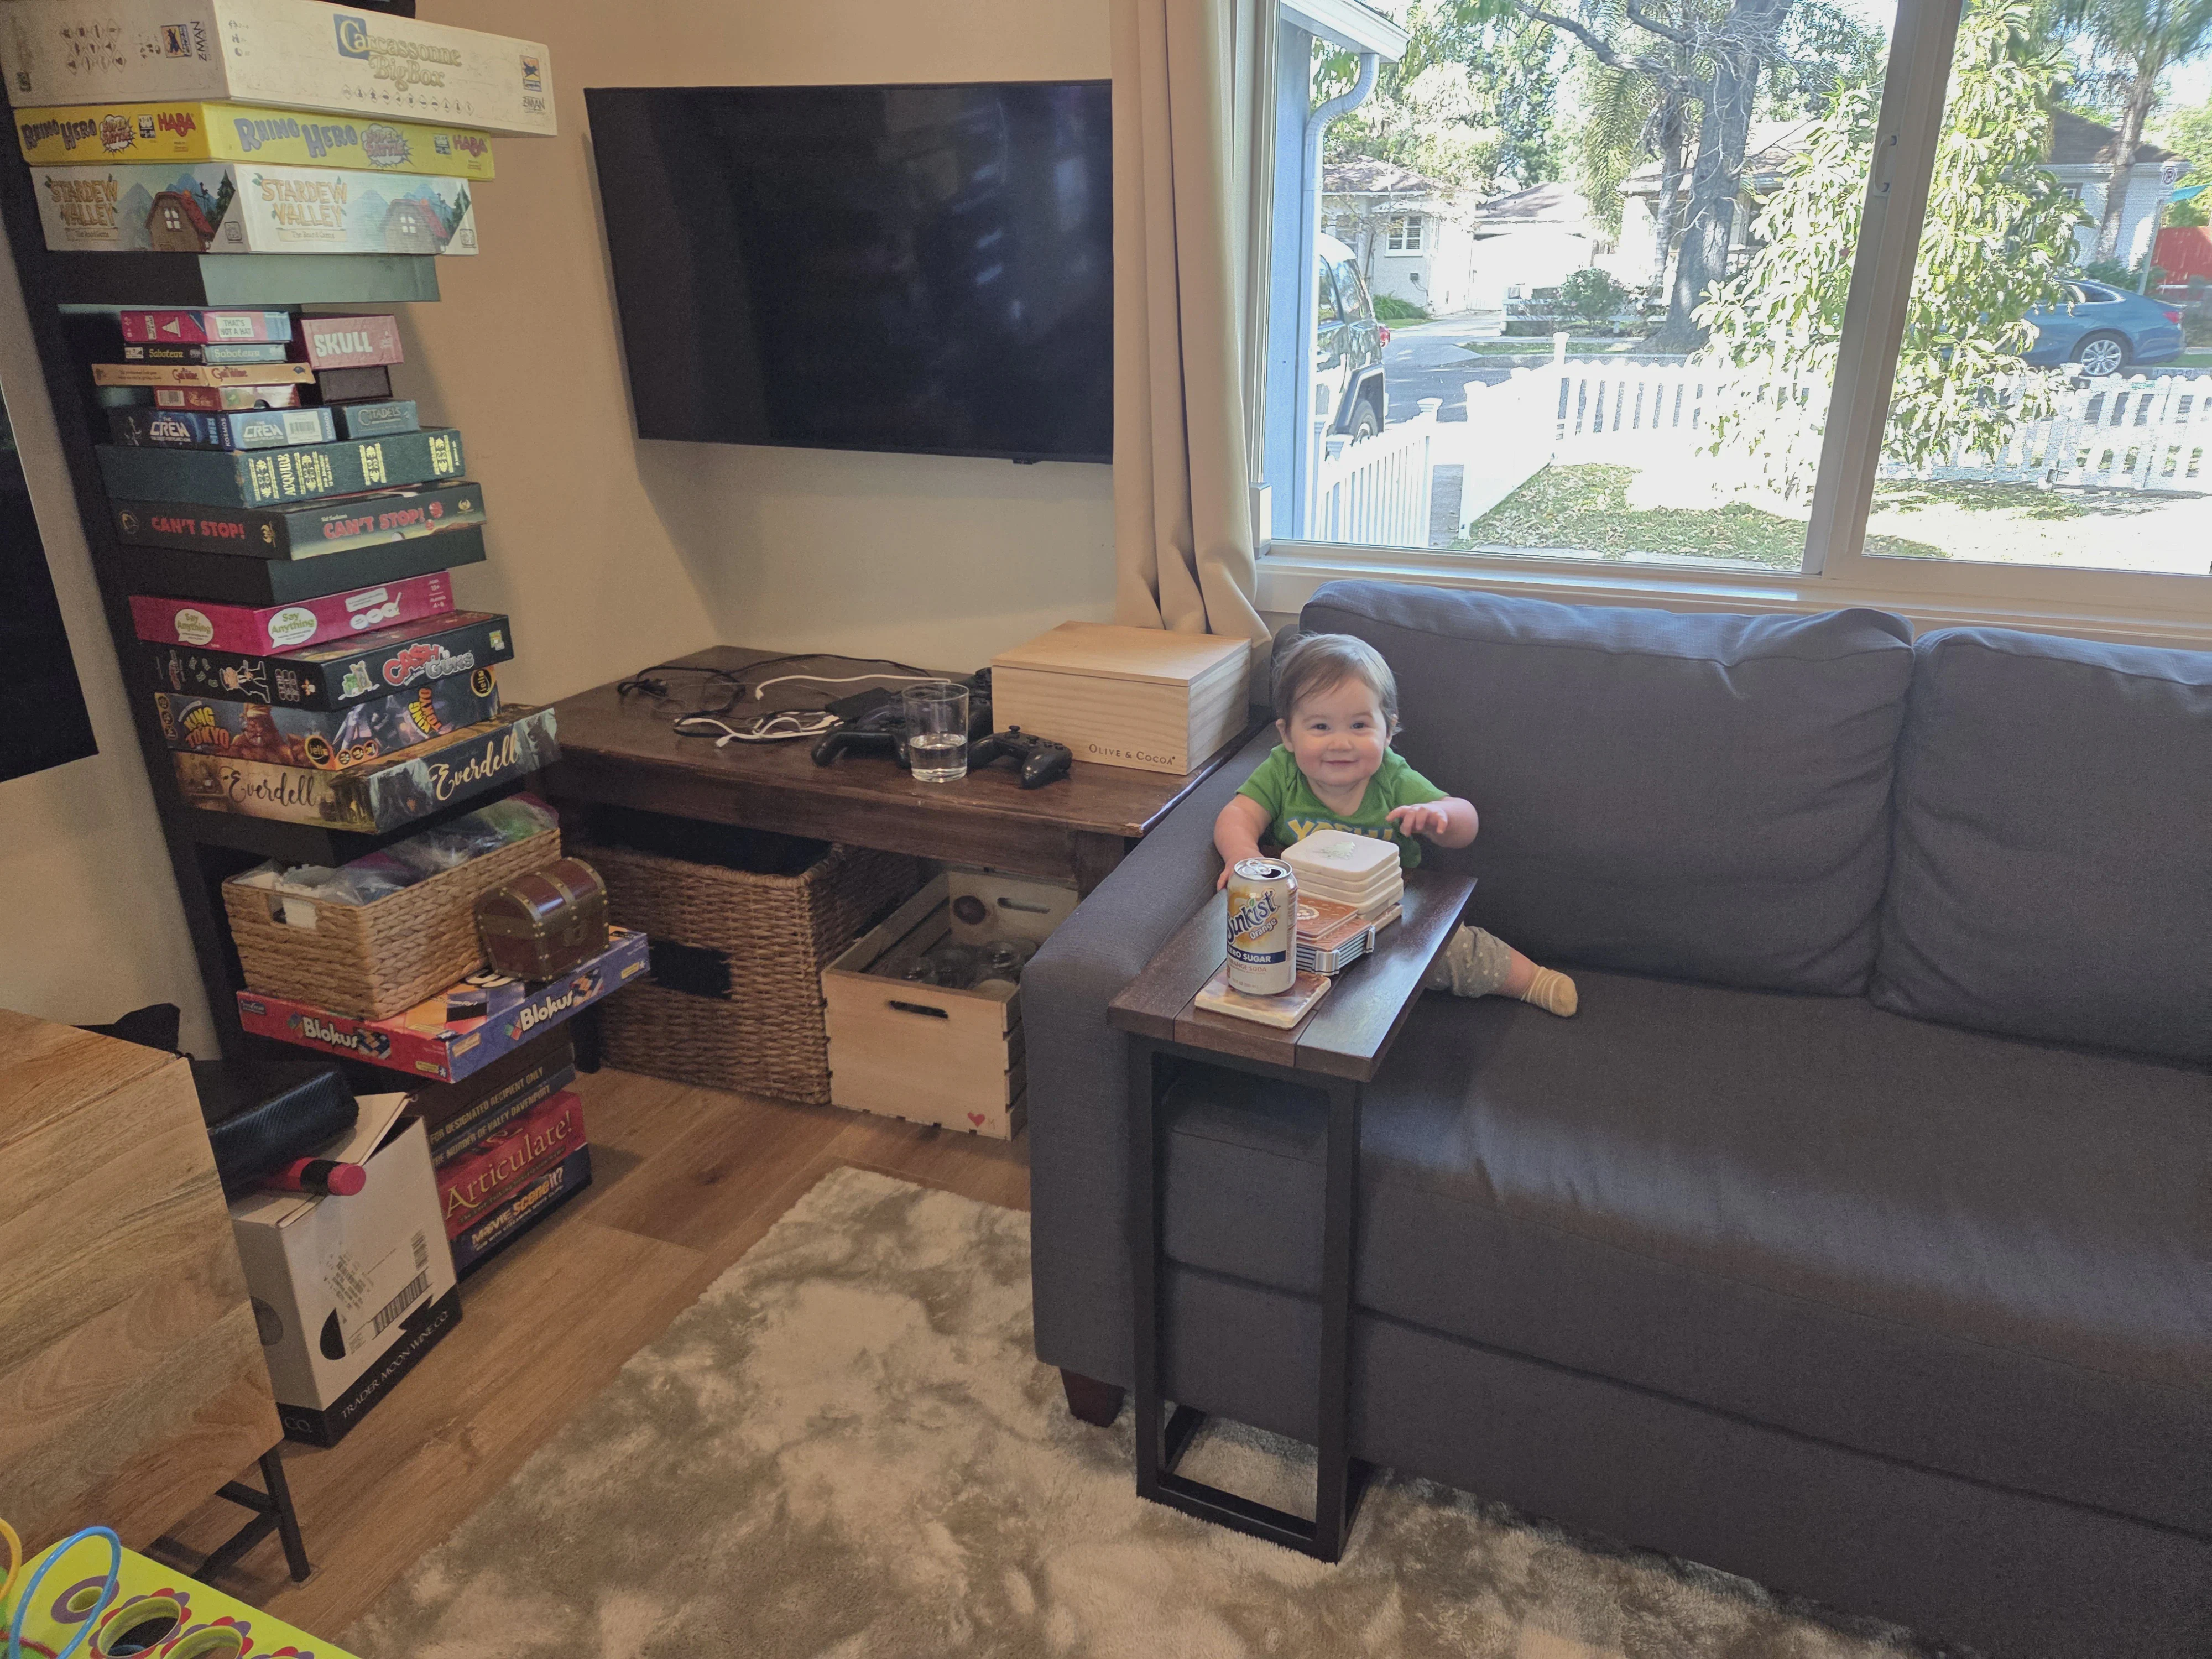
Babyproofed Media Stand
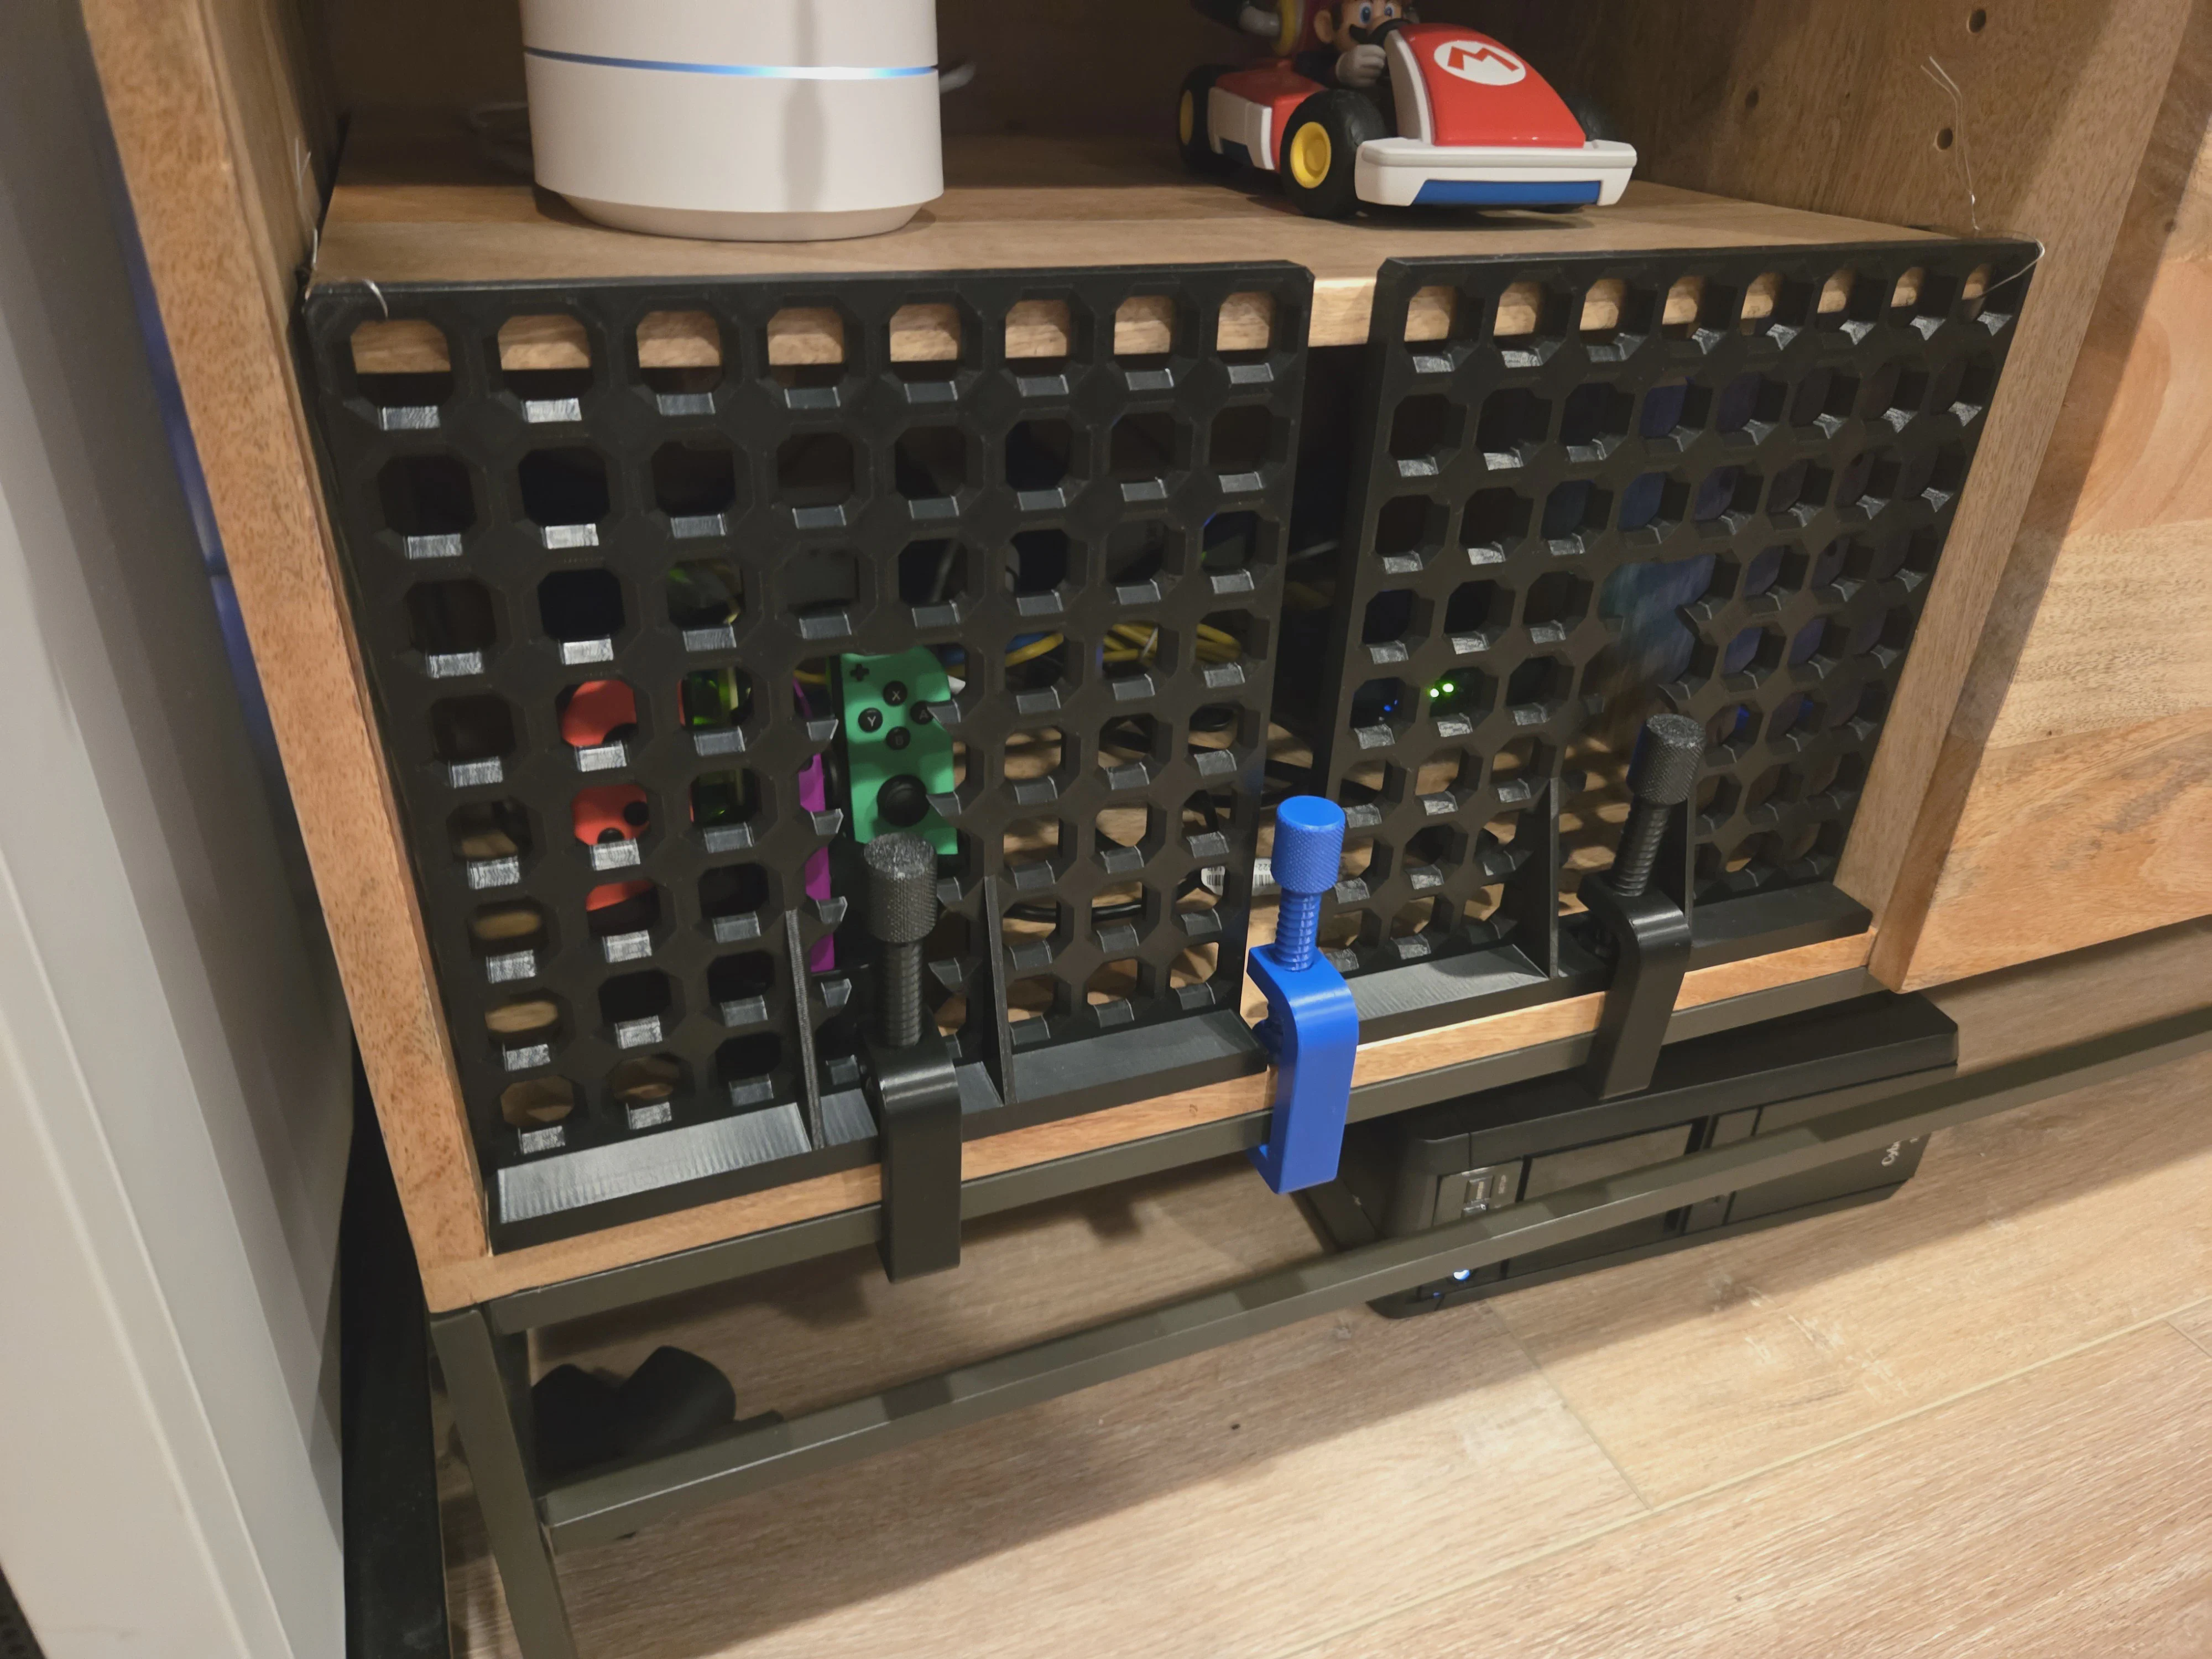

Nothing like some solid CAD modeling for some very specific baby-proofing. We like to “lock” Alice in the living room with us while we’re playing a game or watching something, and she just roams and plays. But she is very attracted to this bottom shelf of our media stand containing router equipment and the Steam Deck - so this custom print, which locks in with 3D-printed G-clamps, protects it. Plus bonus blue decoy G-clamp only tightened enough to be slightly challenging for her to remove.
Fixes around the house!
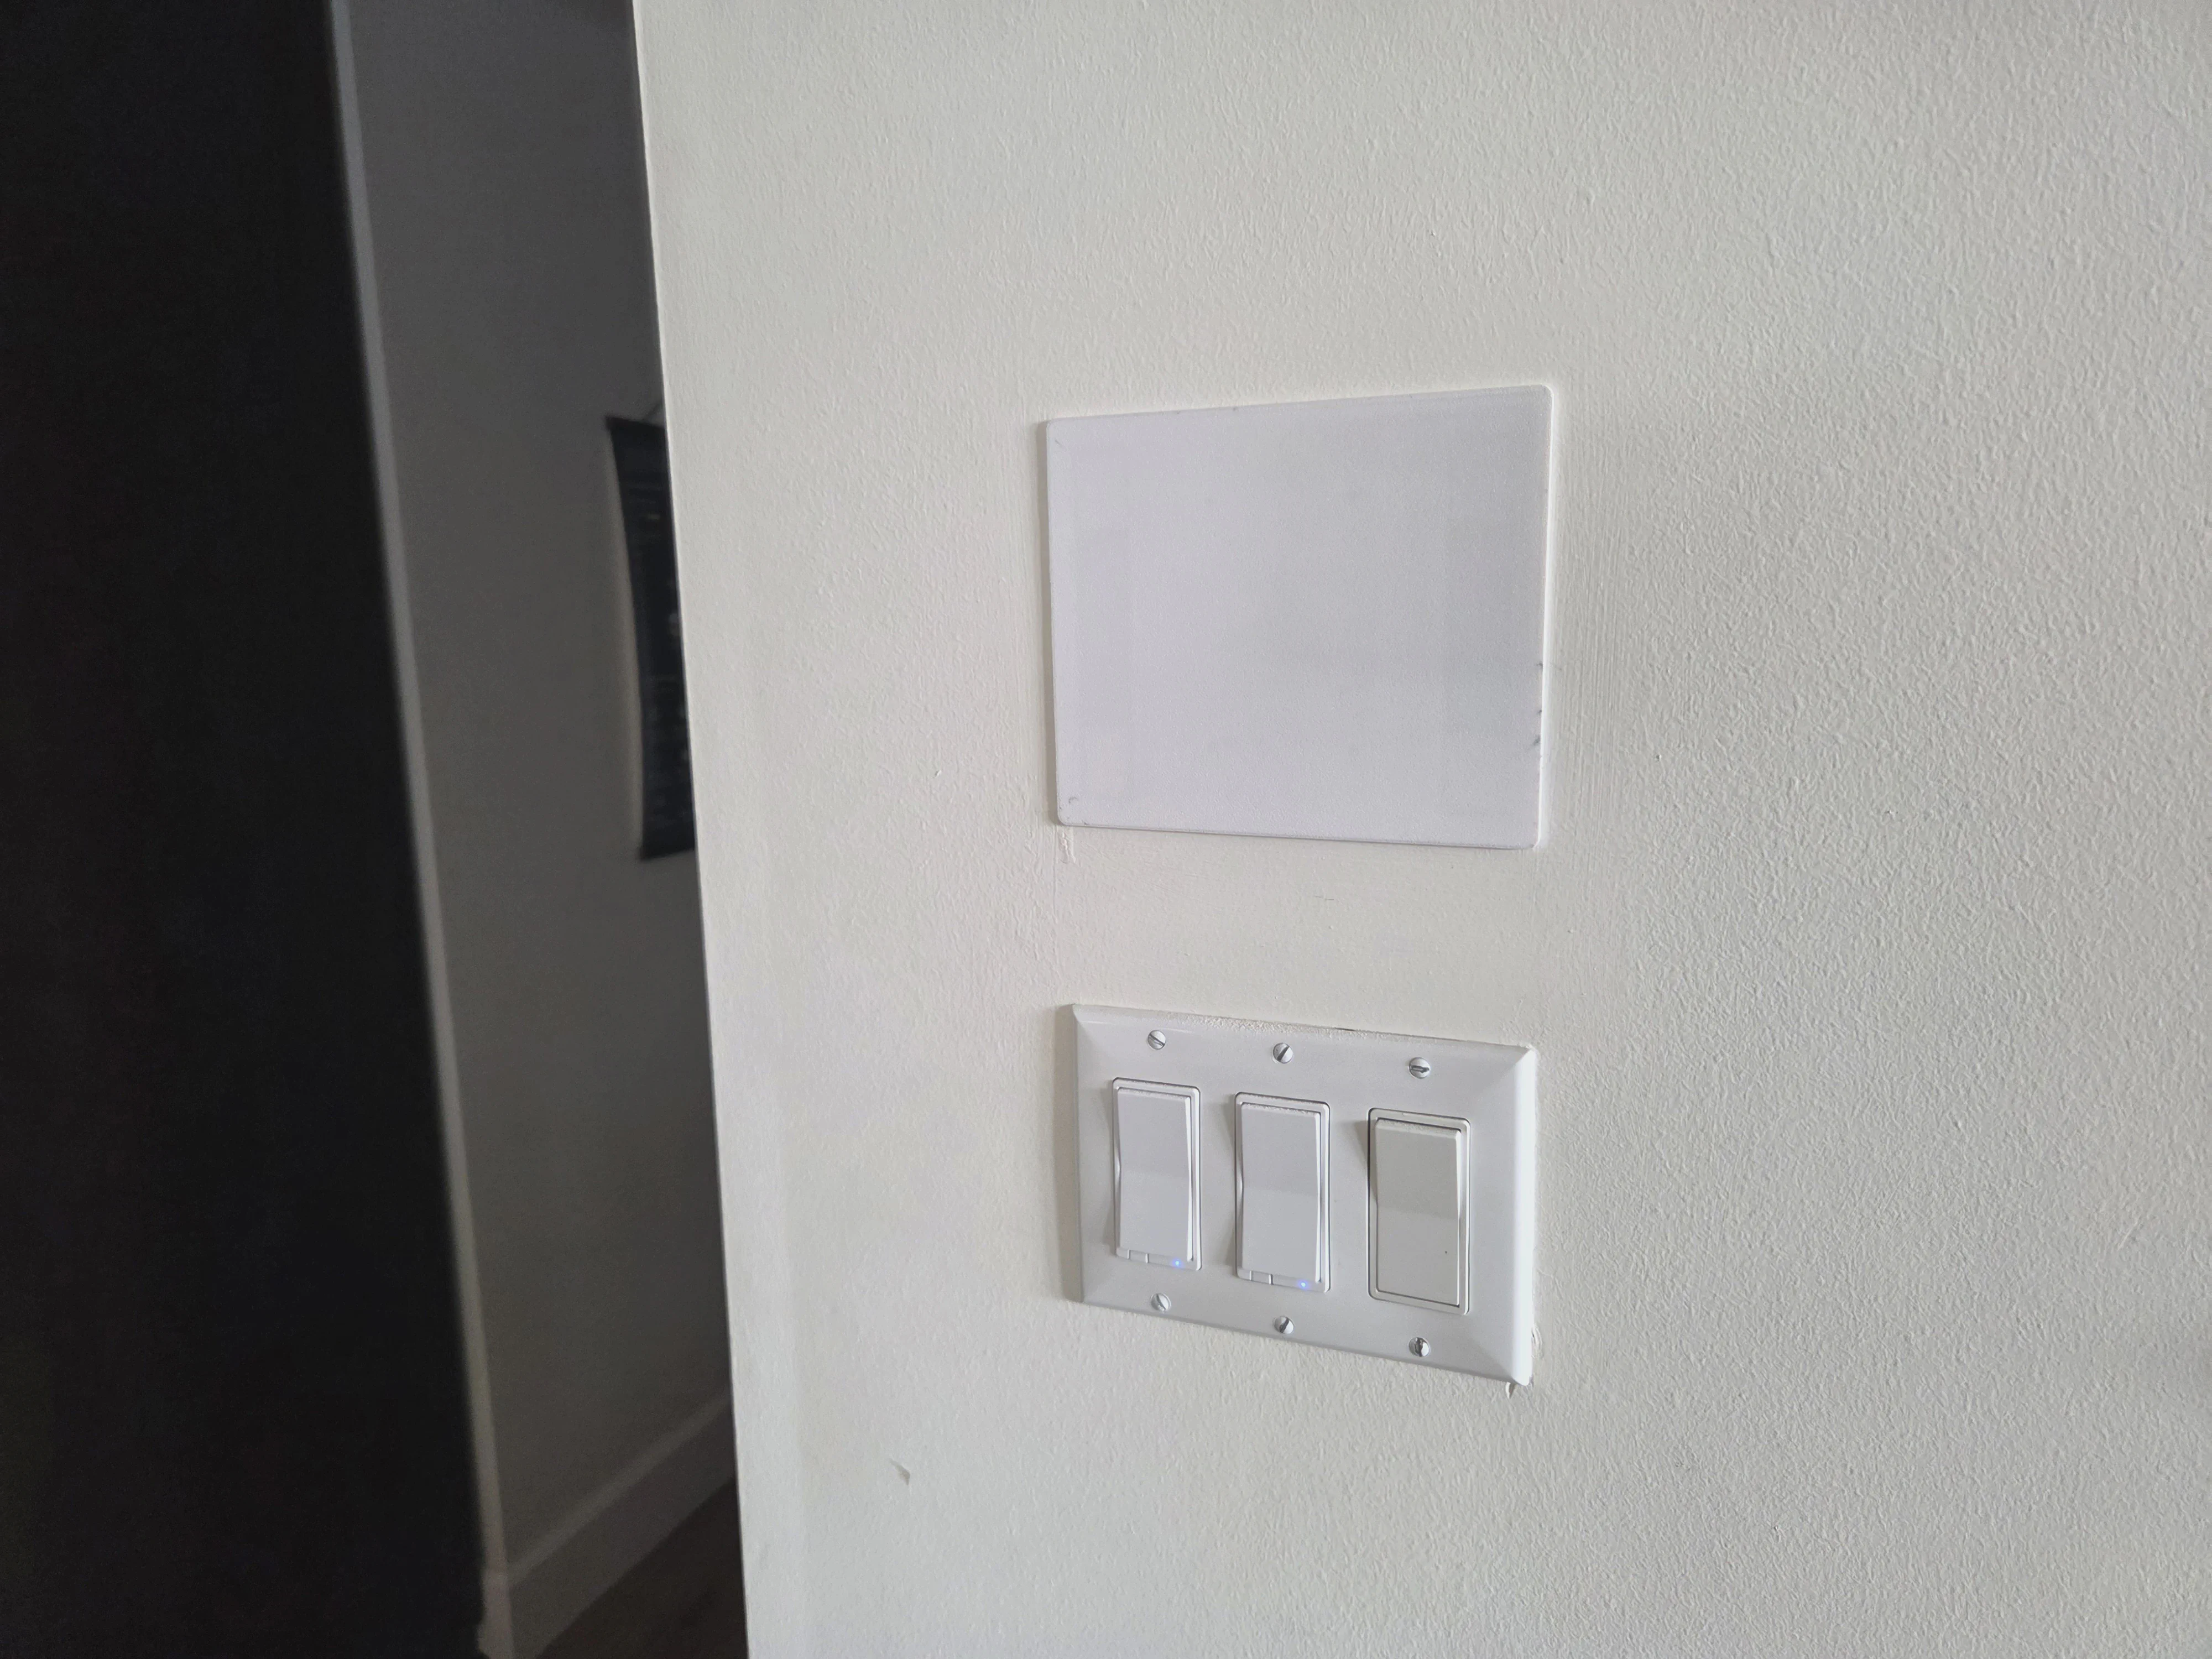
Above: Three quick fixes I designed in one weekend: Shims for a new TV articulating mount we needed to mount to a window sill, a babyproofing screw-in cover for multiple Google Wifi points that Alice loves to unplug, and a wall cover for a hole left by a couple of ADT panels I finally removed (We have long switched to a new system). Boy do I love white ABS!
Teak Reinforcement Grid

And another outdoor fix. This model was one-shot created by GPT 5.2-Thinking as OpenSCAD code - a black ABS reinforcement plate for the underside of the lid of this older teak hose reel box that was starting to come apart here where it collides with the base. Rather than picking how many screws would be needed and where to put them at model time, I just had the AI create a staggered grid of holes sized for my most common small screw and felt out which ones I should drill and screw during the repair. Very solid now!
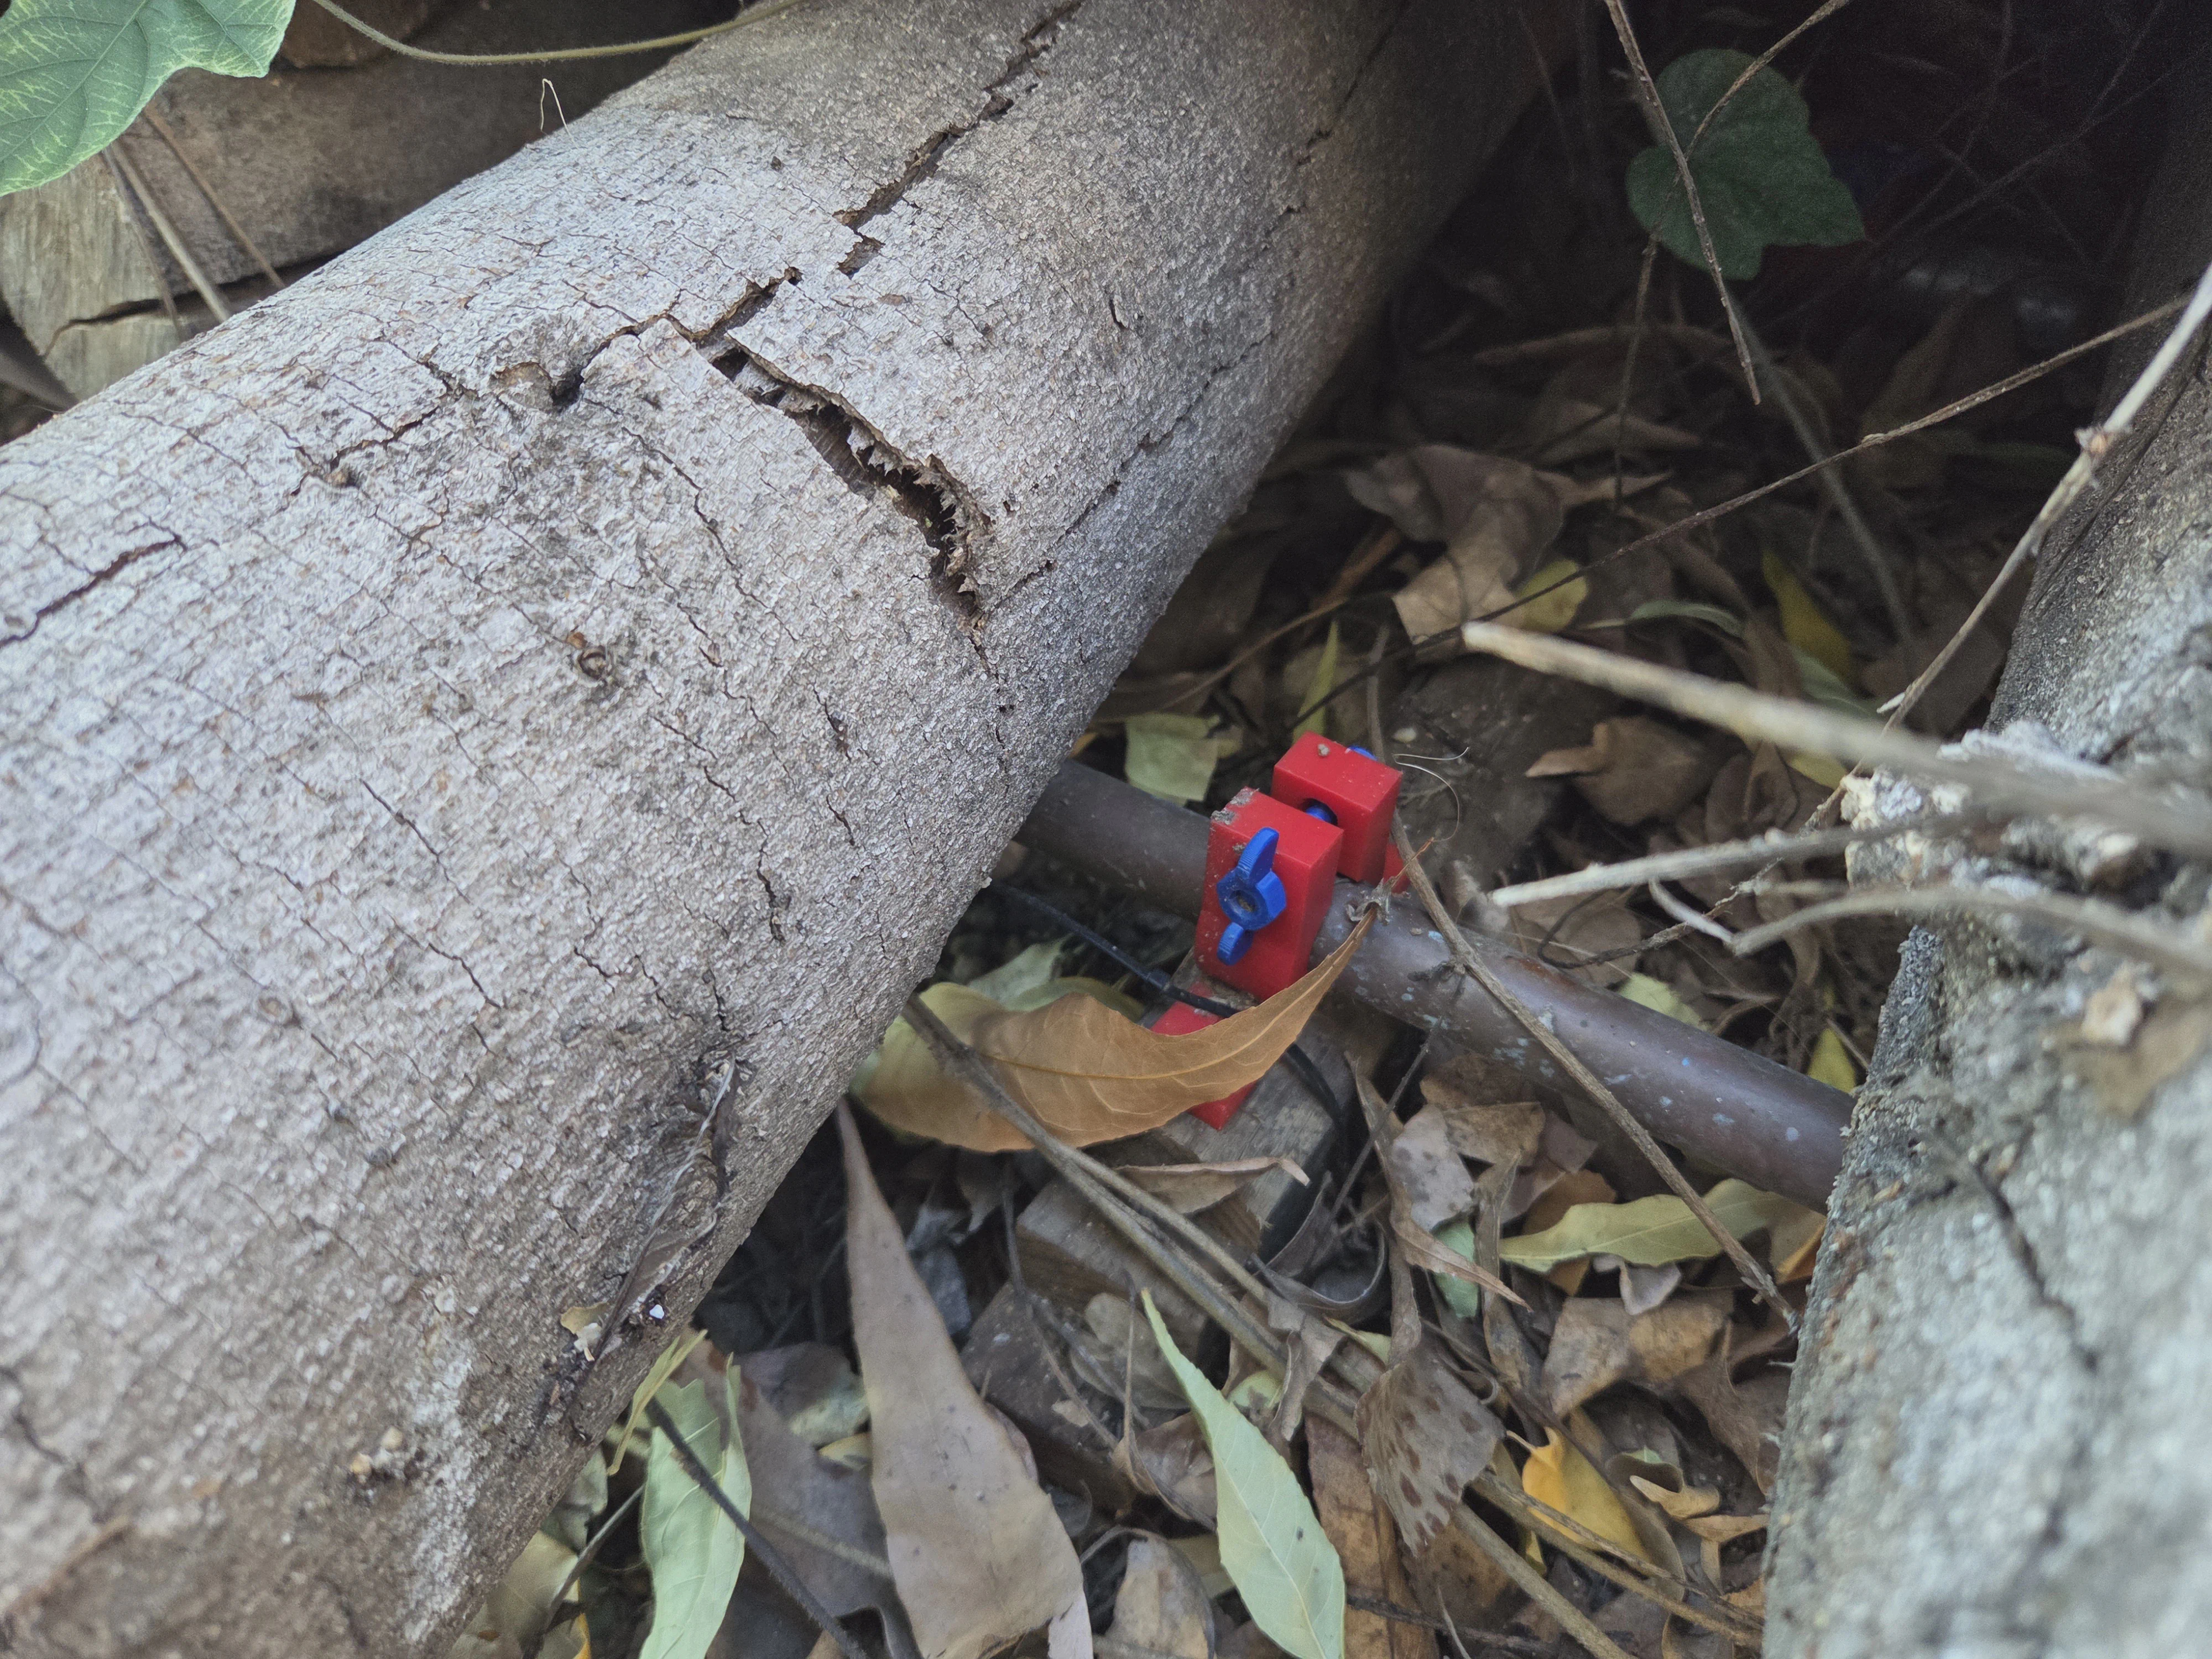
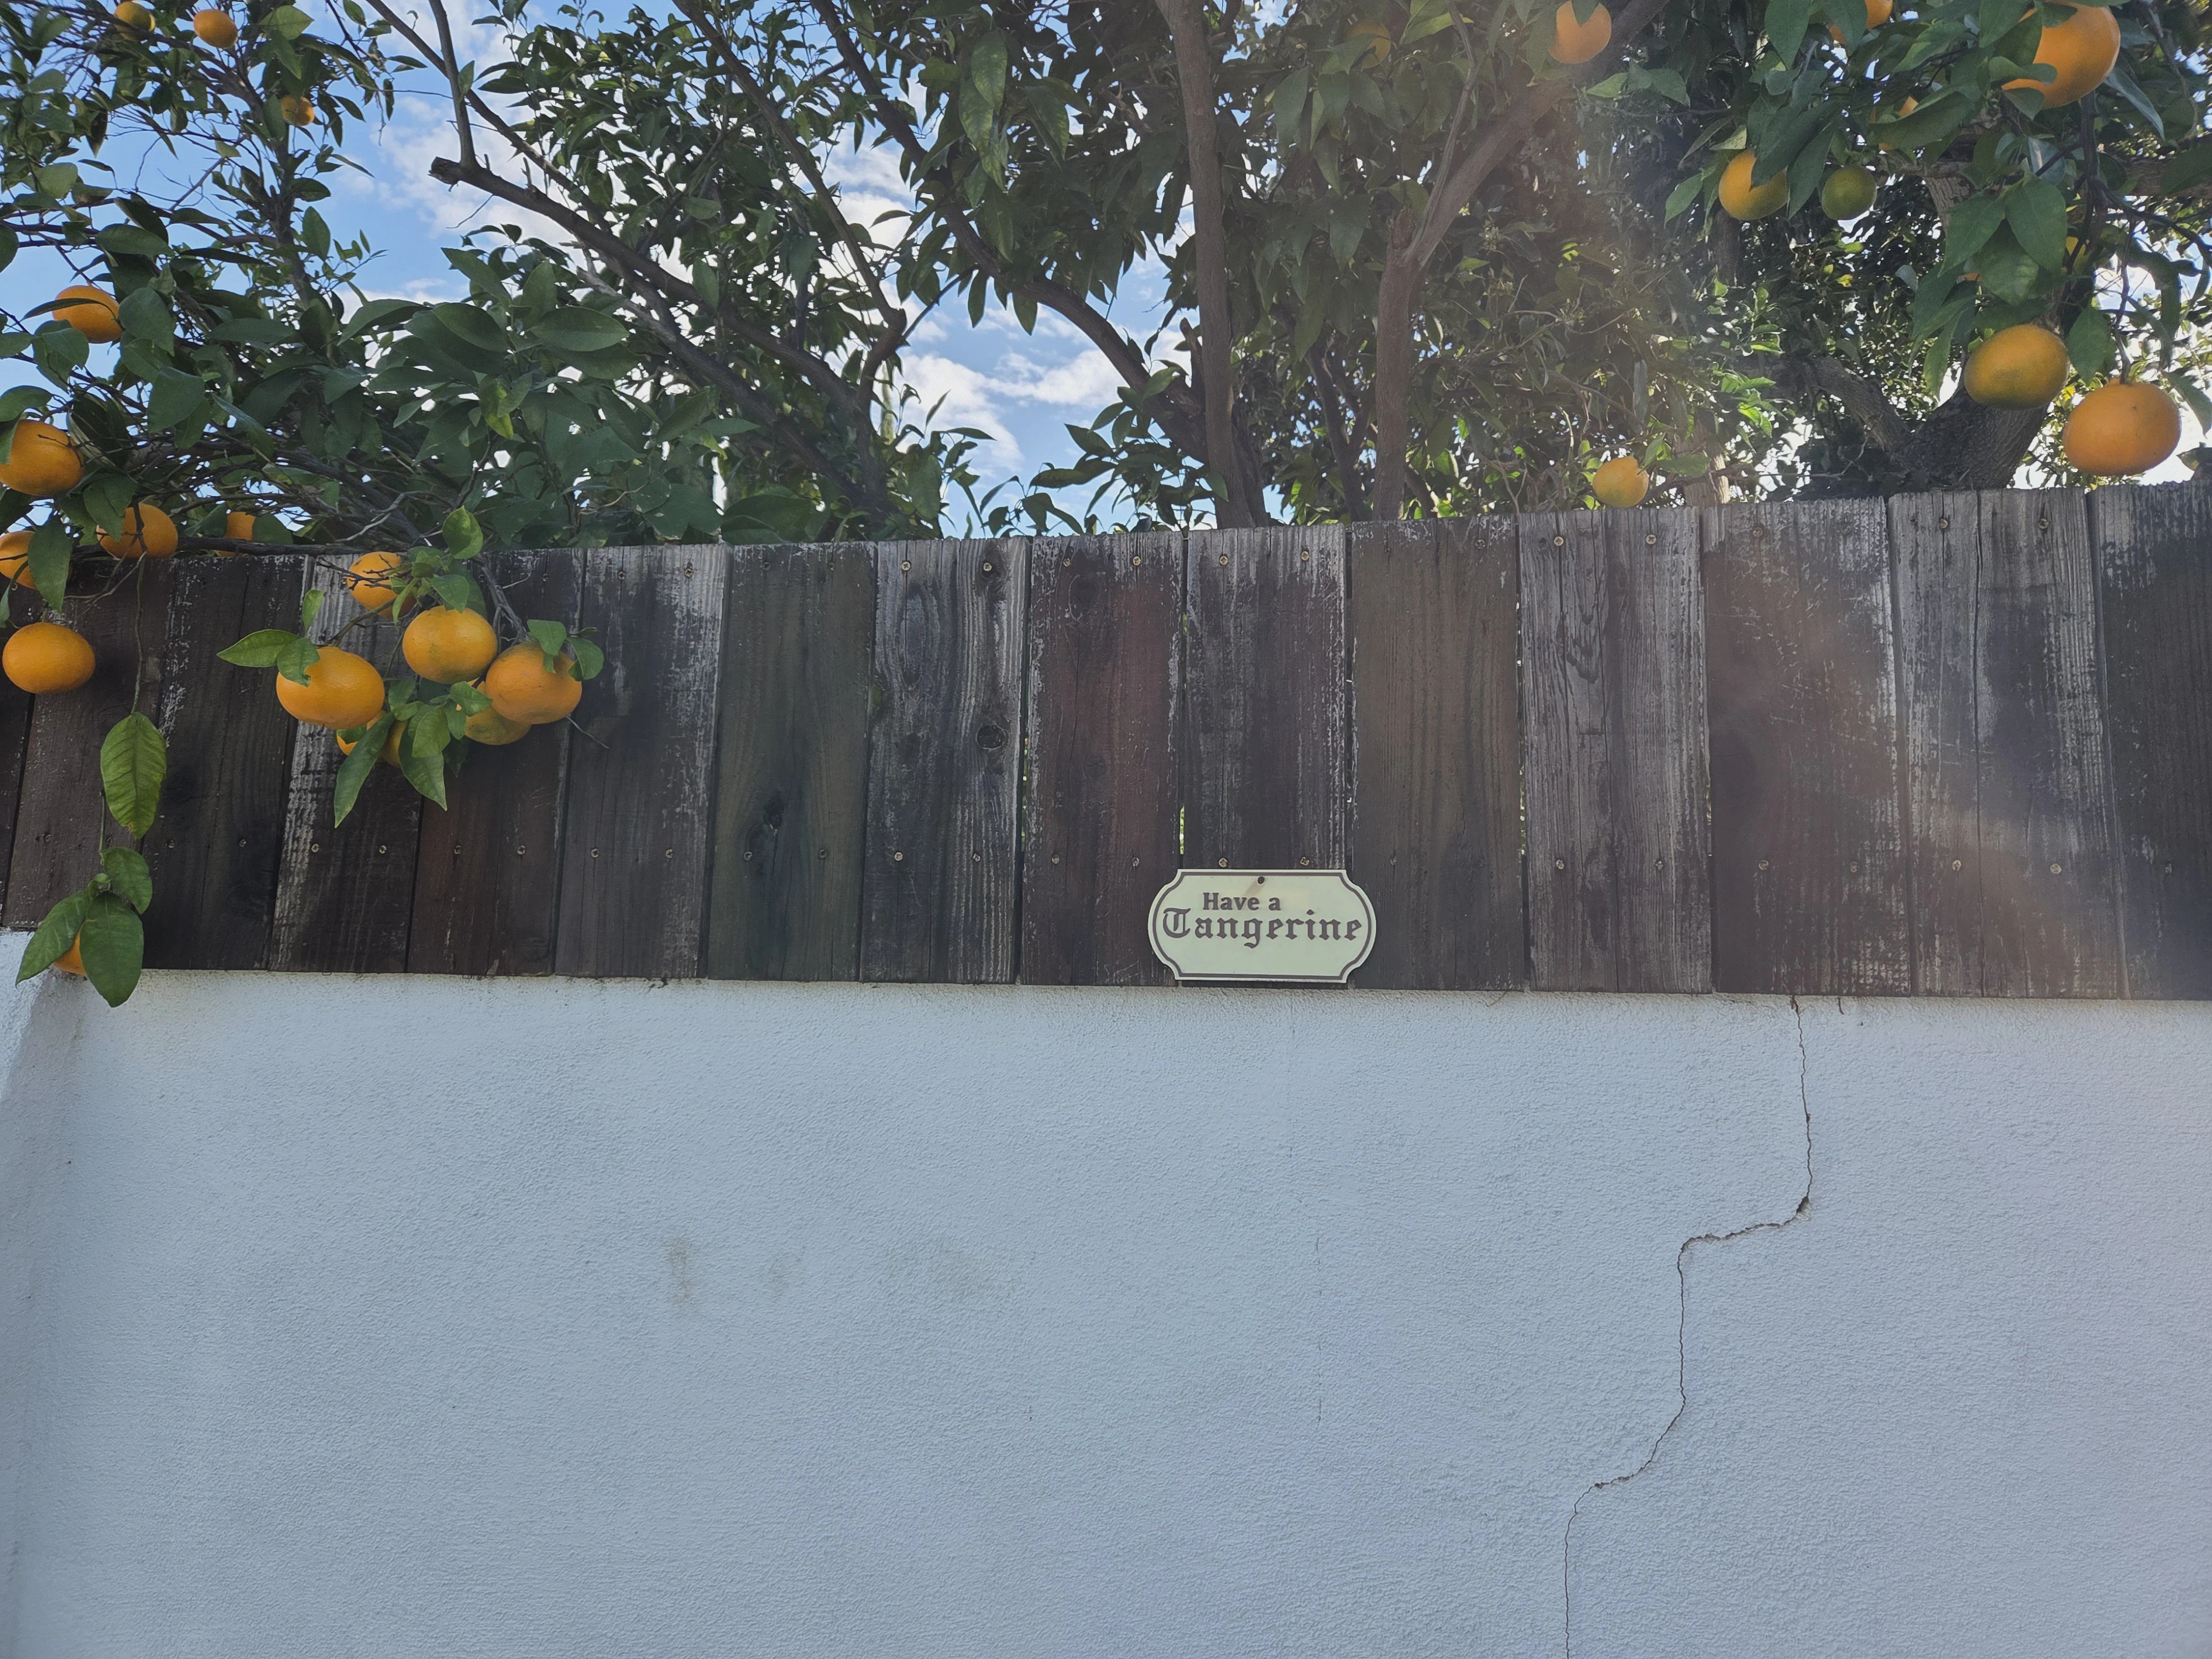
You may wonder how reasonable it is to expect the reinforcement grid above and the other outdoor prints in this post to last, so I present the following 3 prints as evidence they will. A red and blue ABS bracket for a wood rack I built more than 3 years ago, a “Have a tangerine” sign from 3 years ago, and a locking block for a teak cabinet outside, printed in blue and white ASA to replace a teak block that dried up and broke nearly 5 years ago. All three of these live outside 24/7 and see sun and moisture every day. Use the right material and outdoor prints can last longer than treated wood!
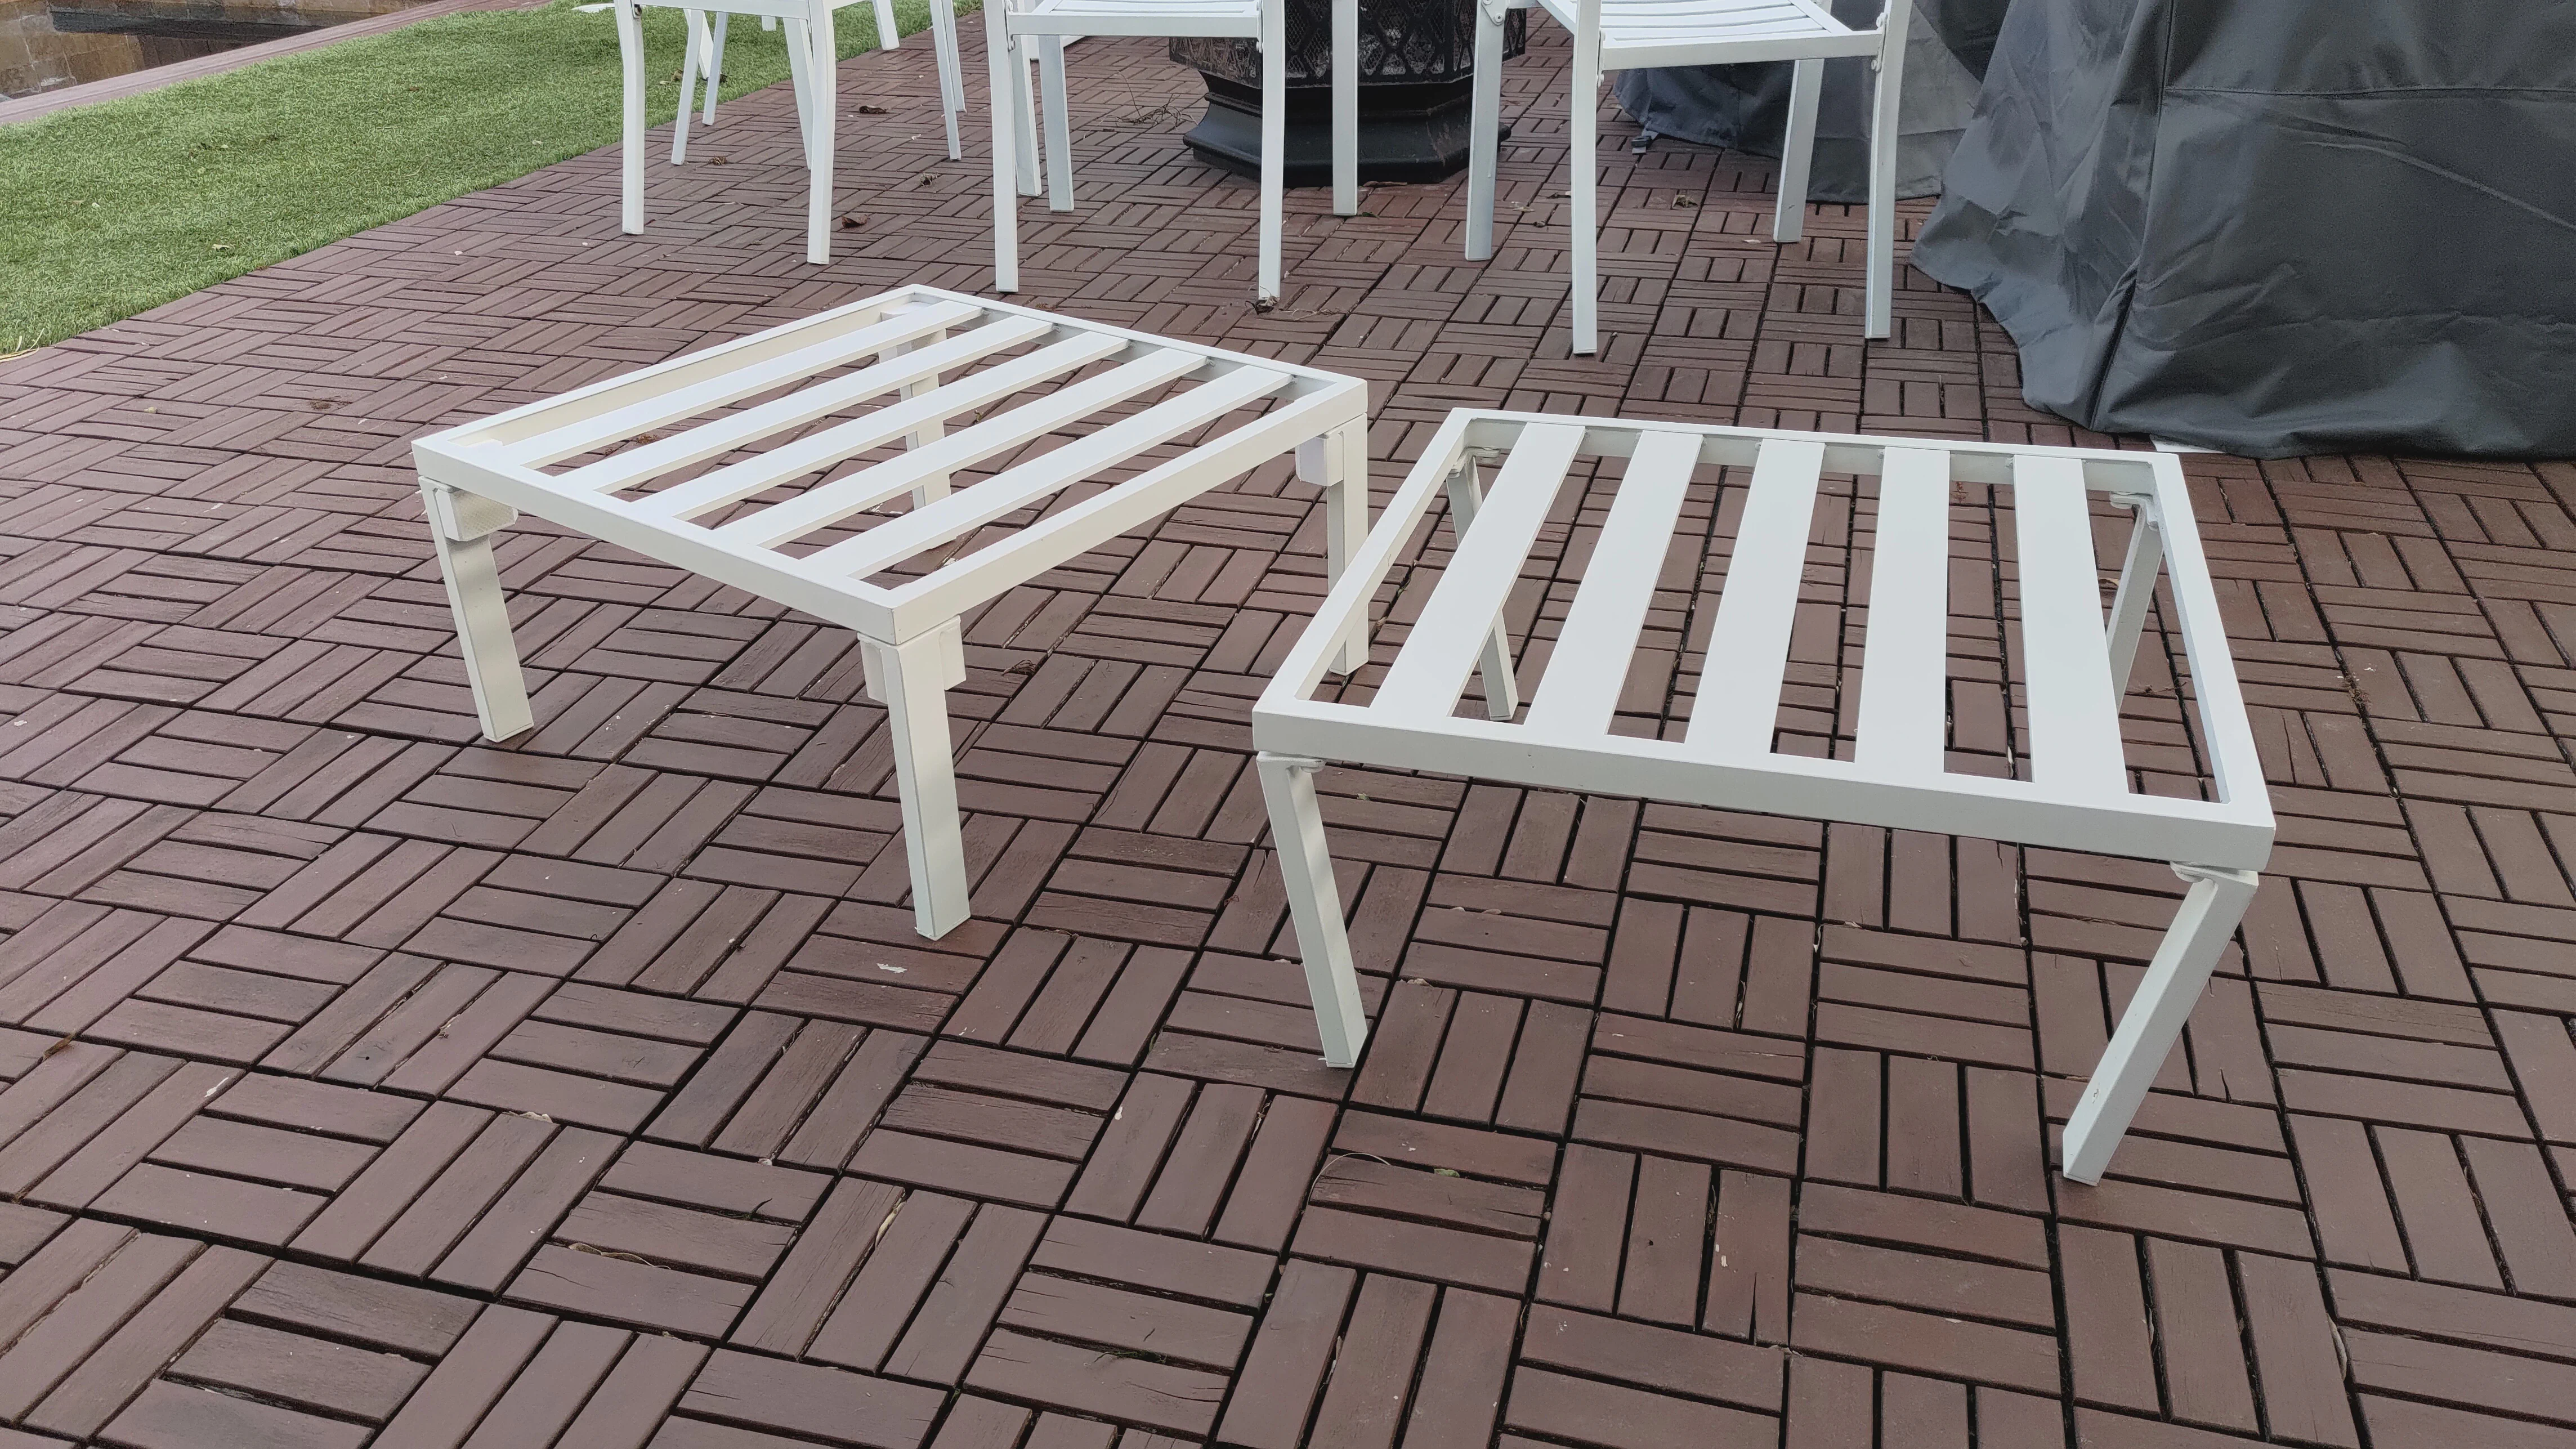
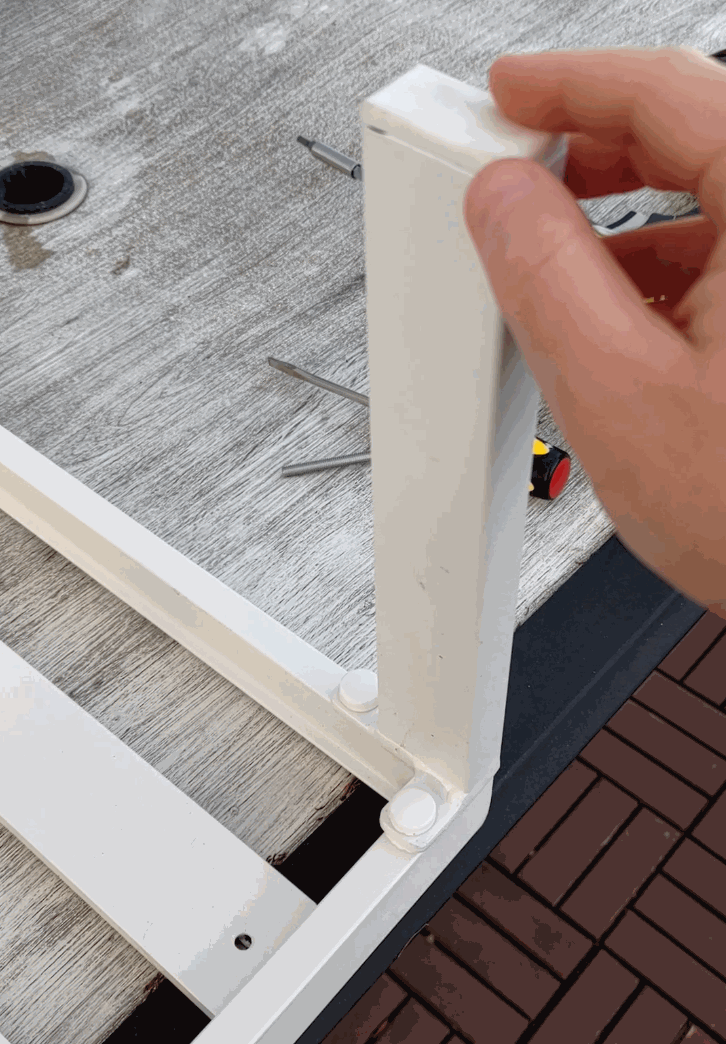
Coffee Table Stilts
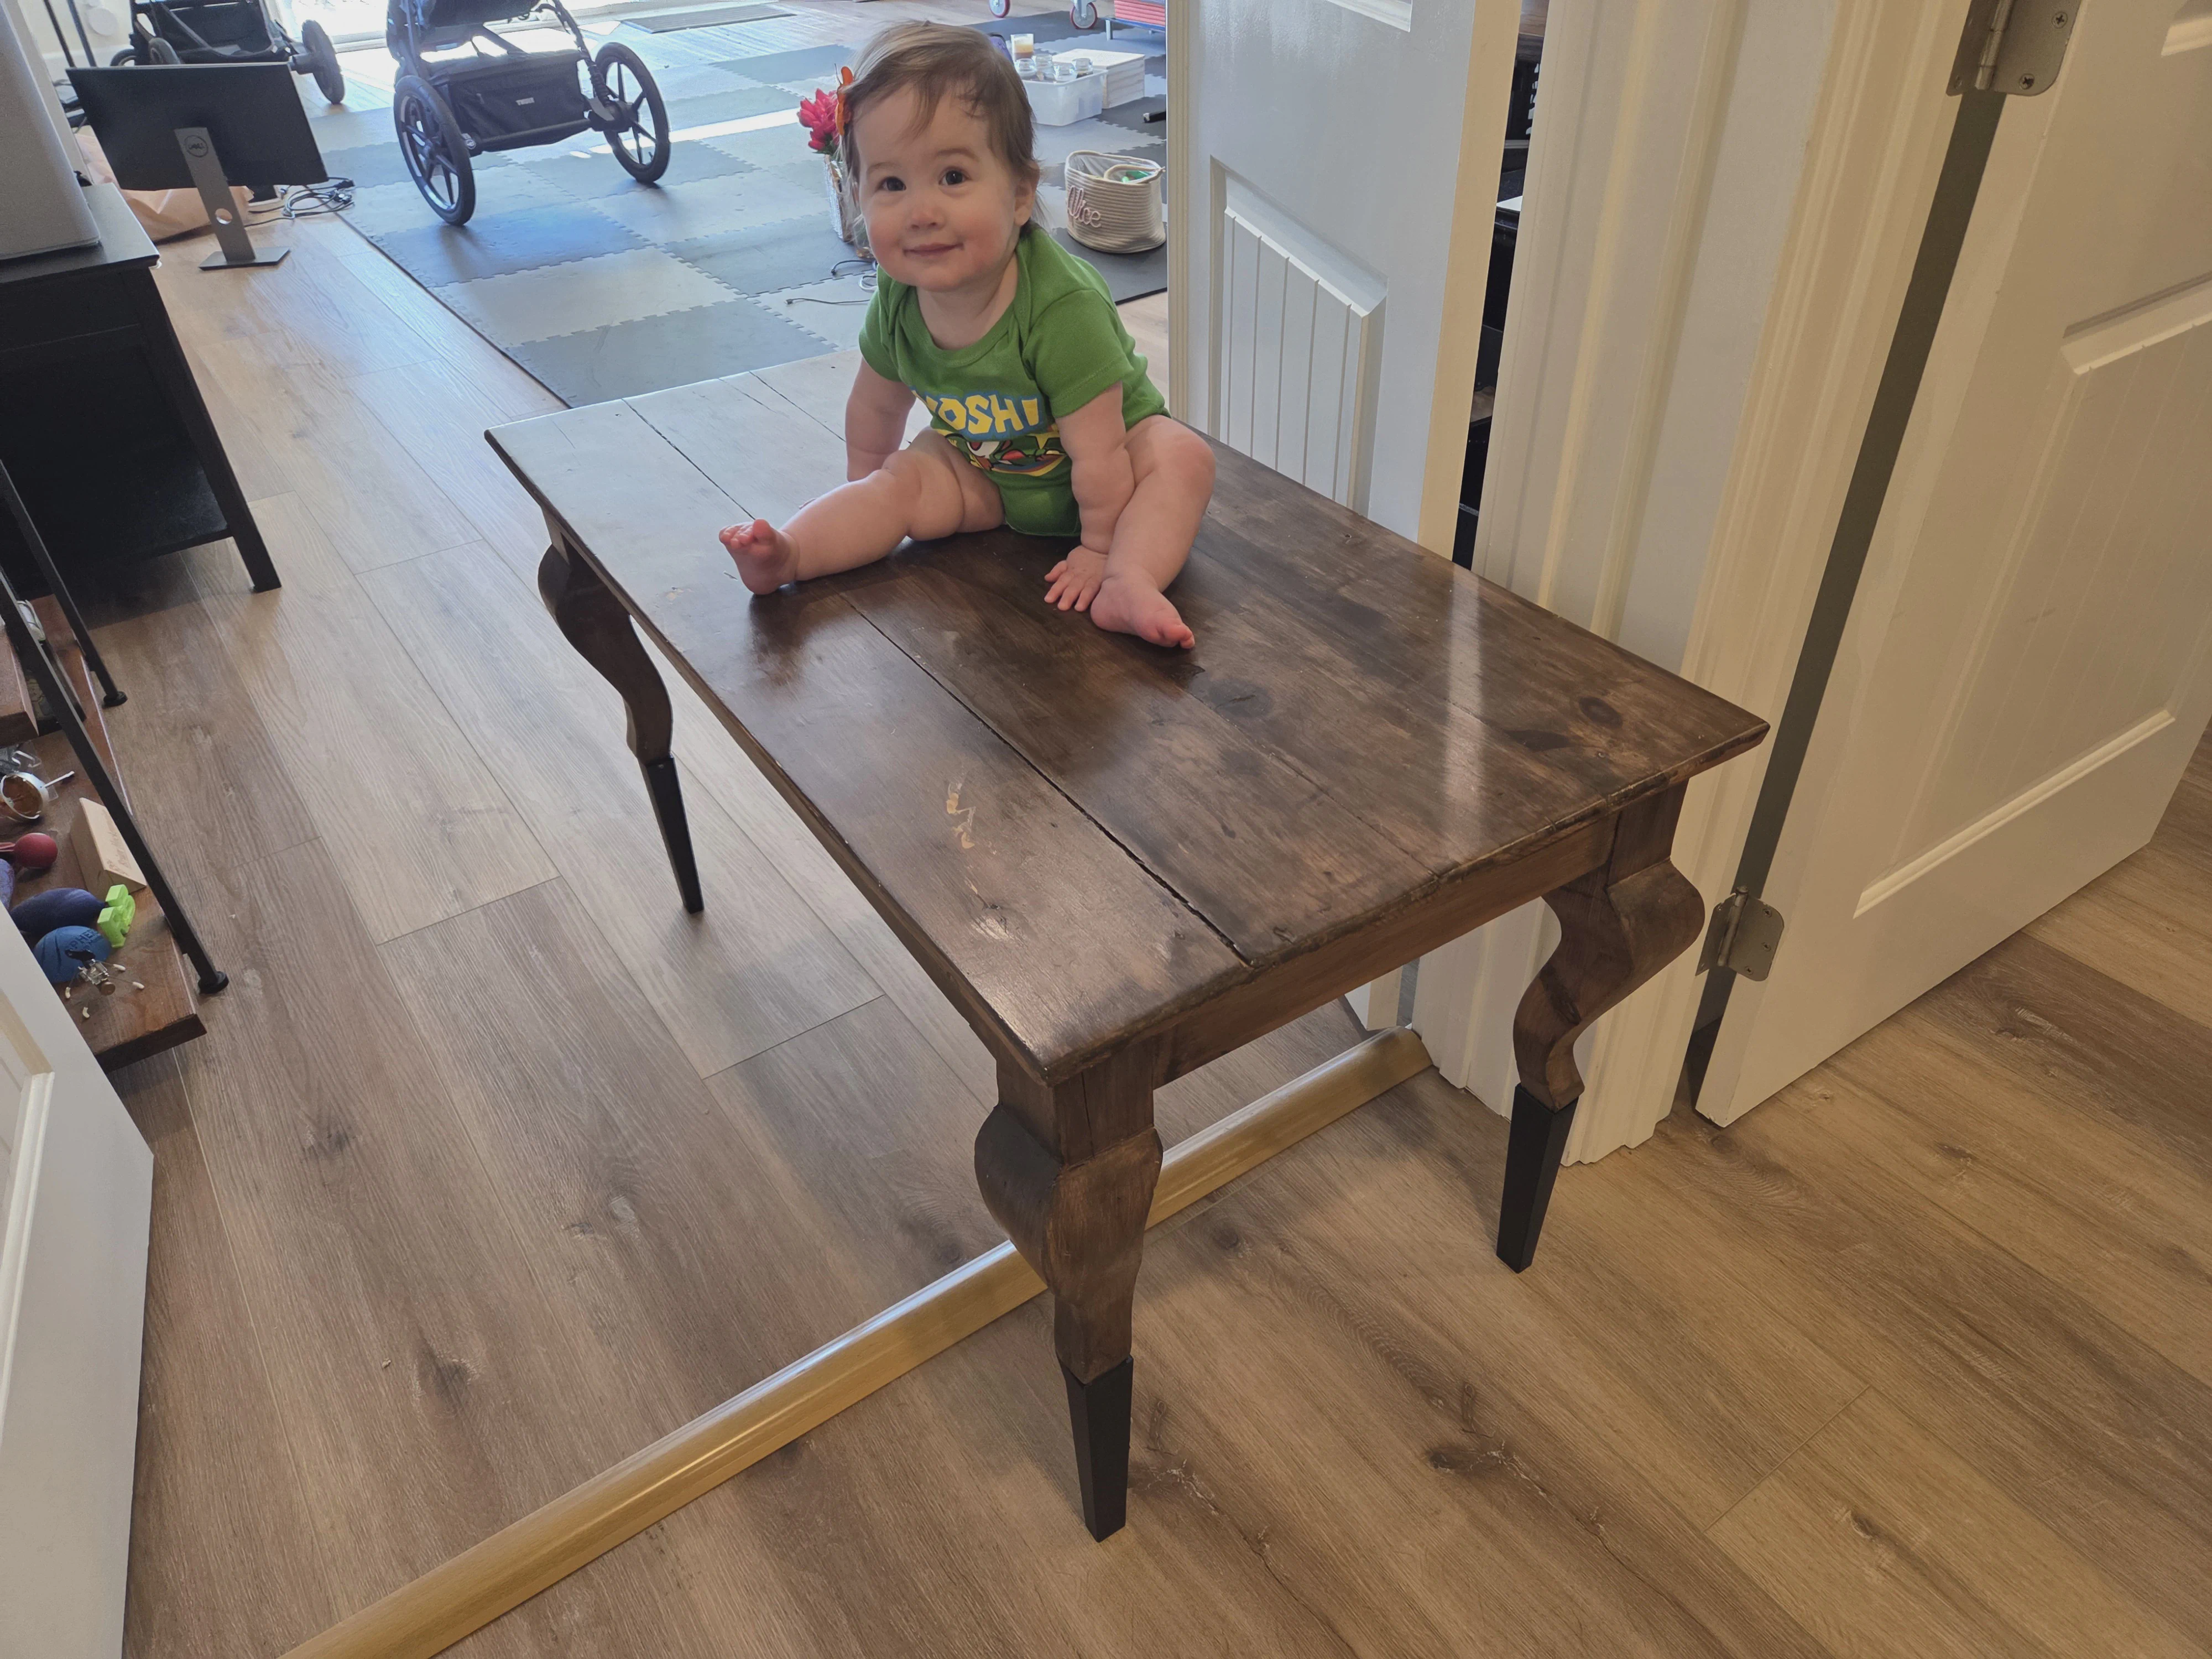
My latest print: stilts for an old coffee table we had in storage. We were looking for a piece of furniture for under our new secondary screen for Kaitlin, and realized this table was exactly the right footprint - it just needed to be higher. I realized halfway into modeling and test-printing that each foot of the table had very different dimensions, so this is actually four unique models custom for each foot, which I then screwed in on 2 sides each and ABS-glued into place for a solid connection. Strong enough to hold an Alice! The right sized media stand I was eyeing on amazon was $250 and it wasn’t even made with solid wood. I love frugal printing!
Thanks for reading! There were some other 3D modeling and printing projects I took on in this timespan that got their own posts, too: my custom “Bloom or Bust” board game, my new home dashboard, the strollerhock, hocken-pocket-blokus, and my 10 year anniversary videogame coasters. And sometimes I still do post on Thingiverse for things like these lawn stakes which I think might be generally useful. But most of the modeling I do these days is for one-off projects.
See you next time
-Brian


 200
200


